

This is a comprehensive guide on how to get set up using Matterbeam's Salesforce Collector to gather your CRM data. With Matterbeam, you can select specific Salesforce objects for collection, ensuring your data is instantly available for transformation and emission to various destinations. To discover how Matterbeam can liberate your CRM data and streamline your migrations and integrations, check out our CRM use case.
After the above steps are complete in Salesforce, you can create a Salesforce Collector in Matterbeam.
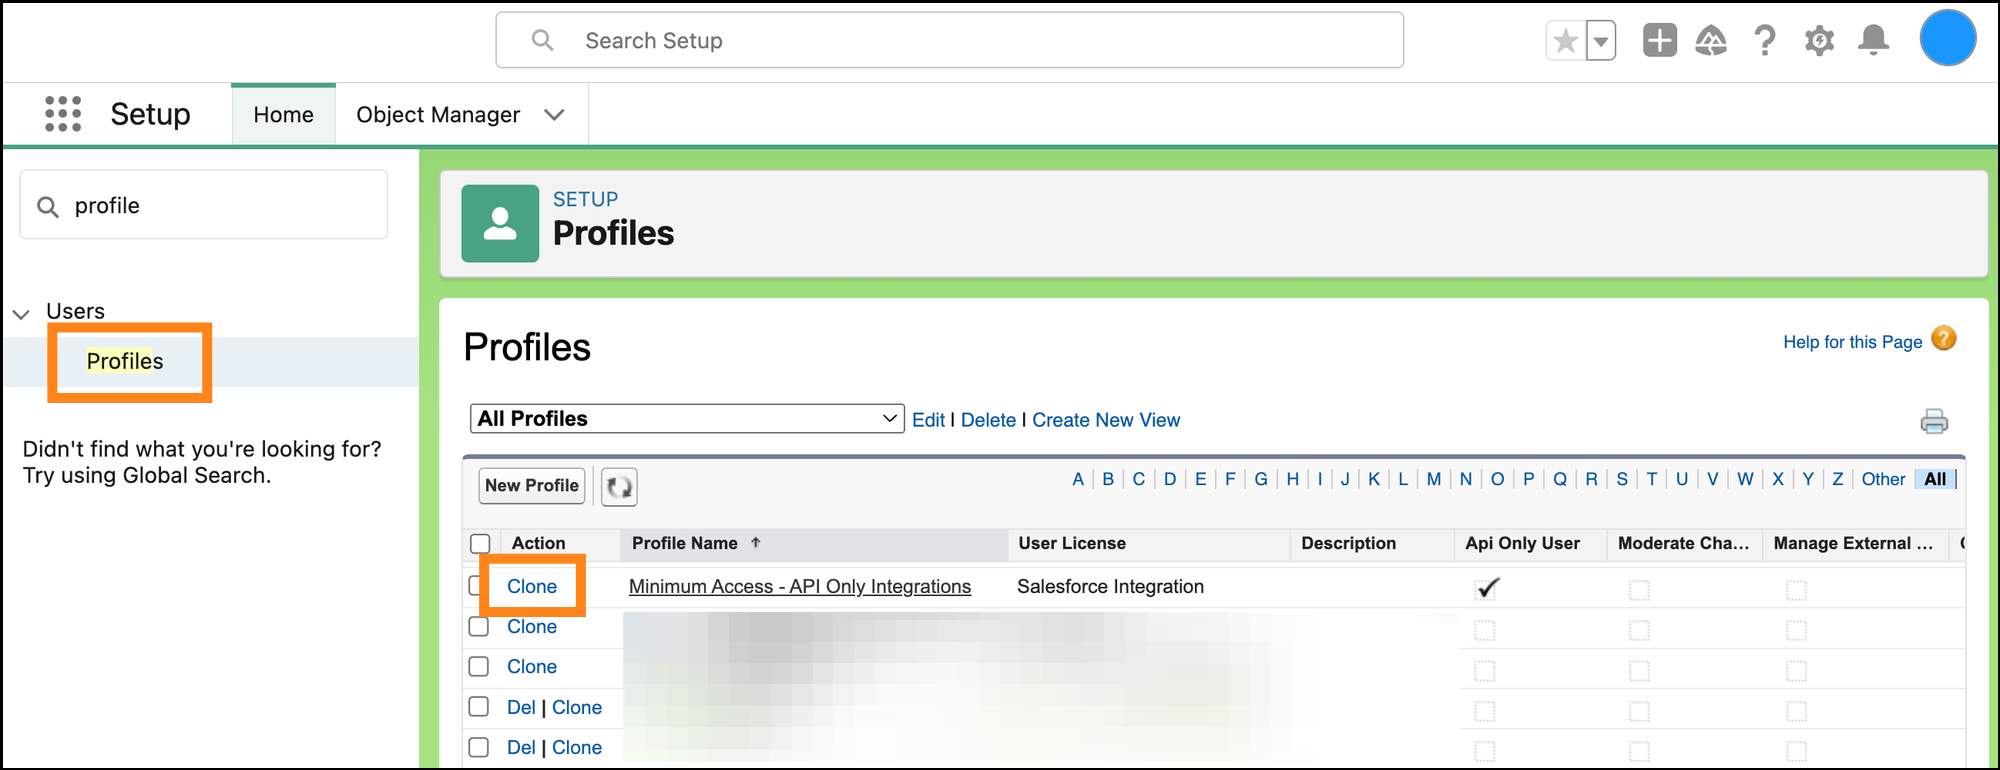
In Salesforce, go to "Setup" and search for “profile” in the search bar on the left. Click “Profiles” (under Users). Click “Clone” next to the “Minimum Access - API Only Integrations” profile.
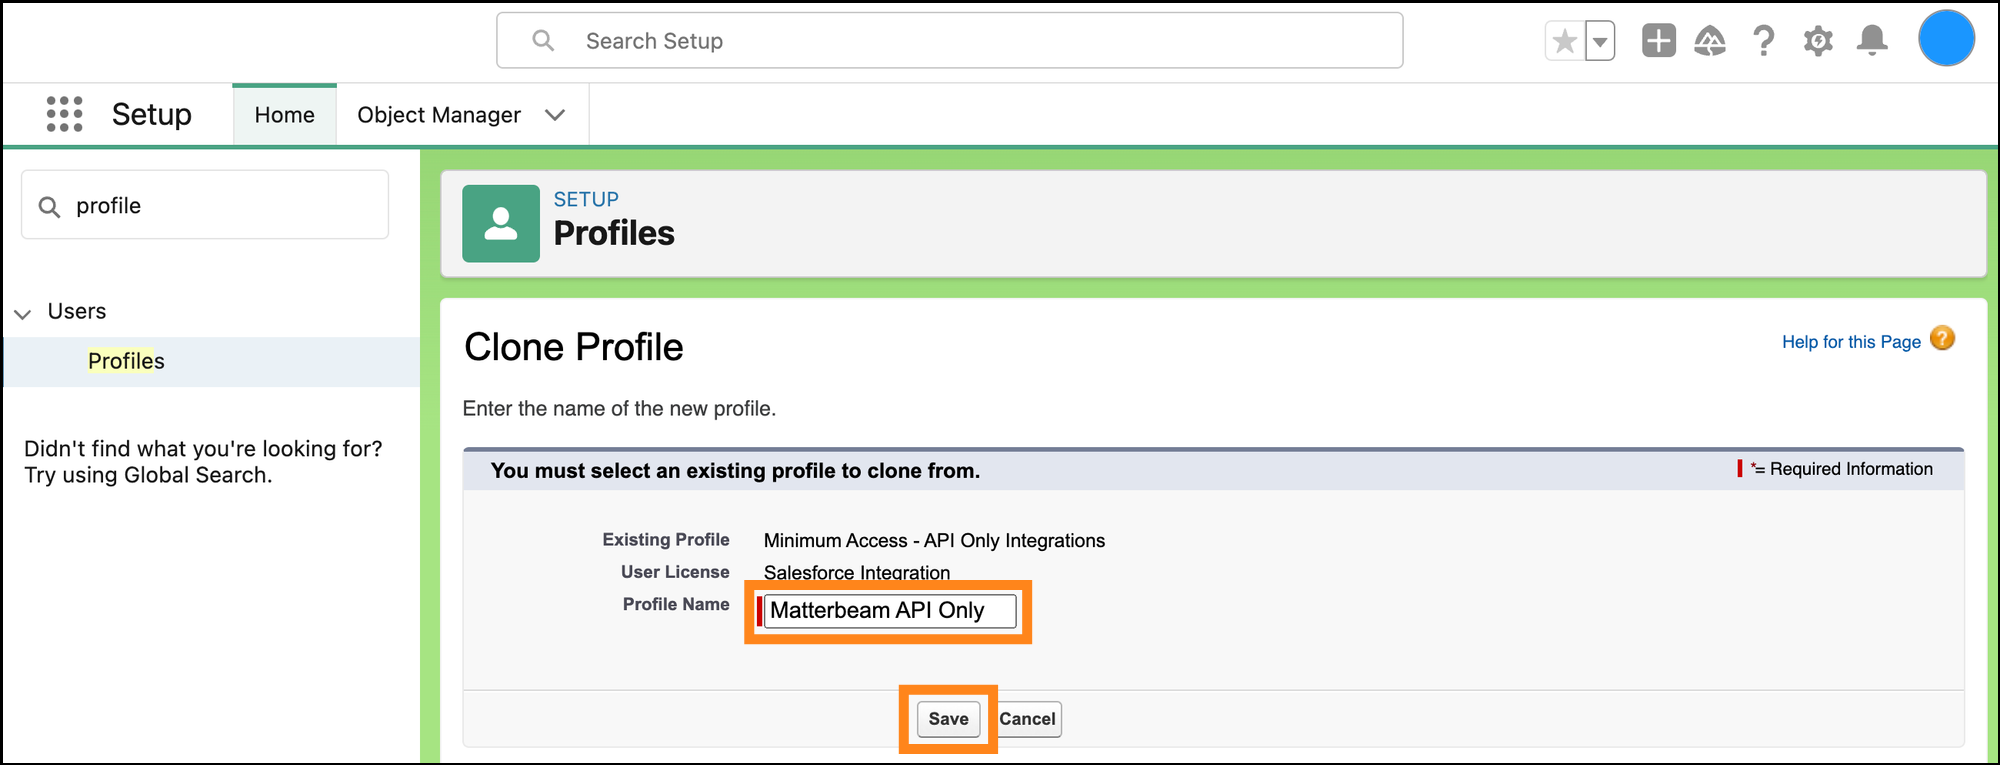
Name your new profile something memorable. For example, “Matterbeam API Only”. Click Save.
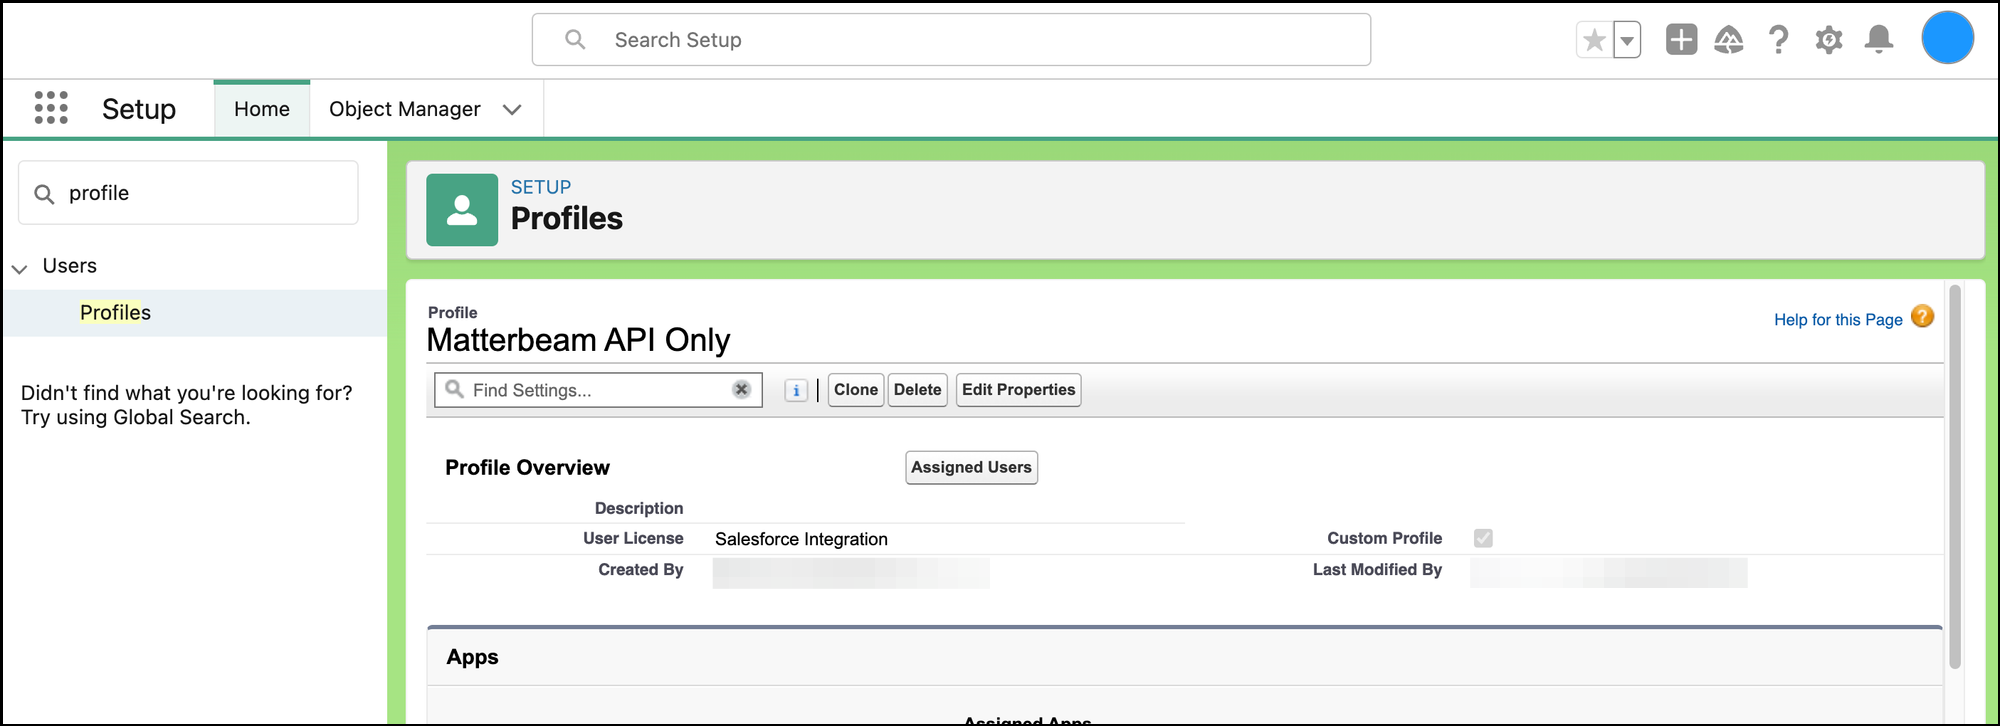
You will see the new profile has been created.
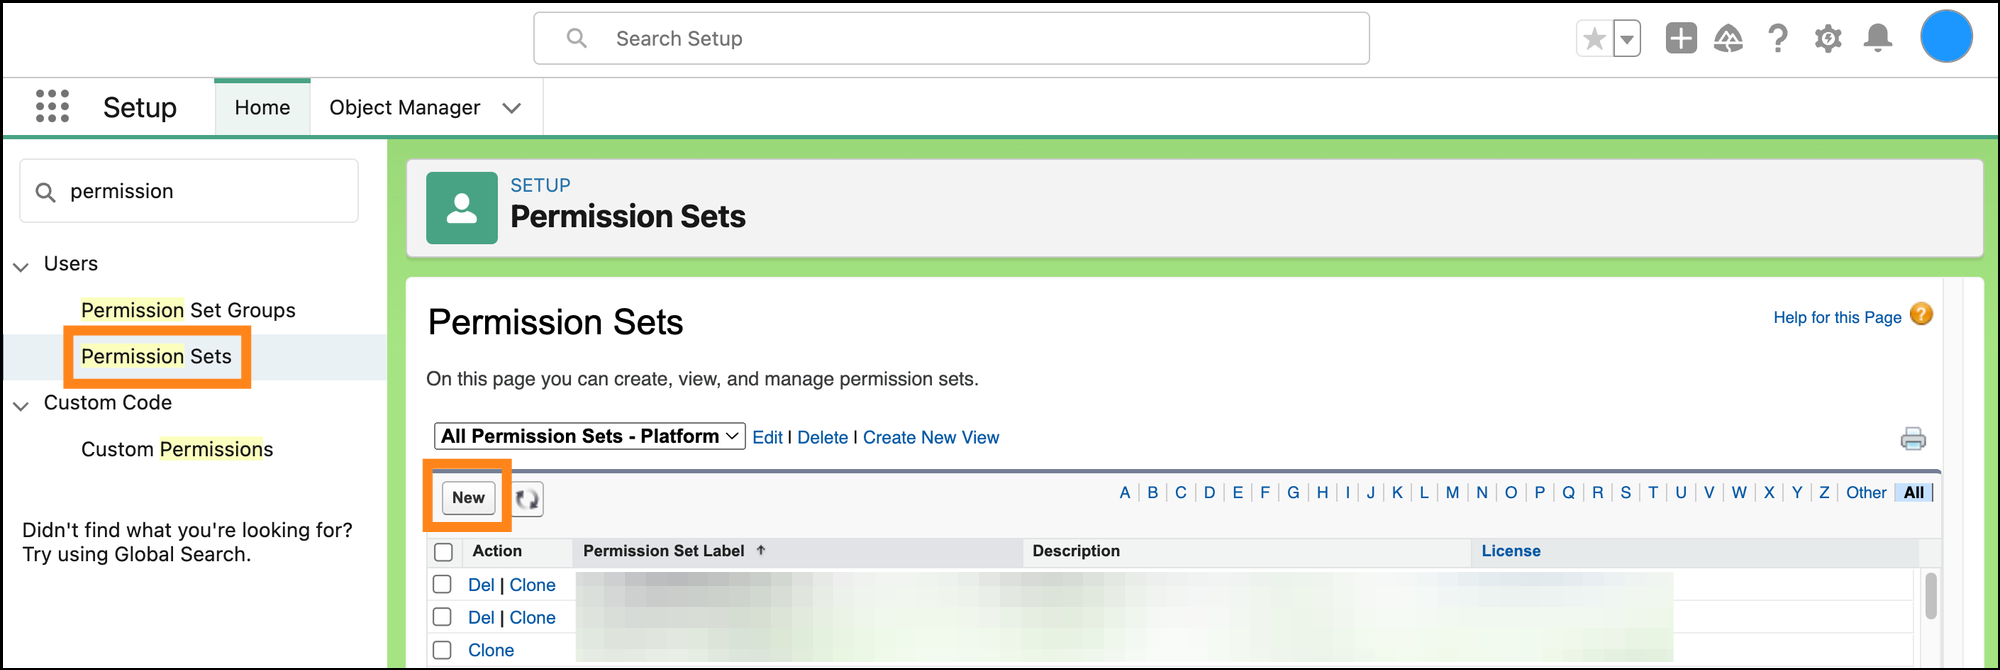
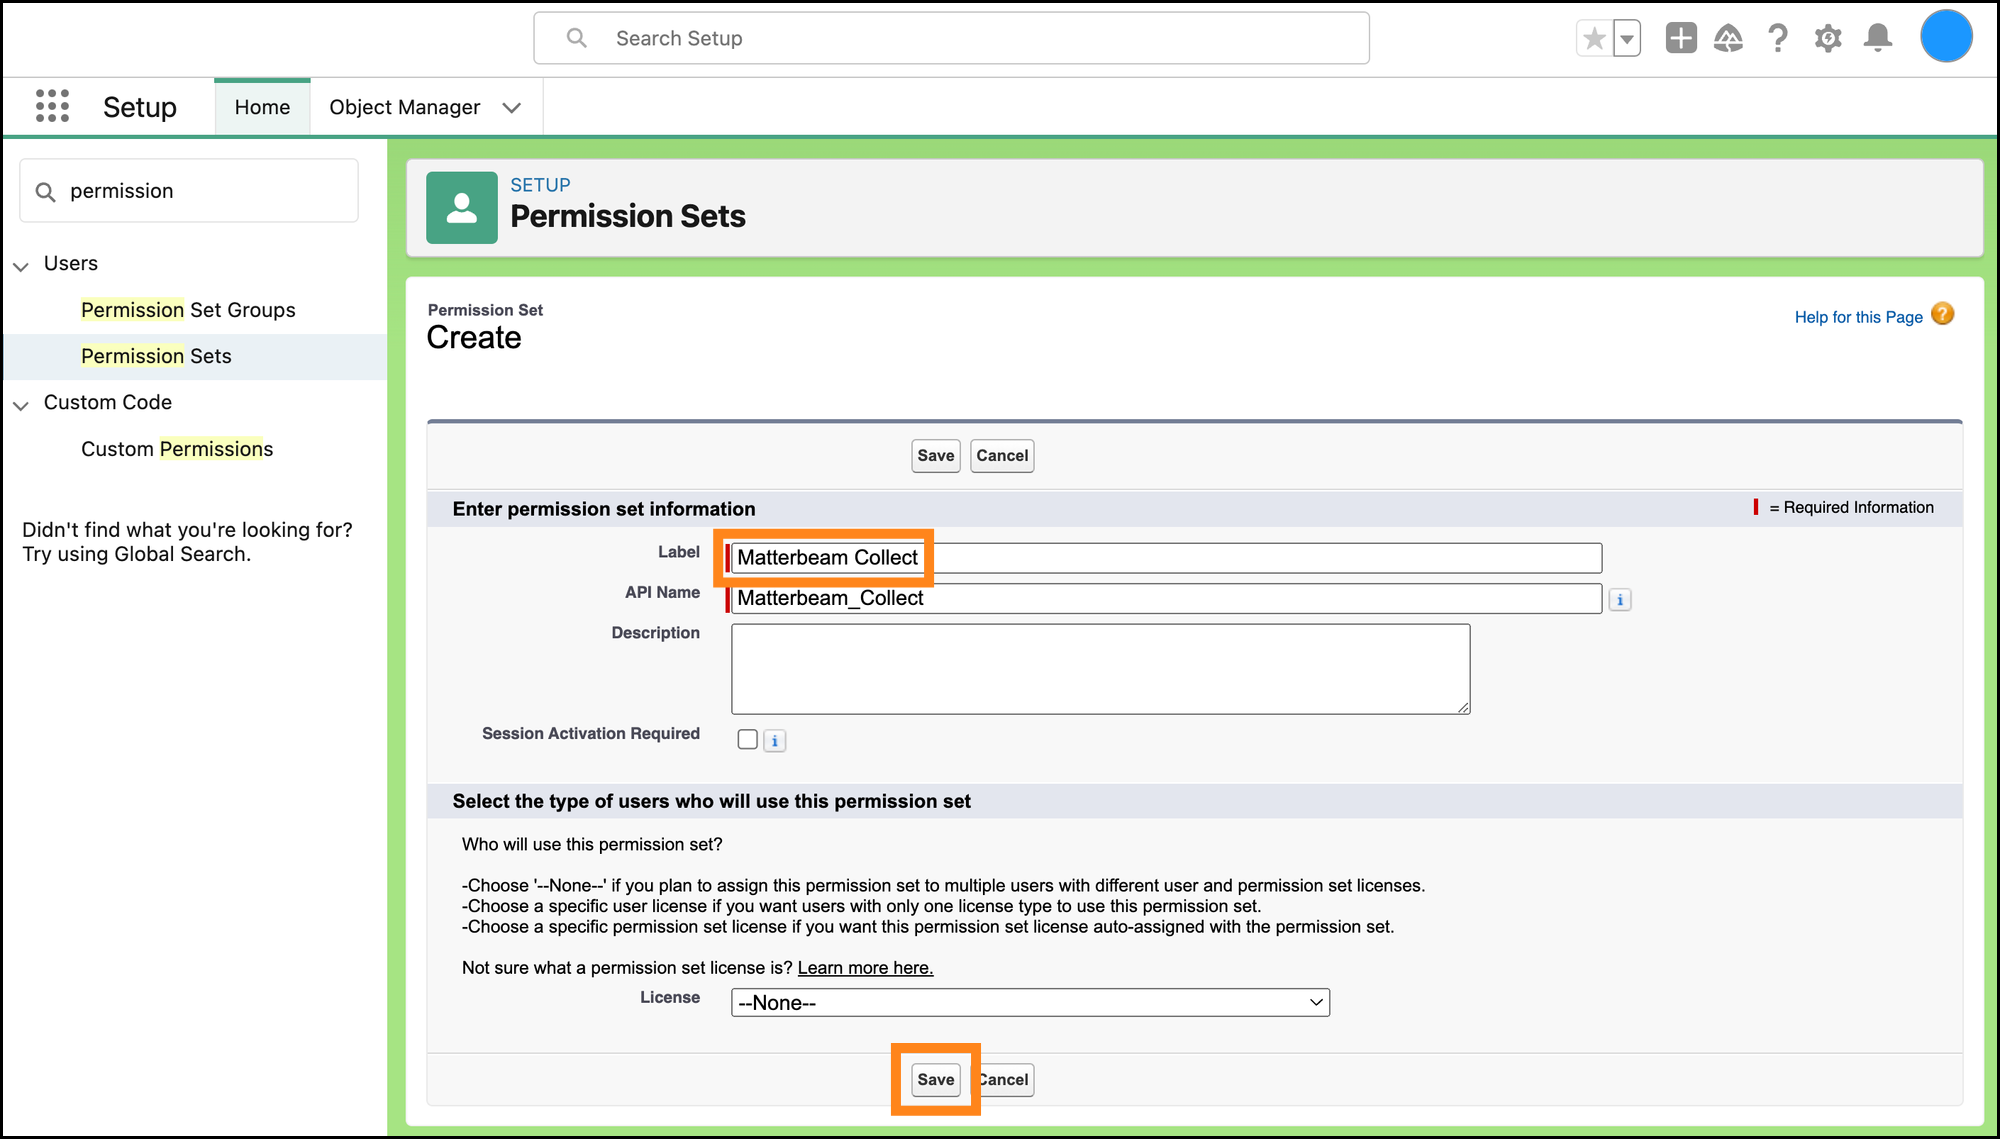
Go to Setup and search for “permission” in the search bar on the left. Click “Permission Sets” (under Users). Click “New”.
Name your new Permission Set something memorable. For example, “Matterbeam Collect”. Click Save.
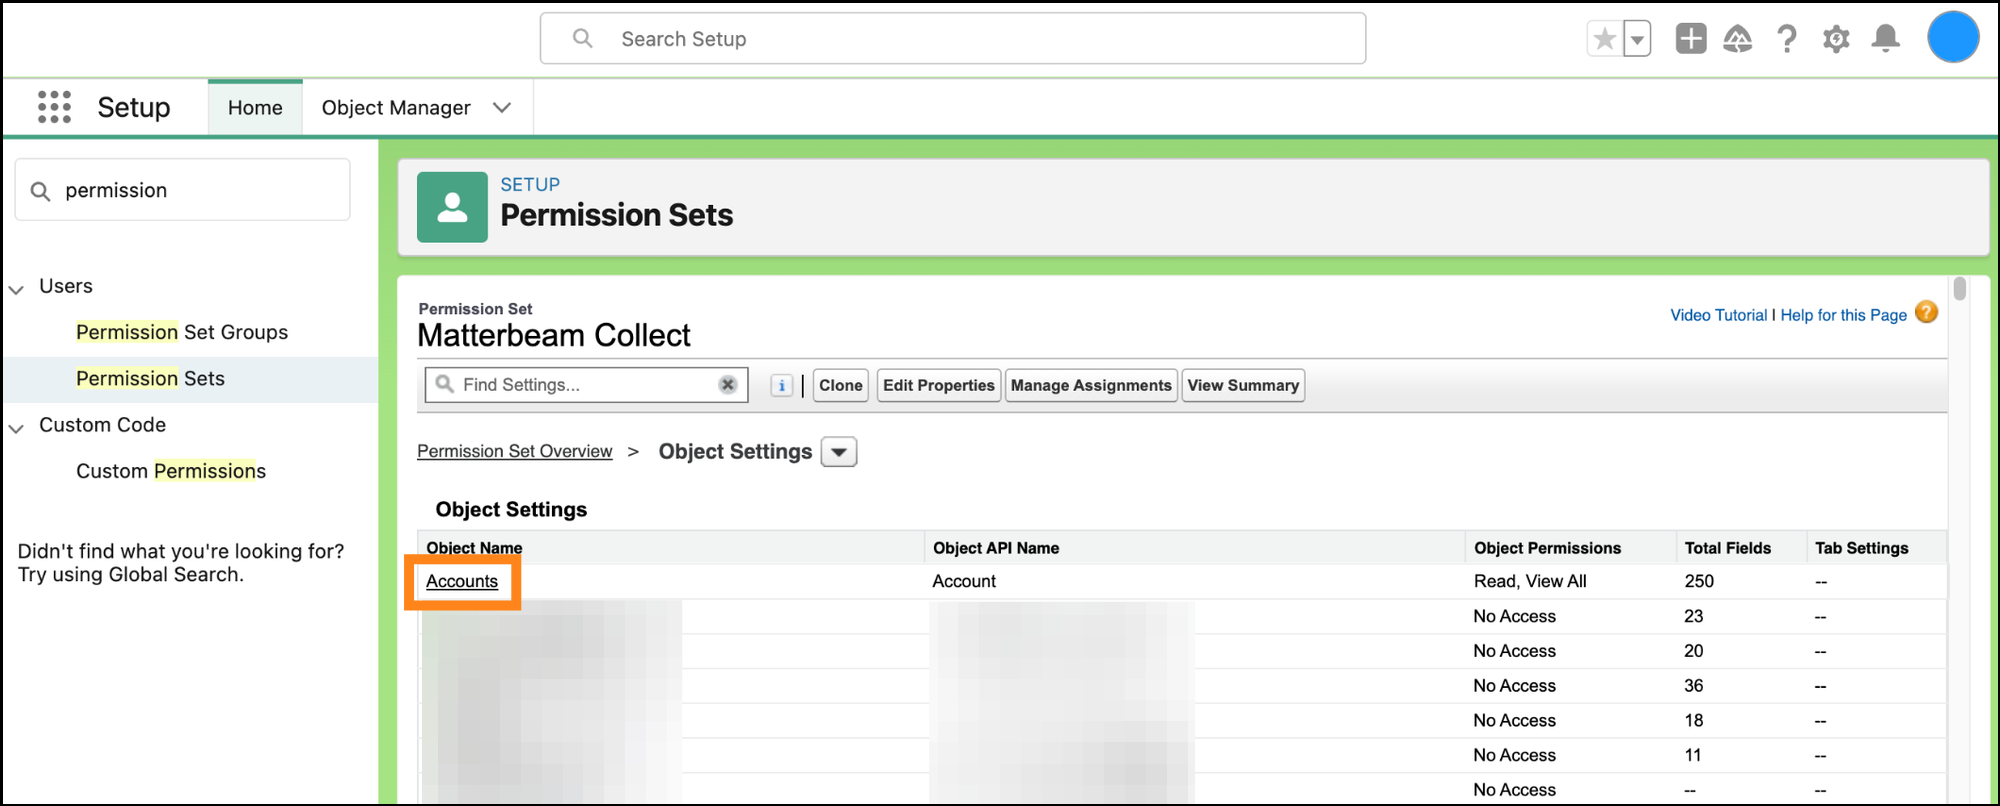
Click "Object Settings".

Edit the permissions for the objects that you want Matterbeam to have access to. For example, you can select "Accounts".
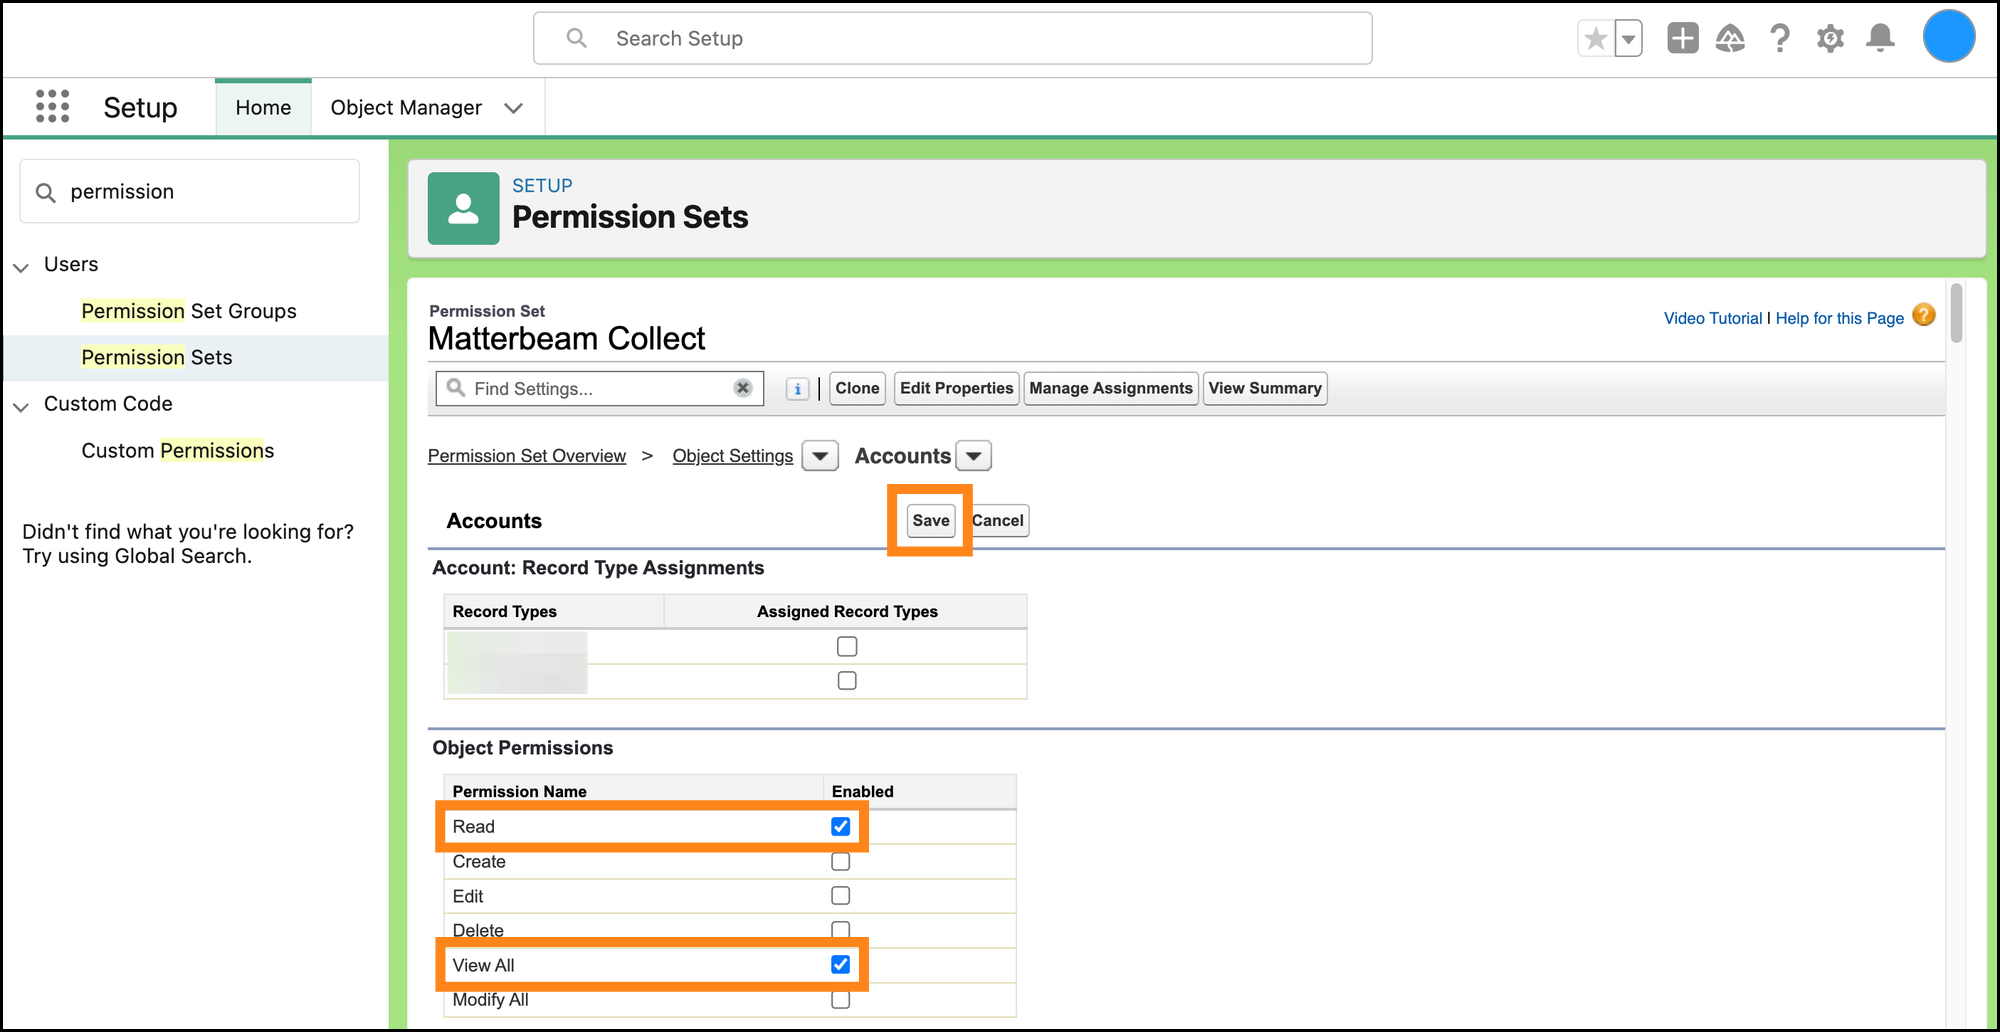
Check off the "Read" and "View All" boxes, then click “Save”.
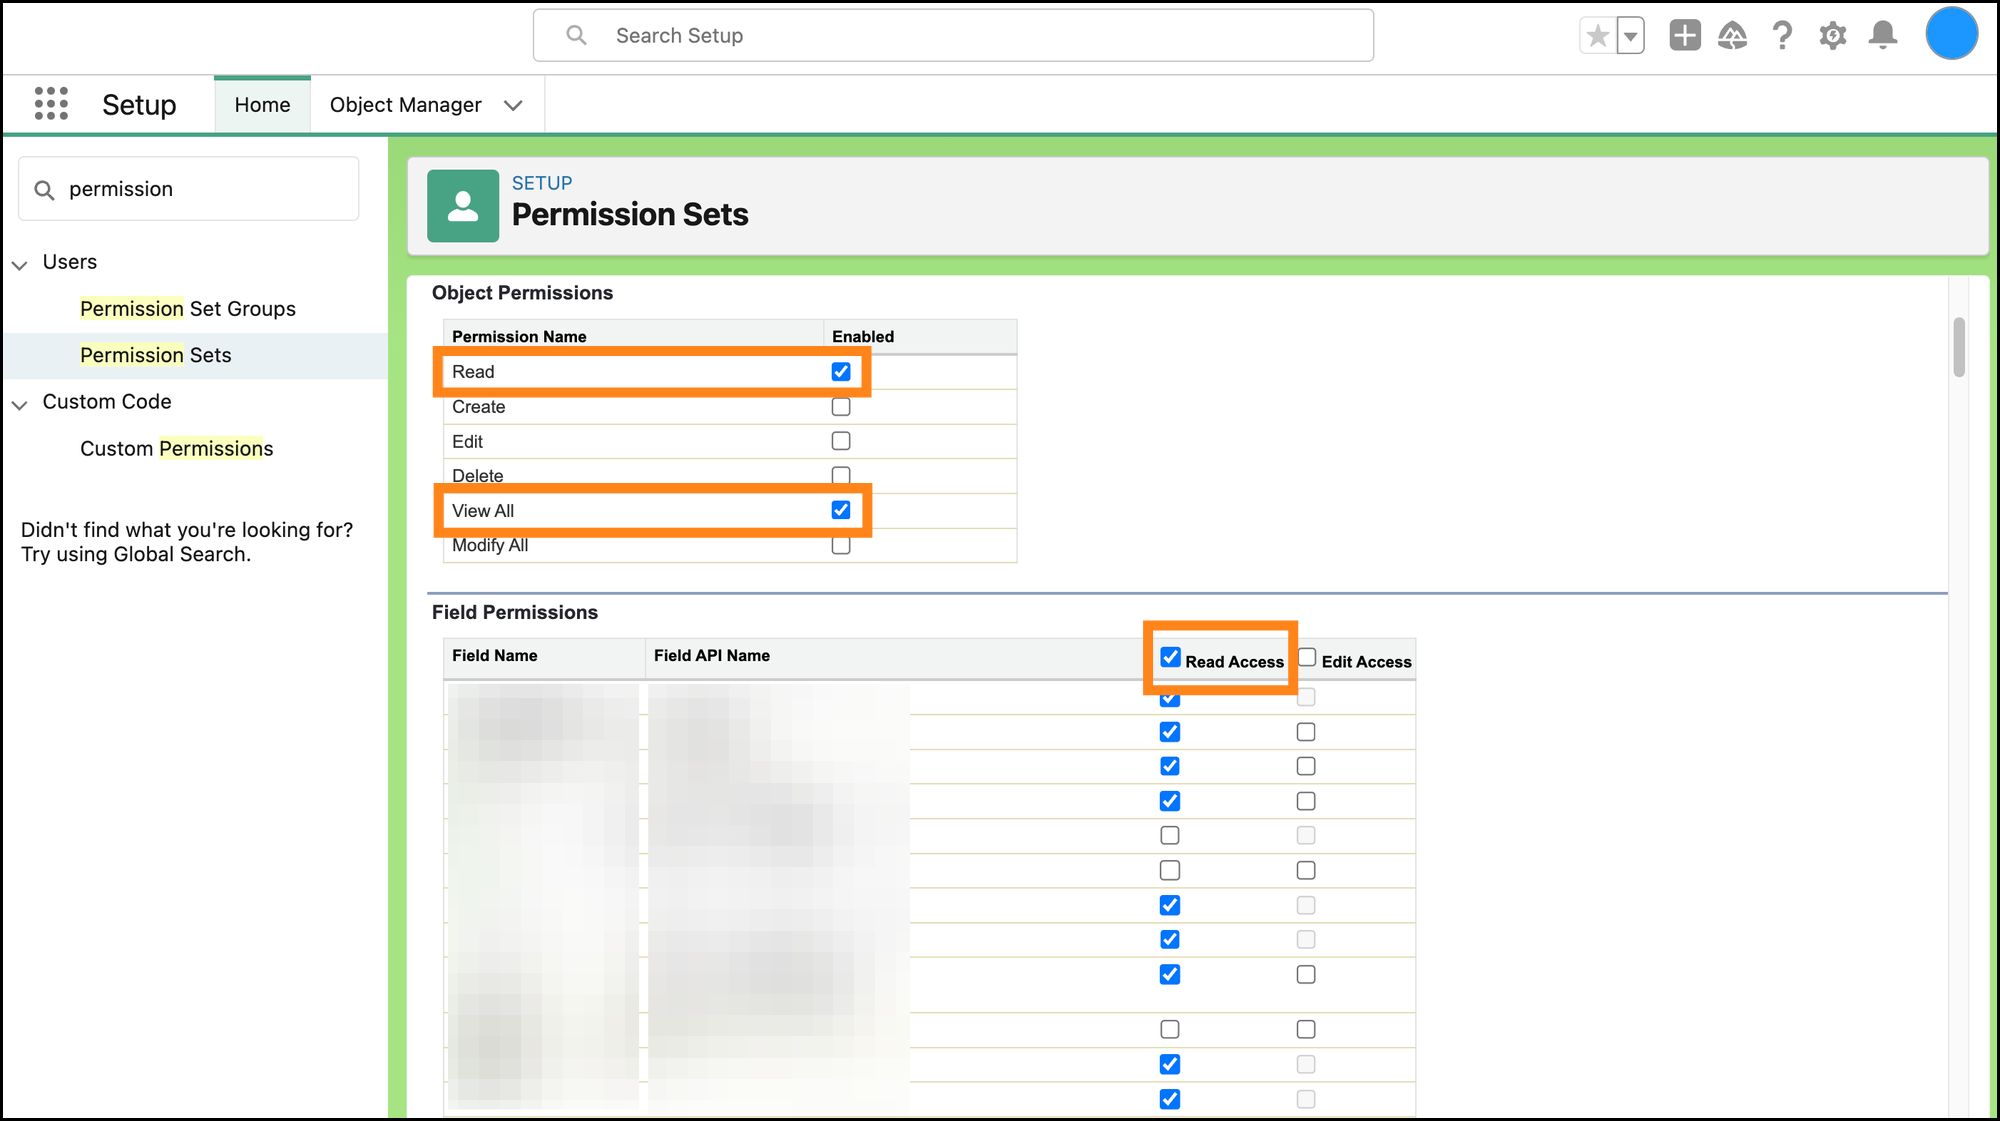
We recommend you check off “Read Access” for all the fields in the "Field Permissions" section. Although, if you want to limit the Matterbeam Collector to certain fields, you can also uncheck any that you wish. When finished, scroll to the bottom and click "Save".
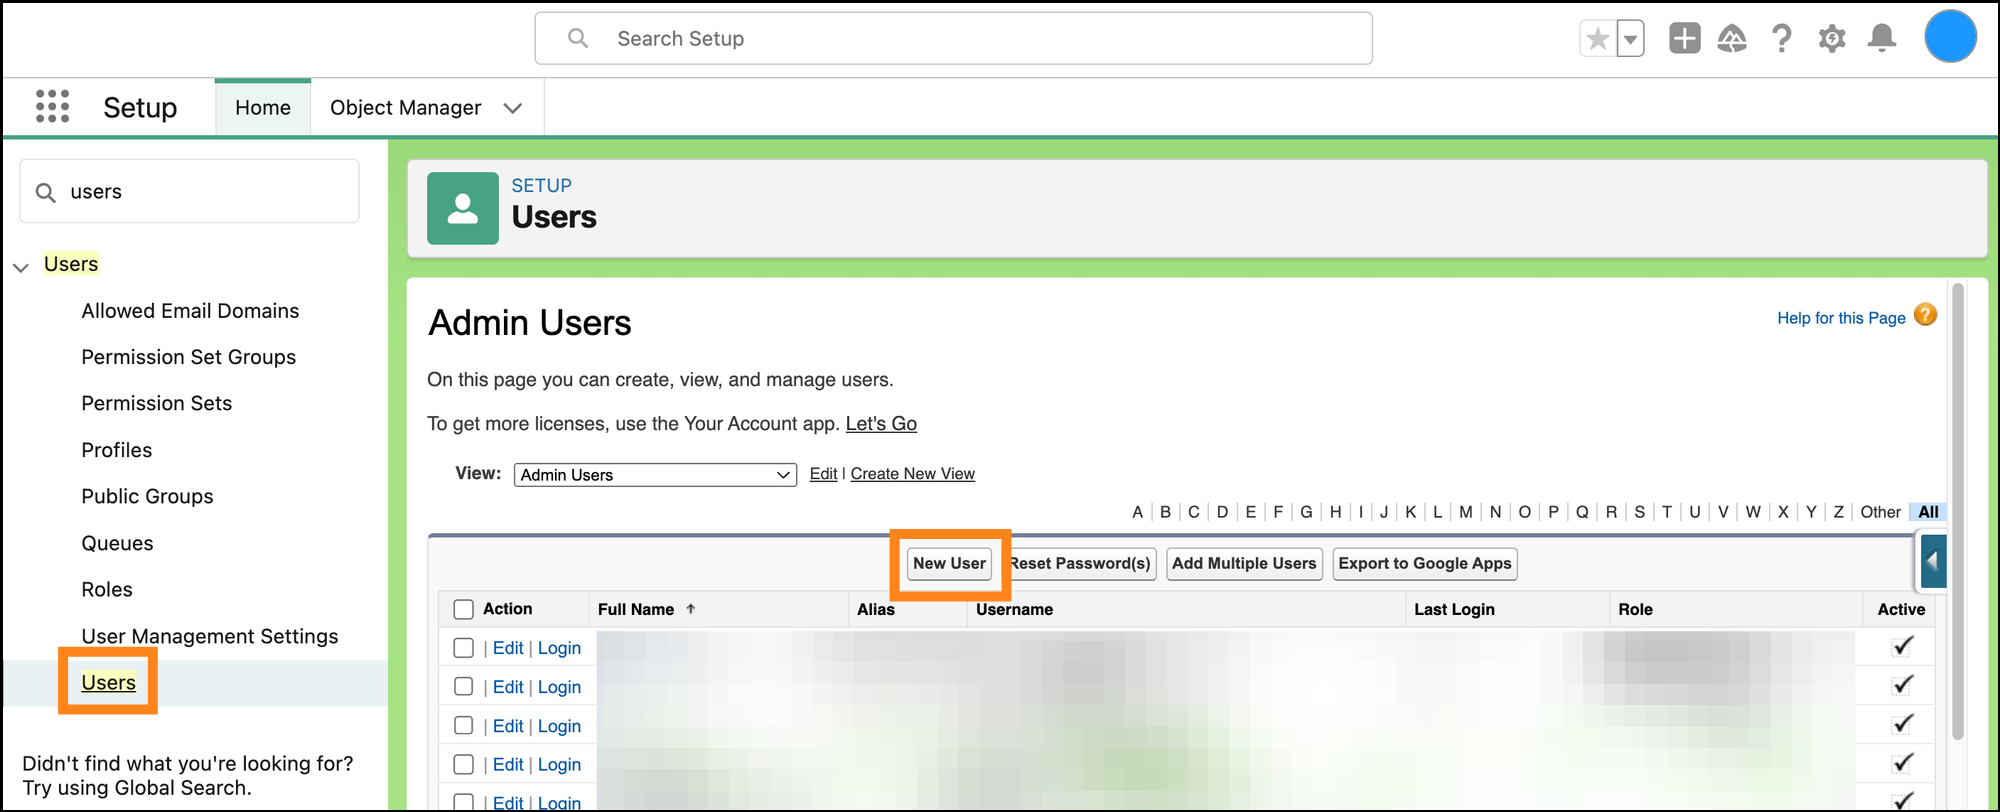
Go to "Setup" and search for “users” in the search bar on the left. Click “Users” (under Users). Click “New User”.
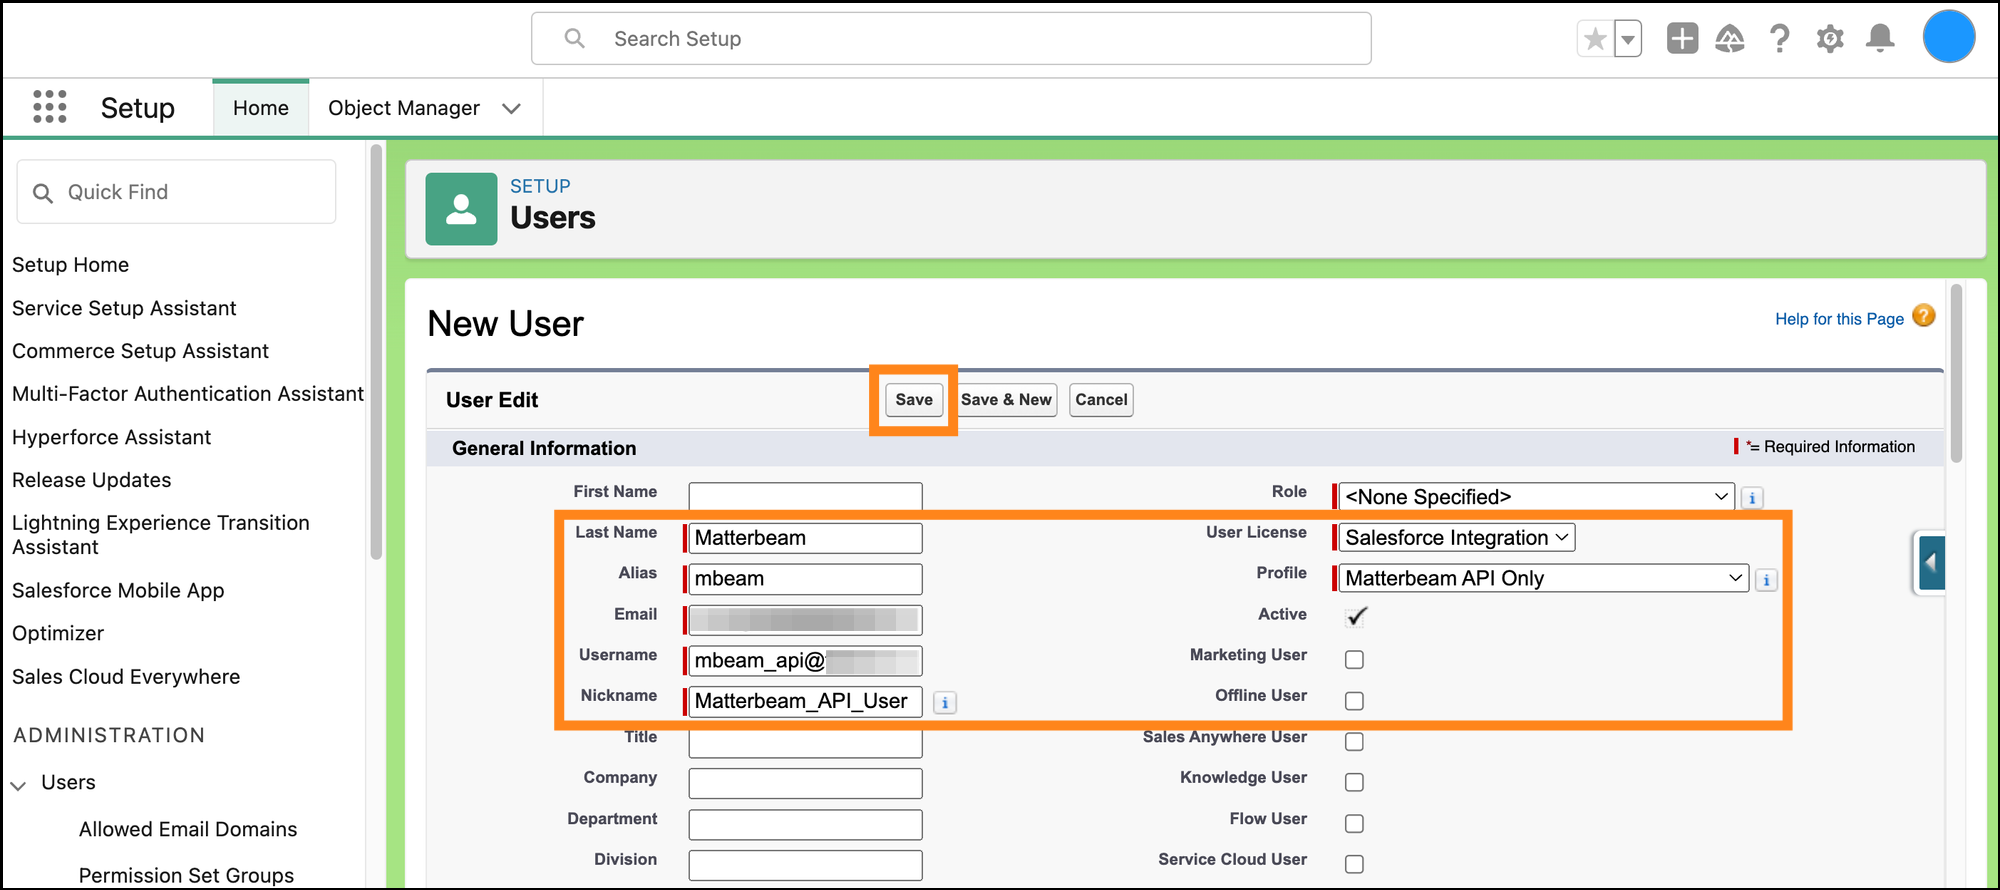
Fill in your desired user details, and assign this user the “Profile” that you created earlier. Choose an “Email” that you have access to because the next step requires email verification. (You will also need to reset the security token for this user later, which will also be emailed.) Click “Save”.
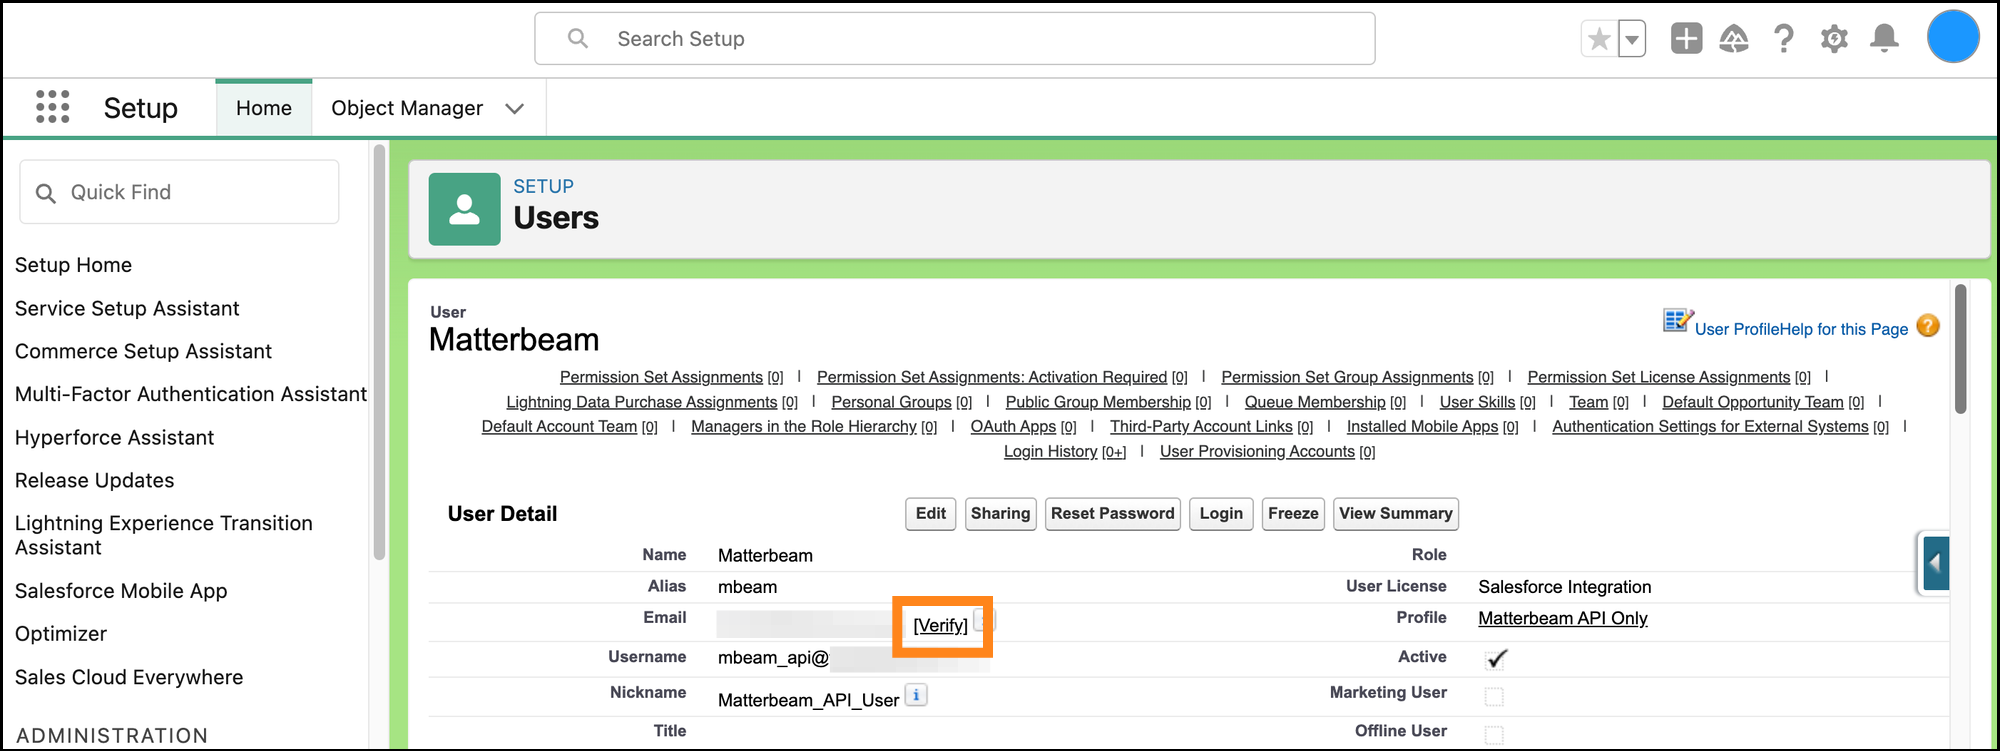
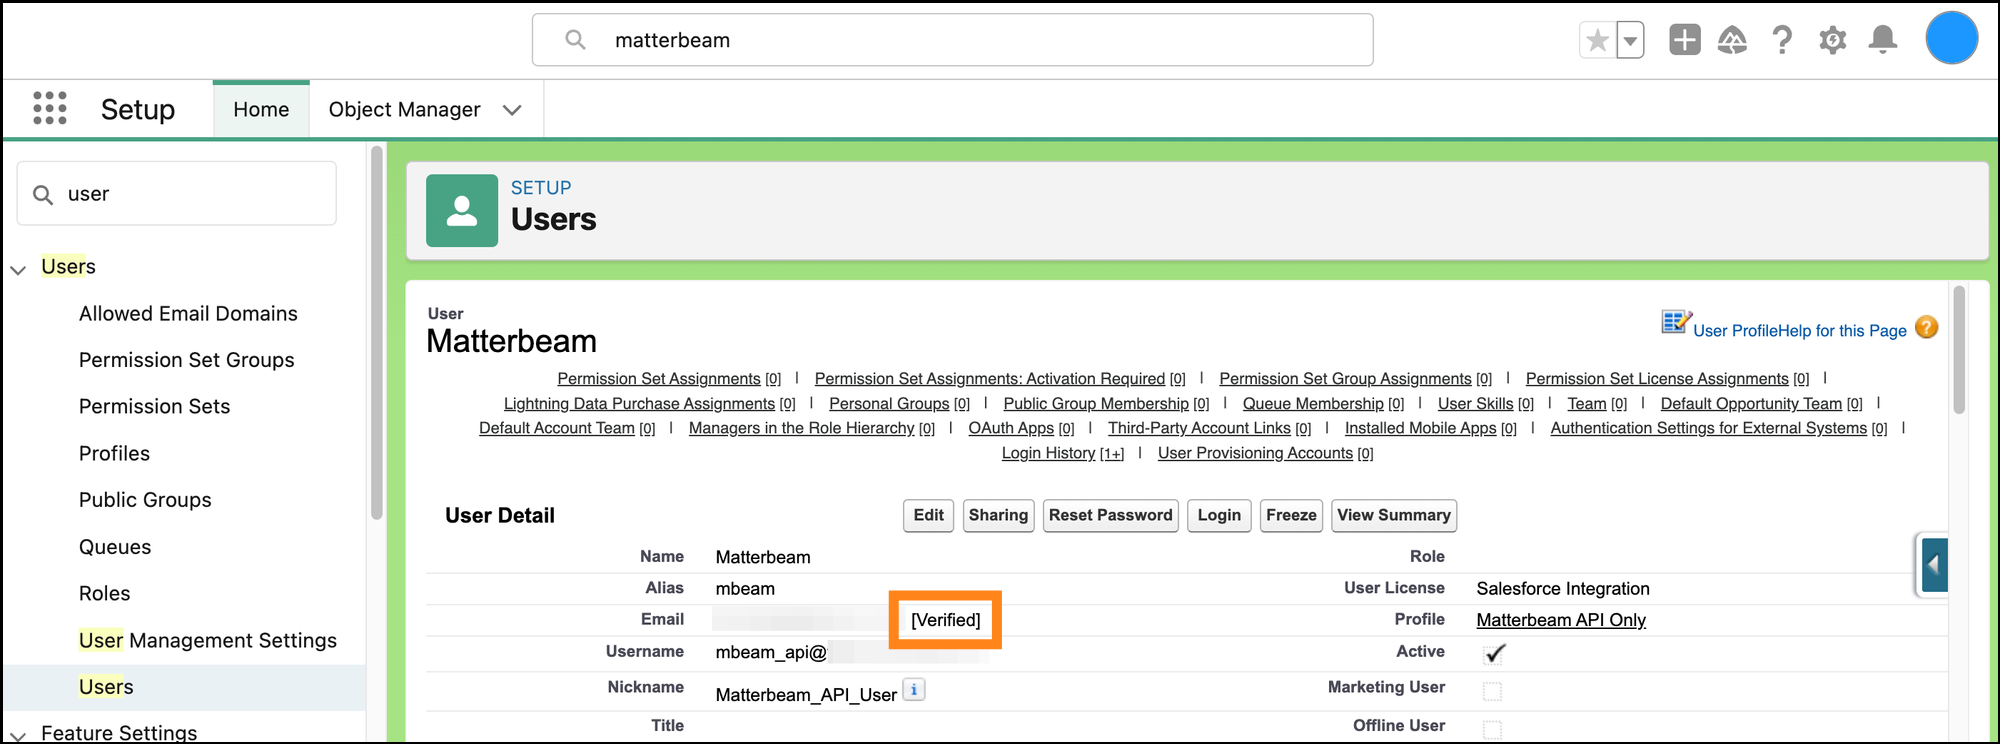
On the next page, notice it says “Verify” next to the Email. This means it still needs to be verified.
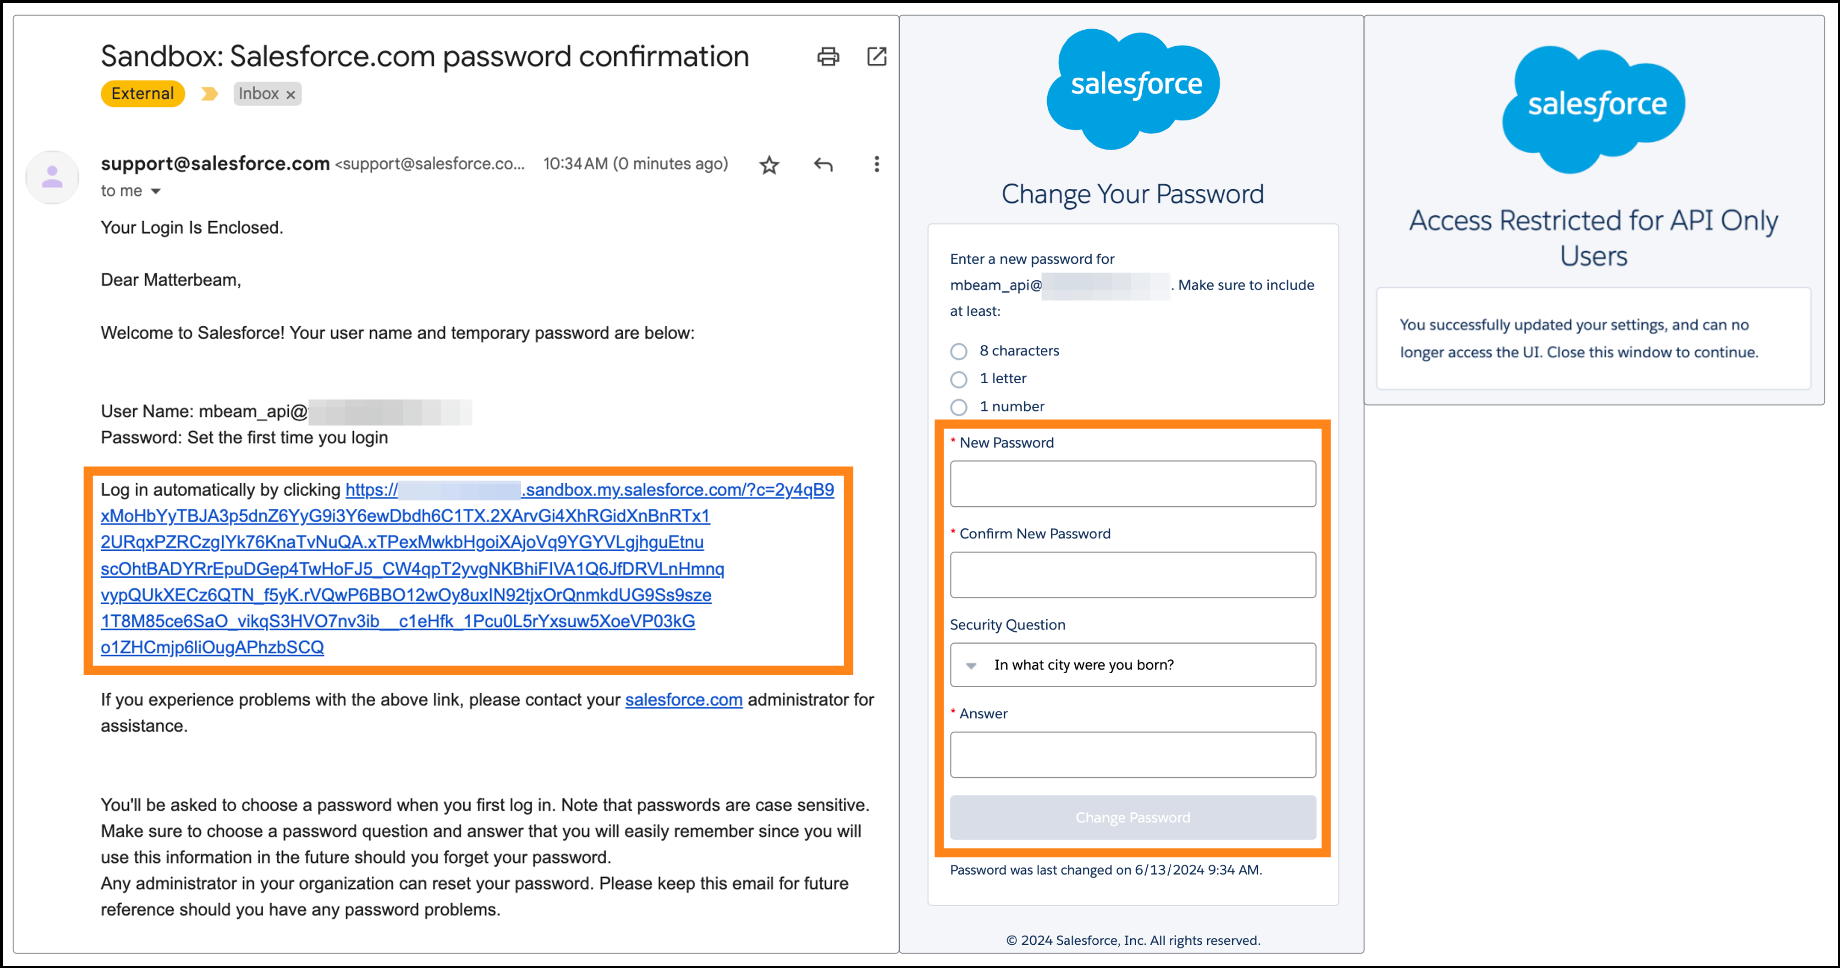
Check your email inbox for the verification email, click the link to verify the user and setup the user’s password. Chose a password for this user and click "Change Password". (After you click "Change Password", the next page may show a "access restricted" message. If so, you may need to log out of Salesforce as the API user and re-log back into Salesforce with your Admin user to continue, because the API user is not allowed access to the UI.)
After the user has been verified and the password has been setup, the user page should look like this with the word “Verified” next to the Email.
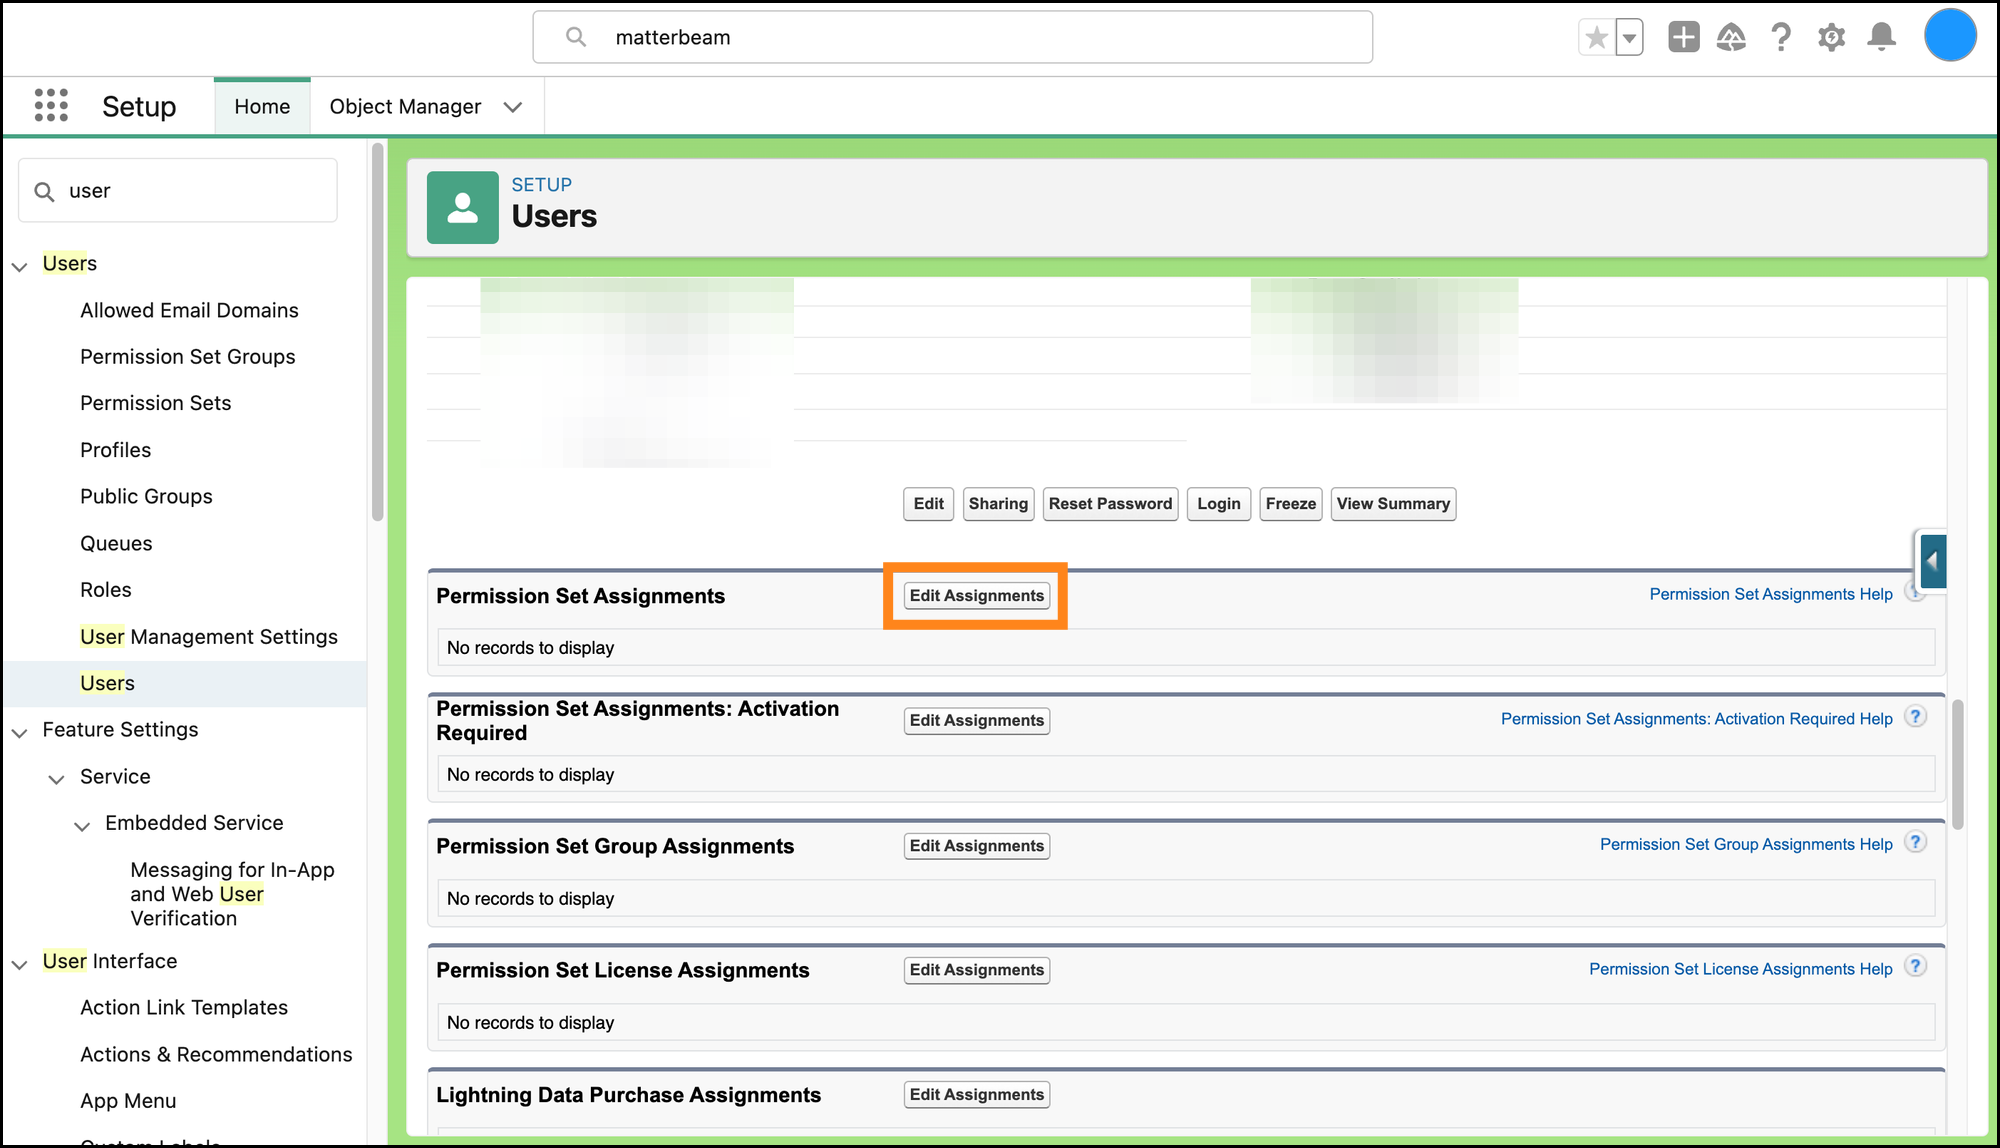
Next, add the Permission Set you created above to this new API user. Click “Edit Assignments” under “Permission Set Assignments”.
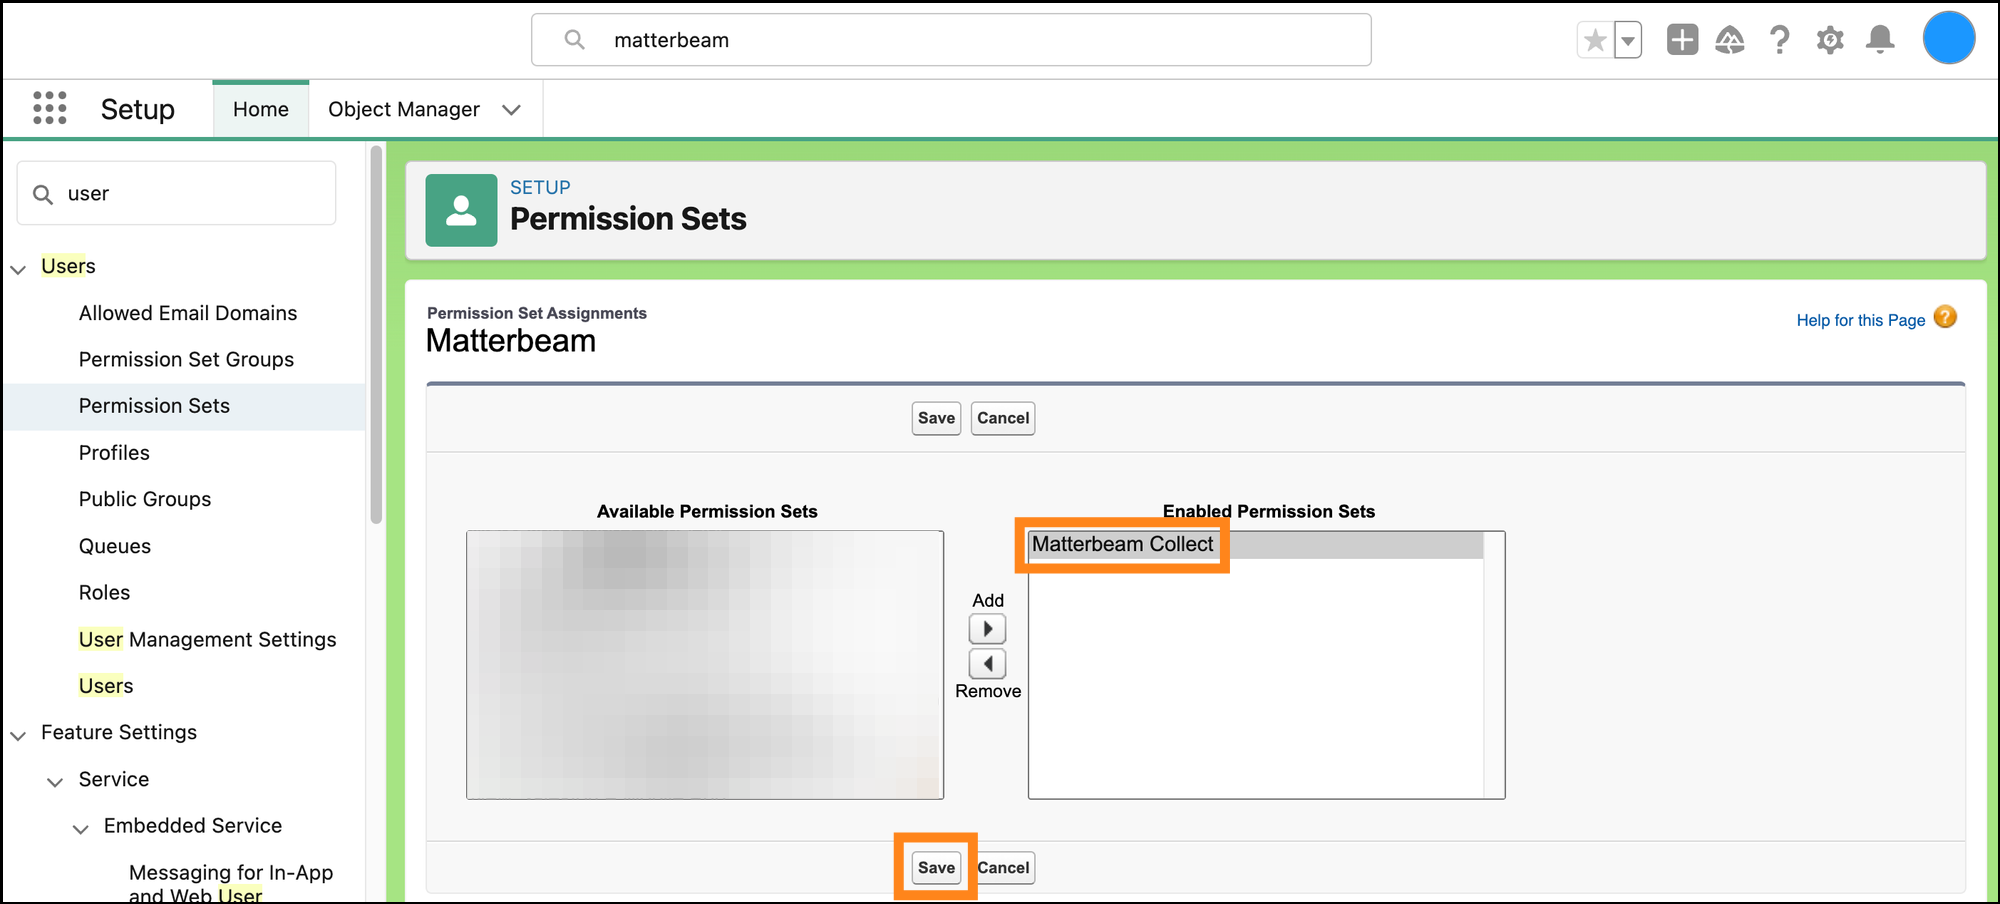
Add the Permission Set you created earlier to the “Enabled Permission Sets” box on the right side, and click "Save".
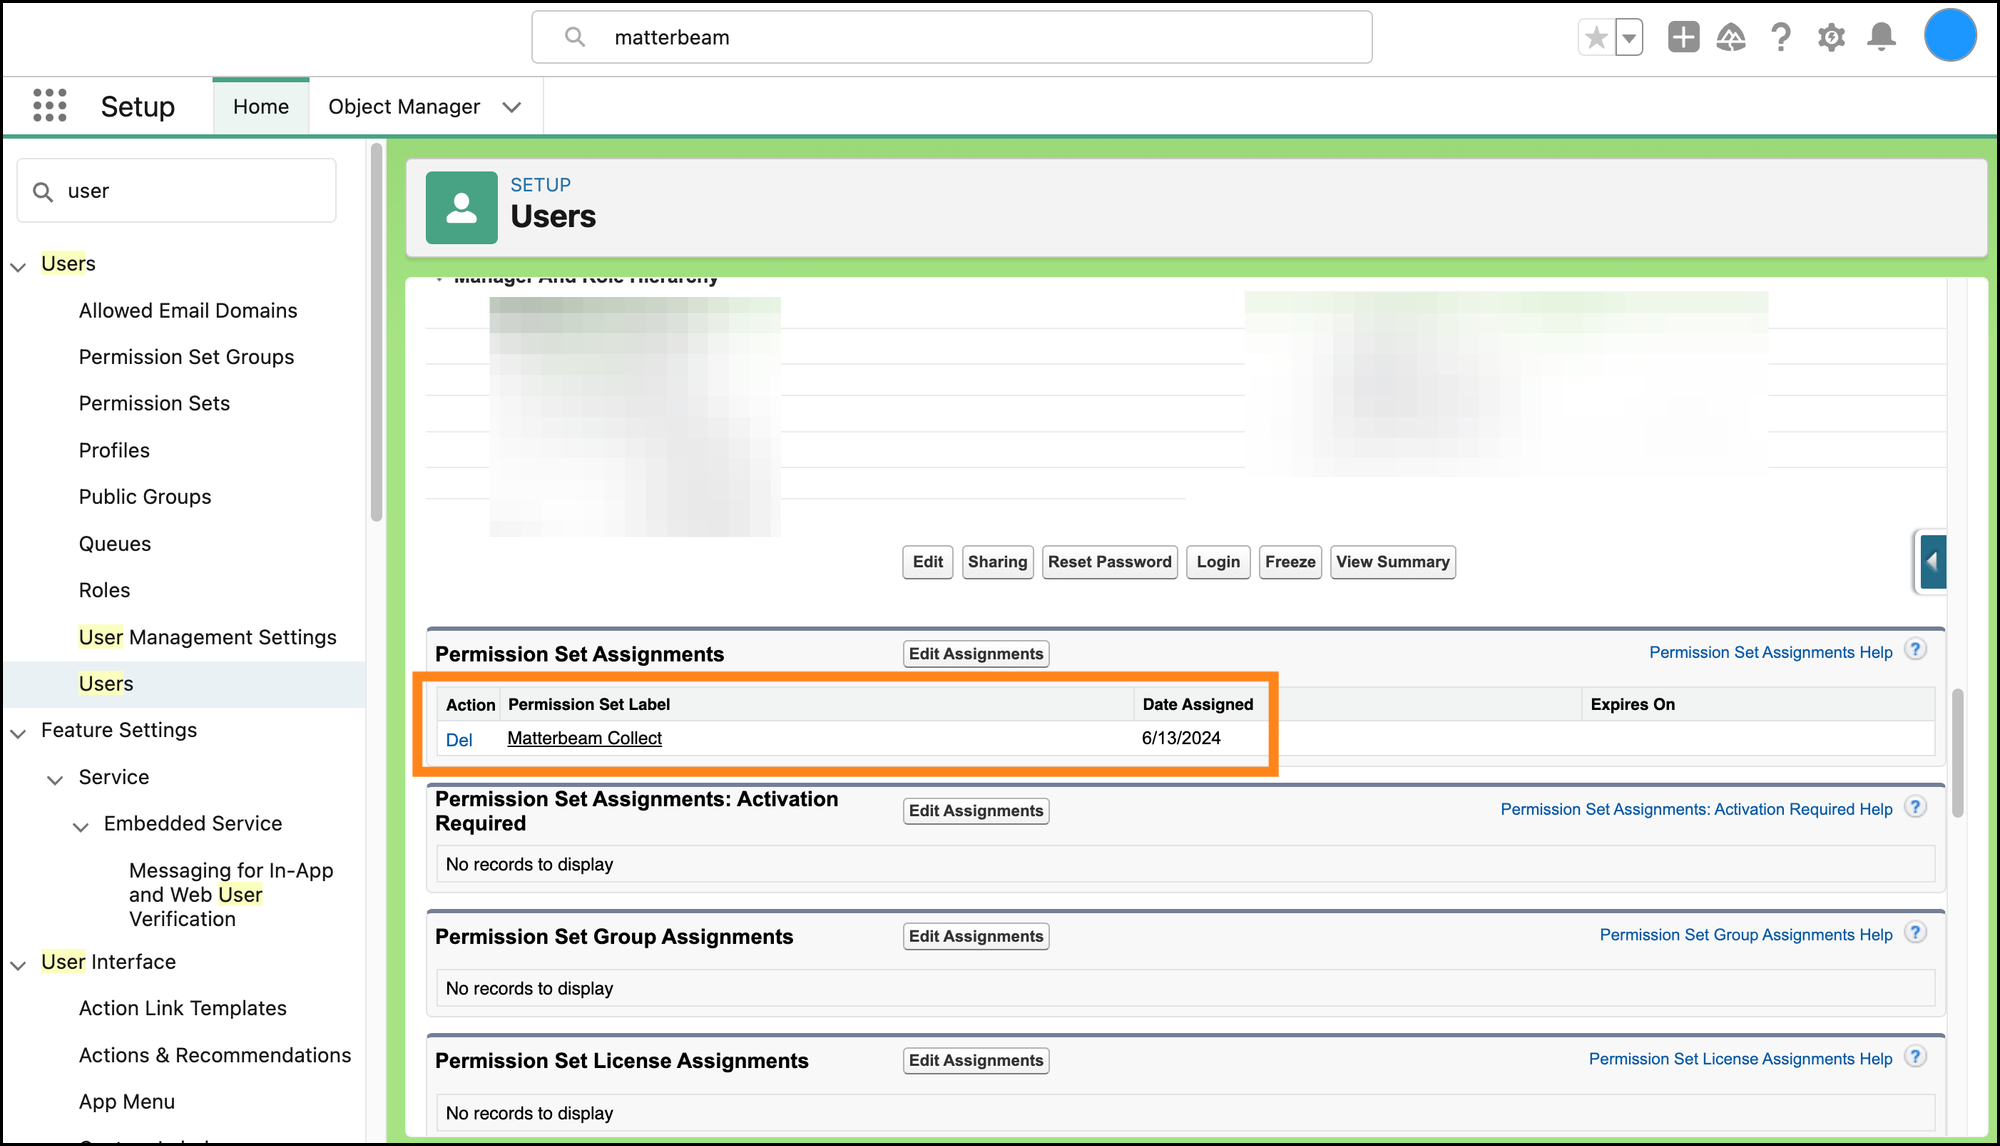
It should now show up under "Permission Set Assignments".
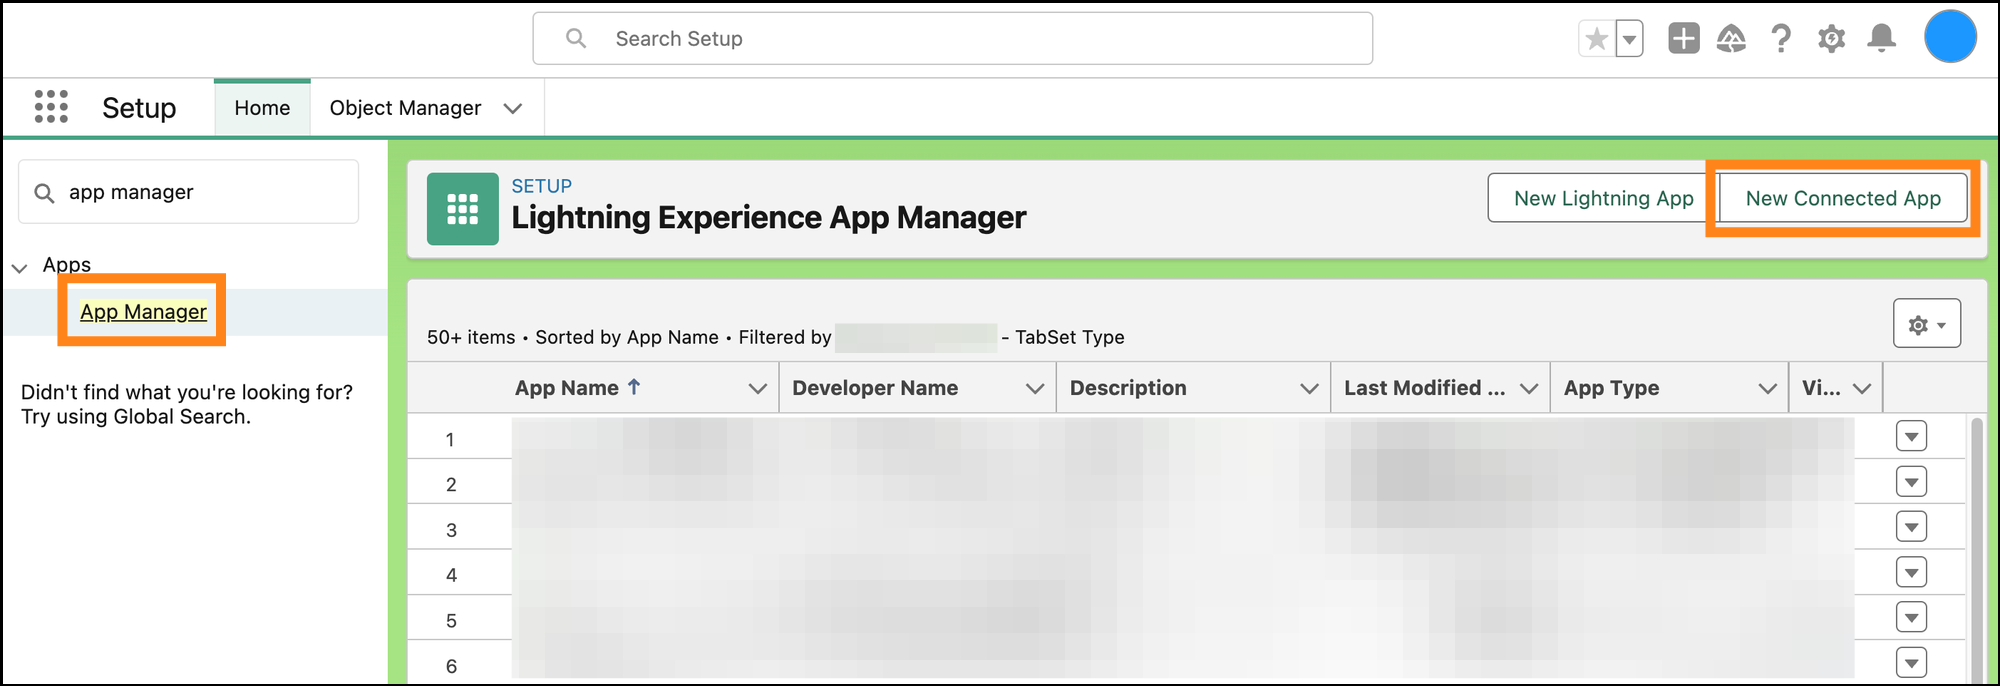
Go to "Setup" and search for “app manager” in the search bar on the left. Click “App Manager” (under Apps). Click “New Connected App”.
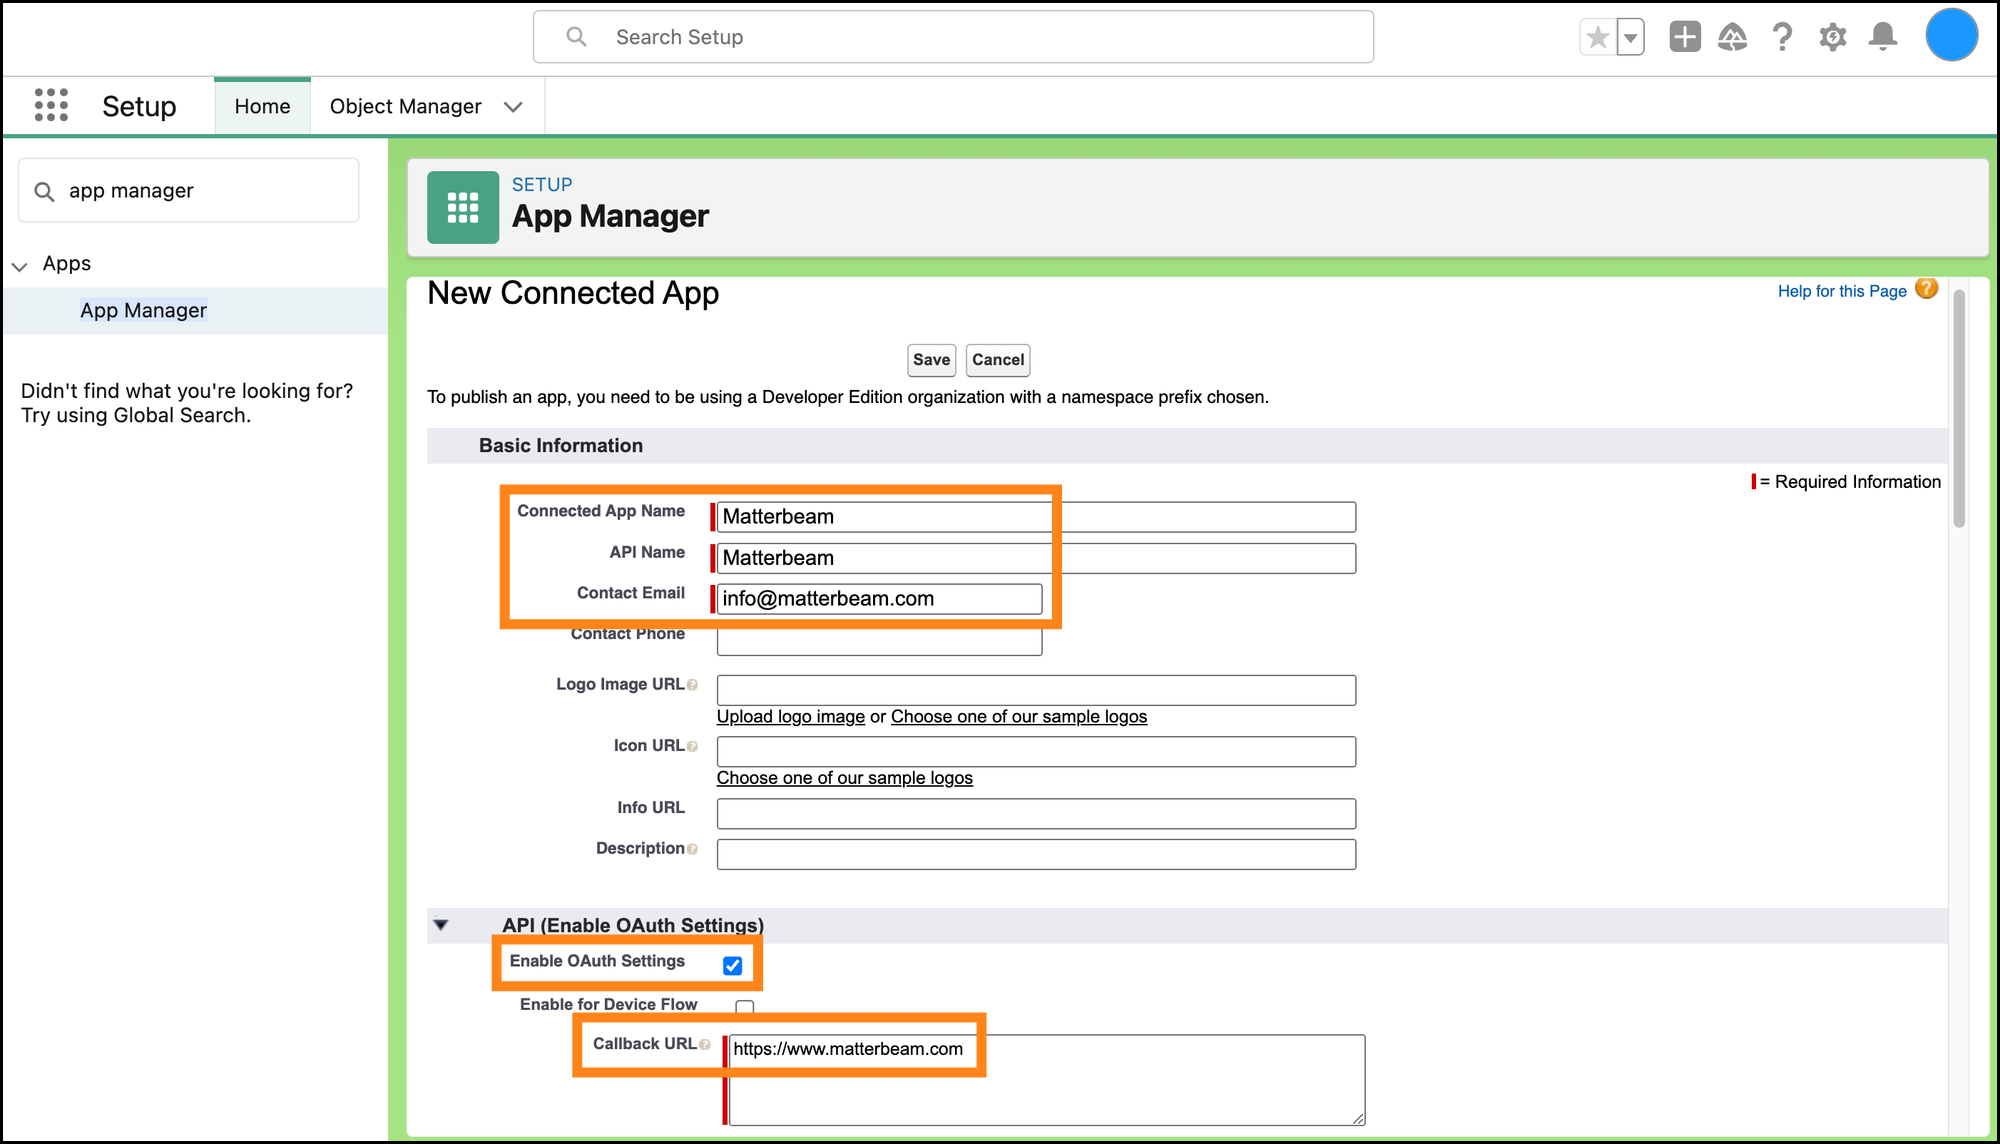
Choose a name for your app - for example, "Matterbeam". Enter “info@matterbeam.com” in the "Contact Email" field. Check off the “Enable OAuth Settings” box. Enter “https://www.matterbeam.com” for the Callback URL.
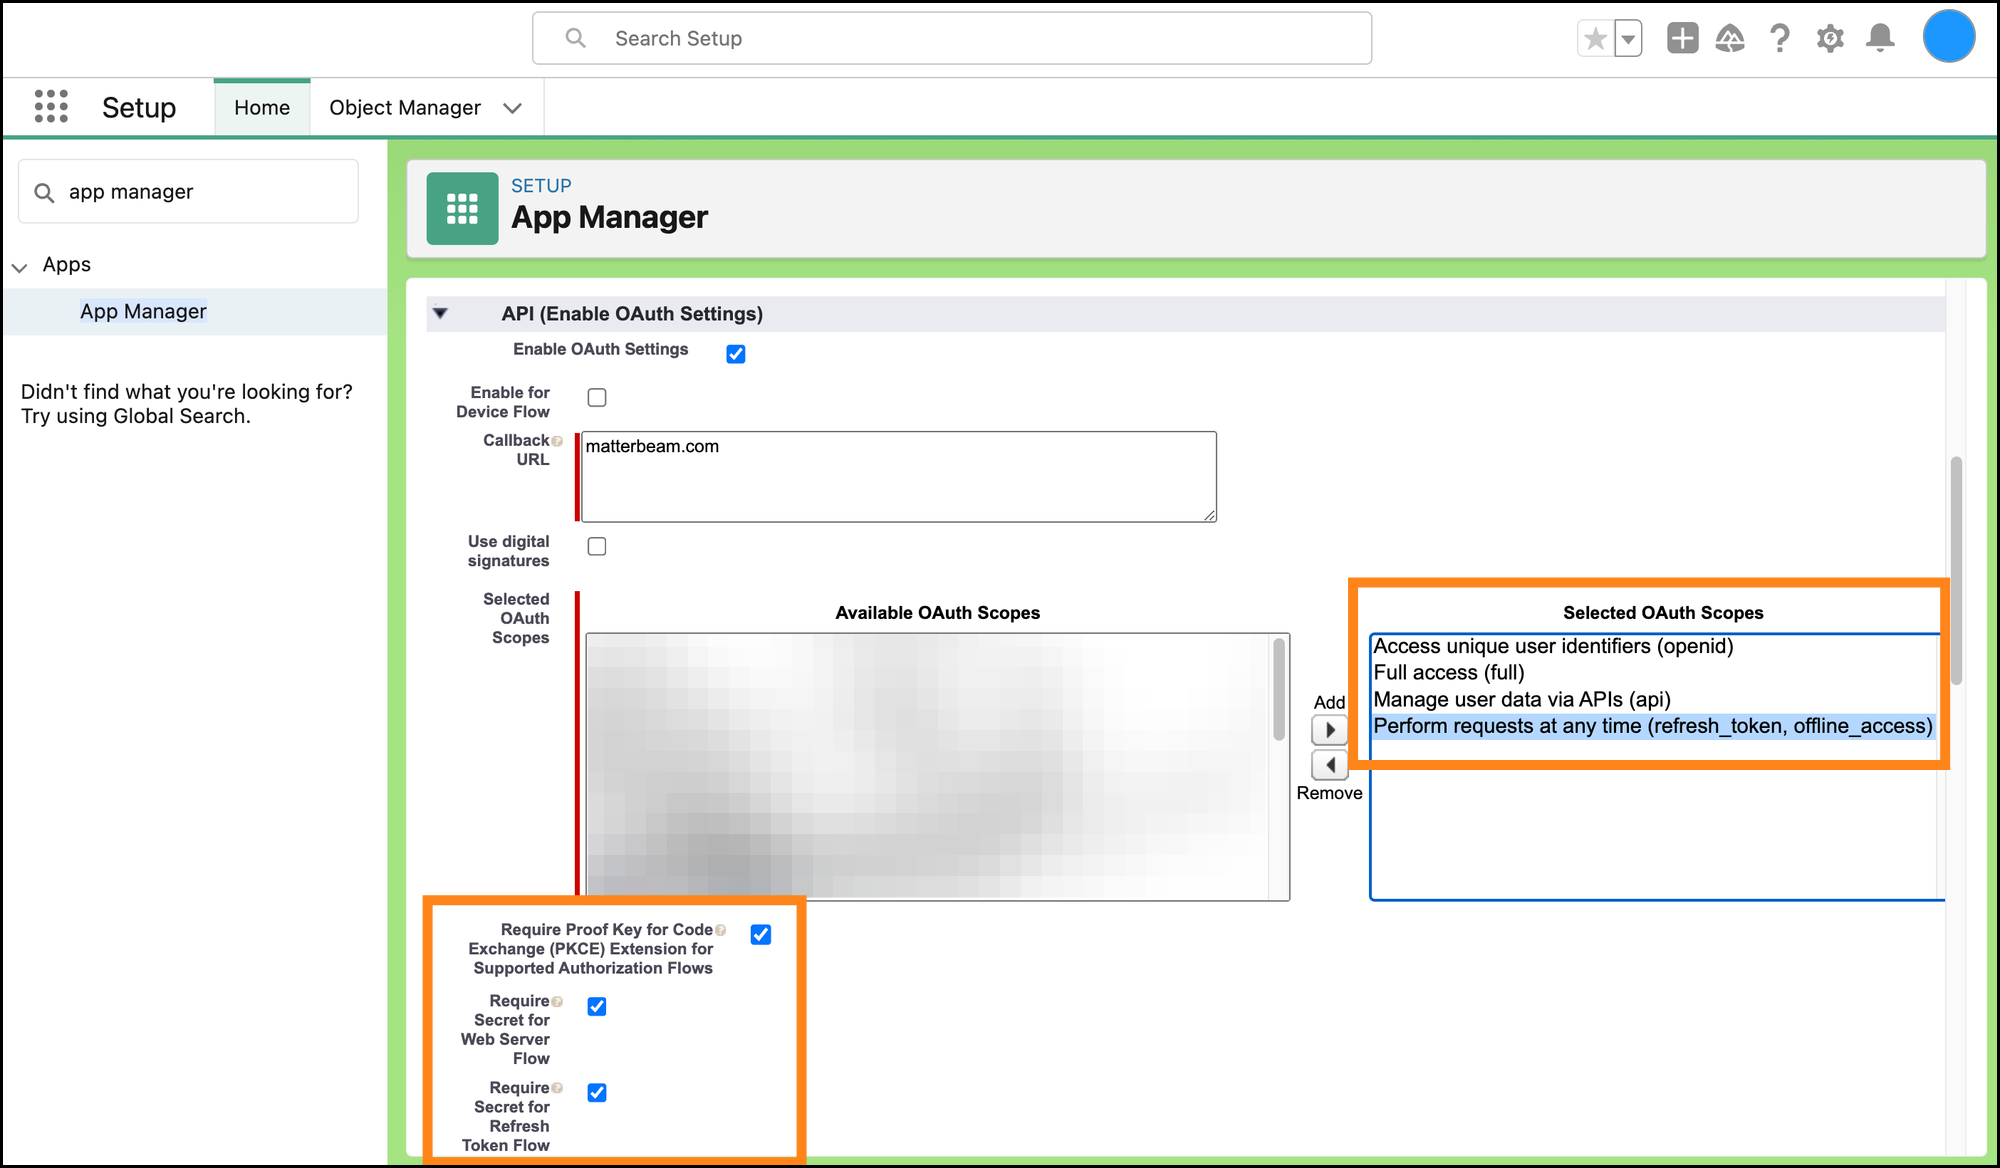
Select the following OAuth Scopes:
These 3 boxes will be checked off by default, leave them checked:
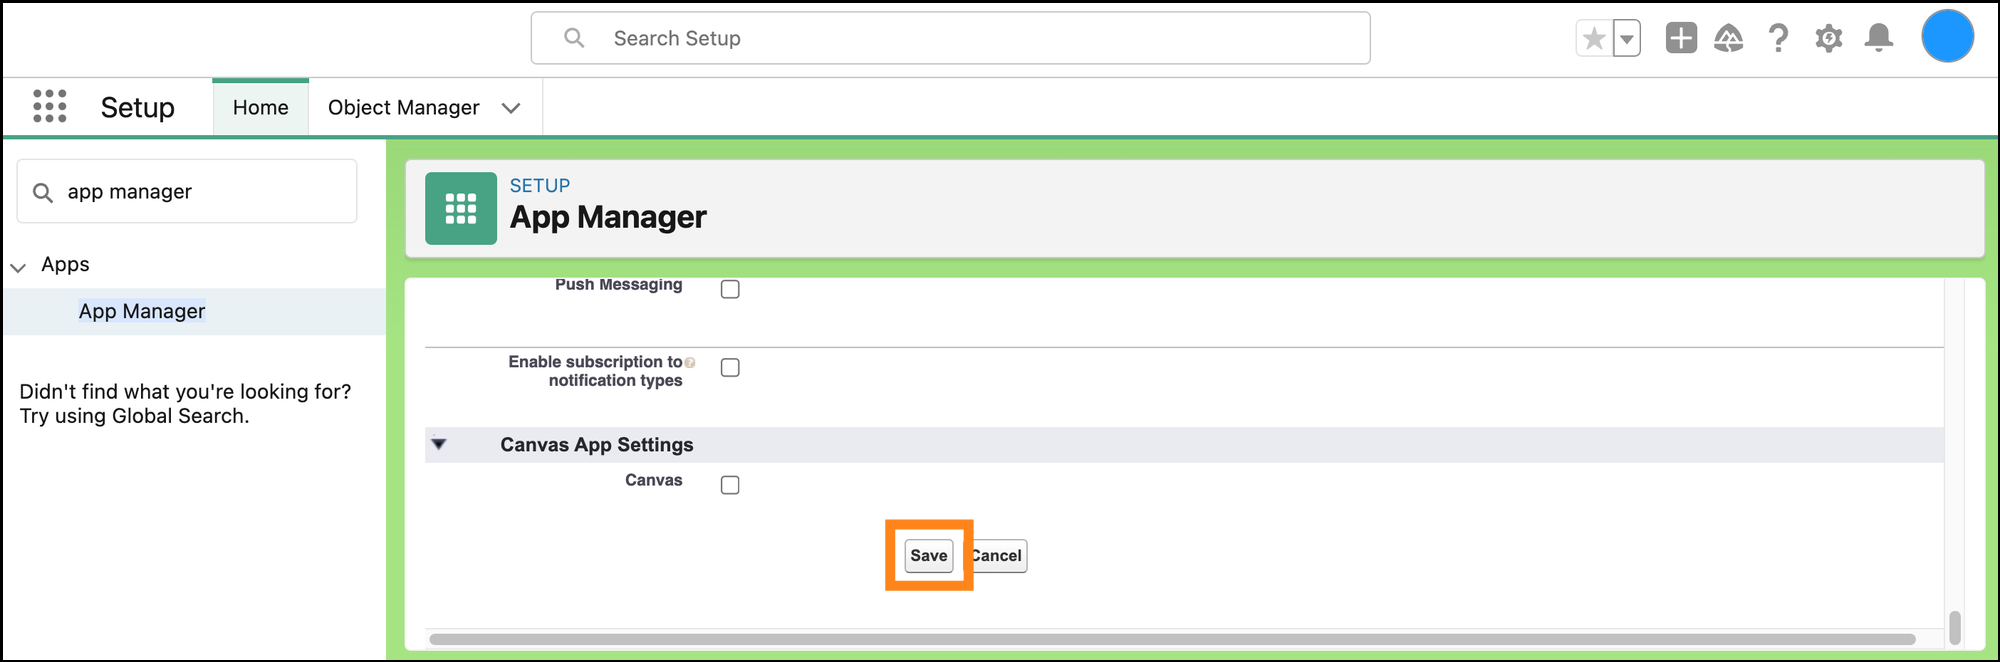
Then click "Save" at the bottom of the page.
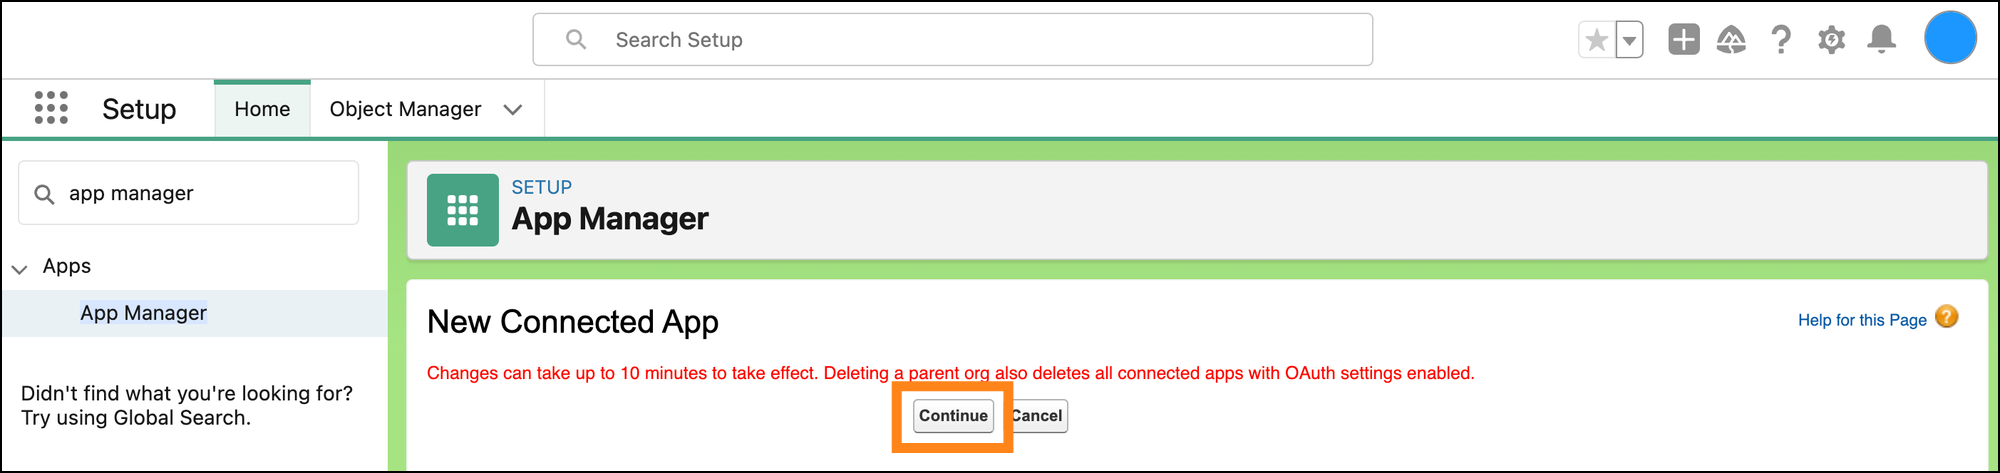
You will see the following message. Click "Continue".
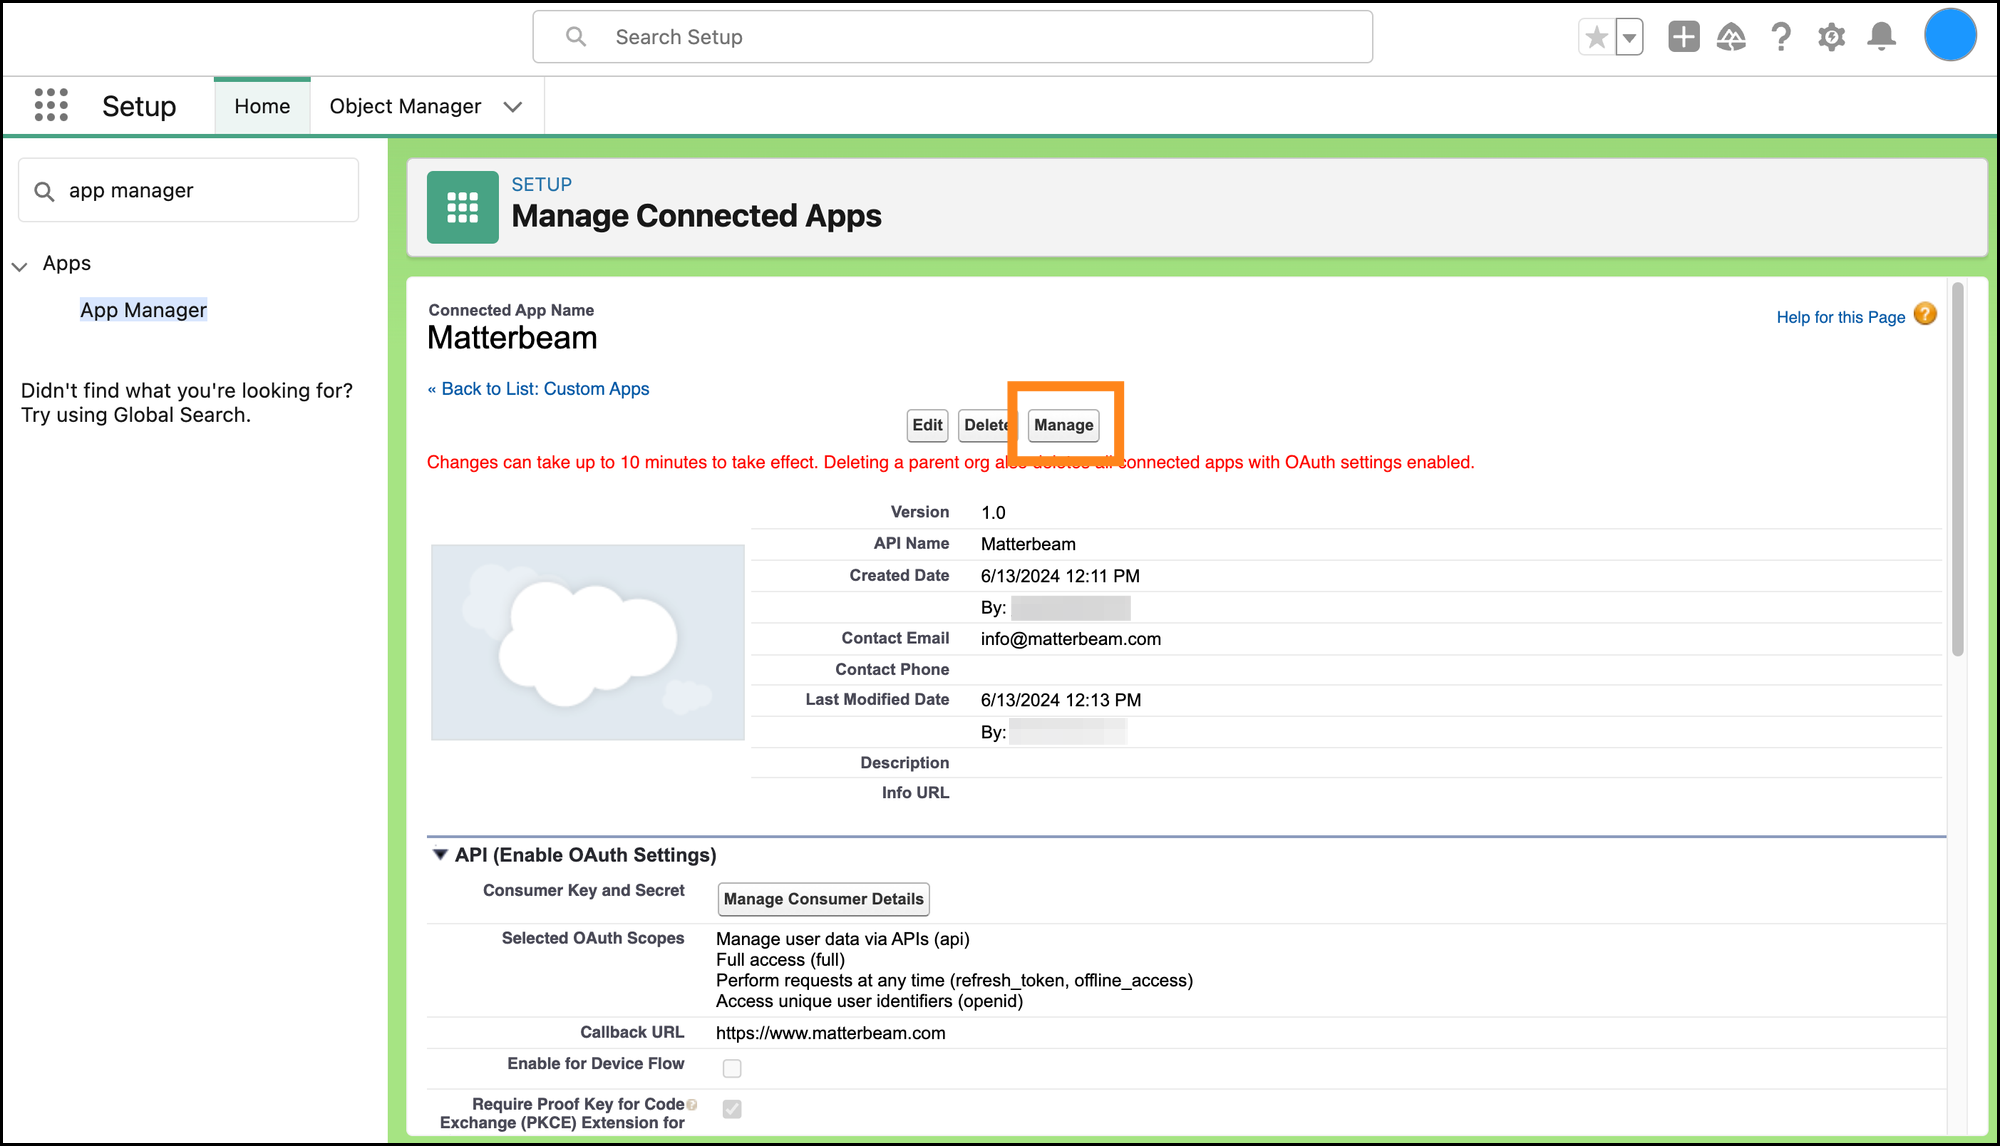
In the Connected App that was just created, click "Manage".
Scroll down and click “Manage Permission Sets”.

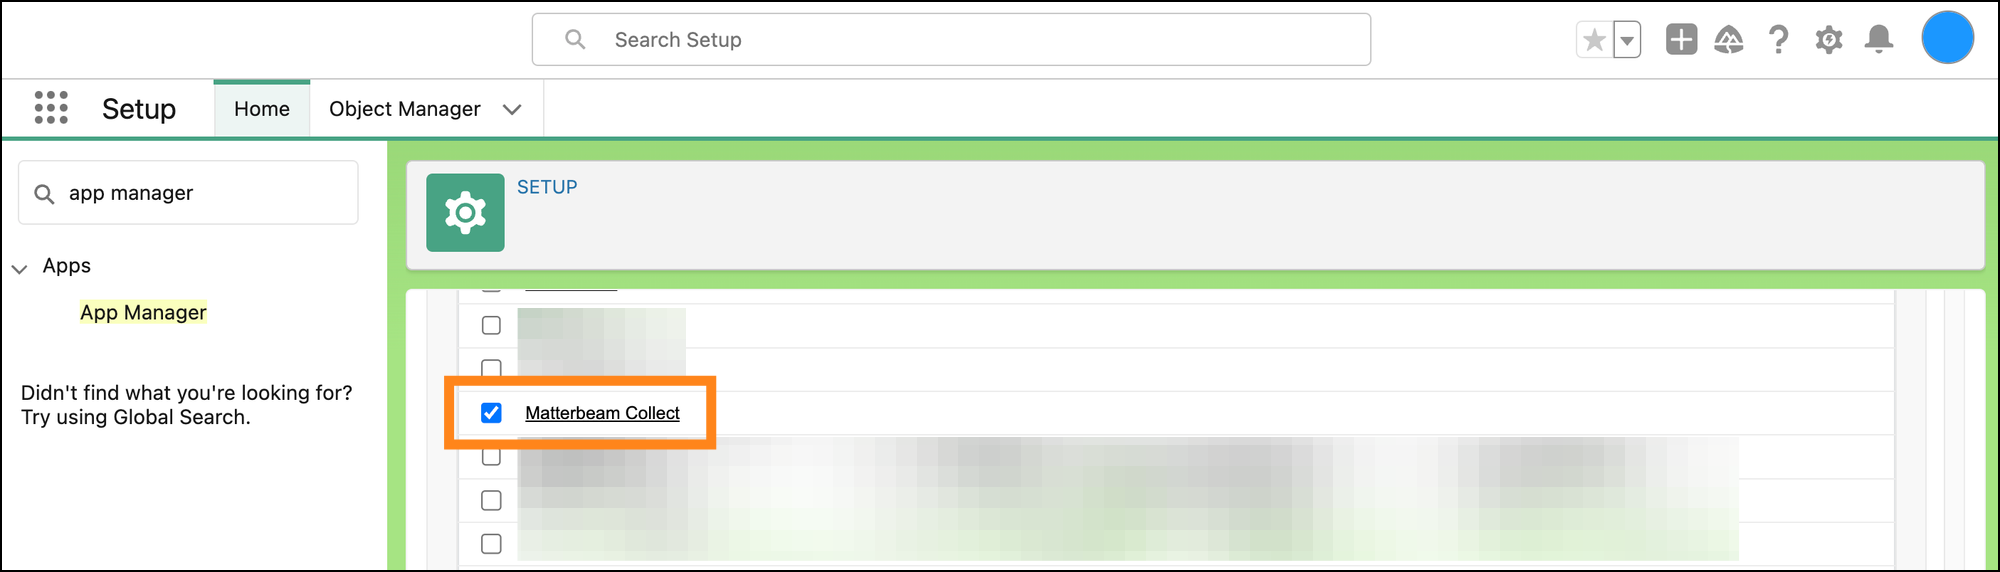
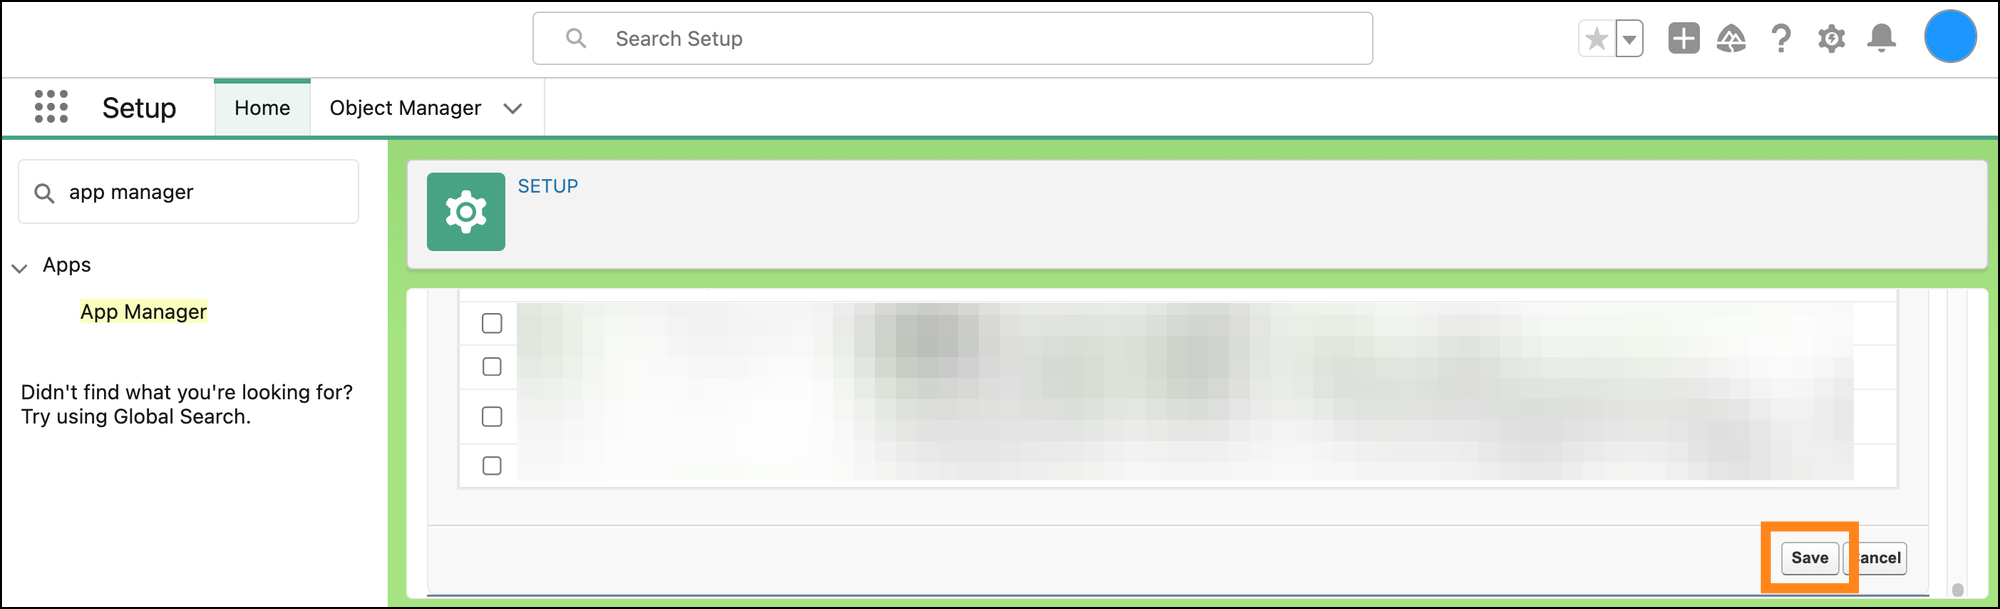
Check off the Permission Set you created, scroll down, and click "Save".
You will see the Permission Set has been added to your Connected App under "Permission Sets".

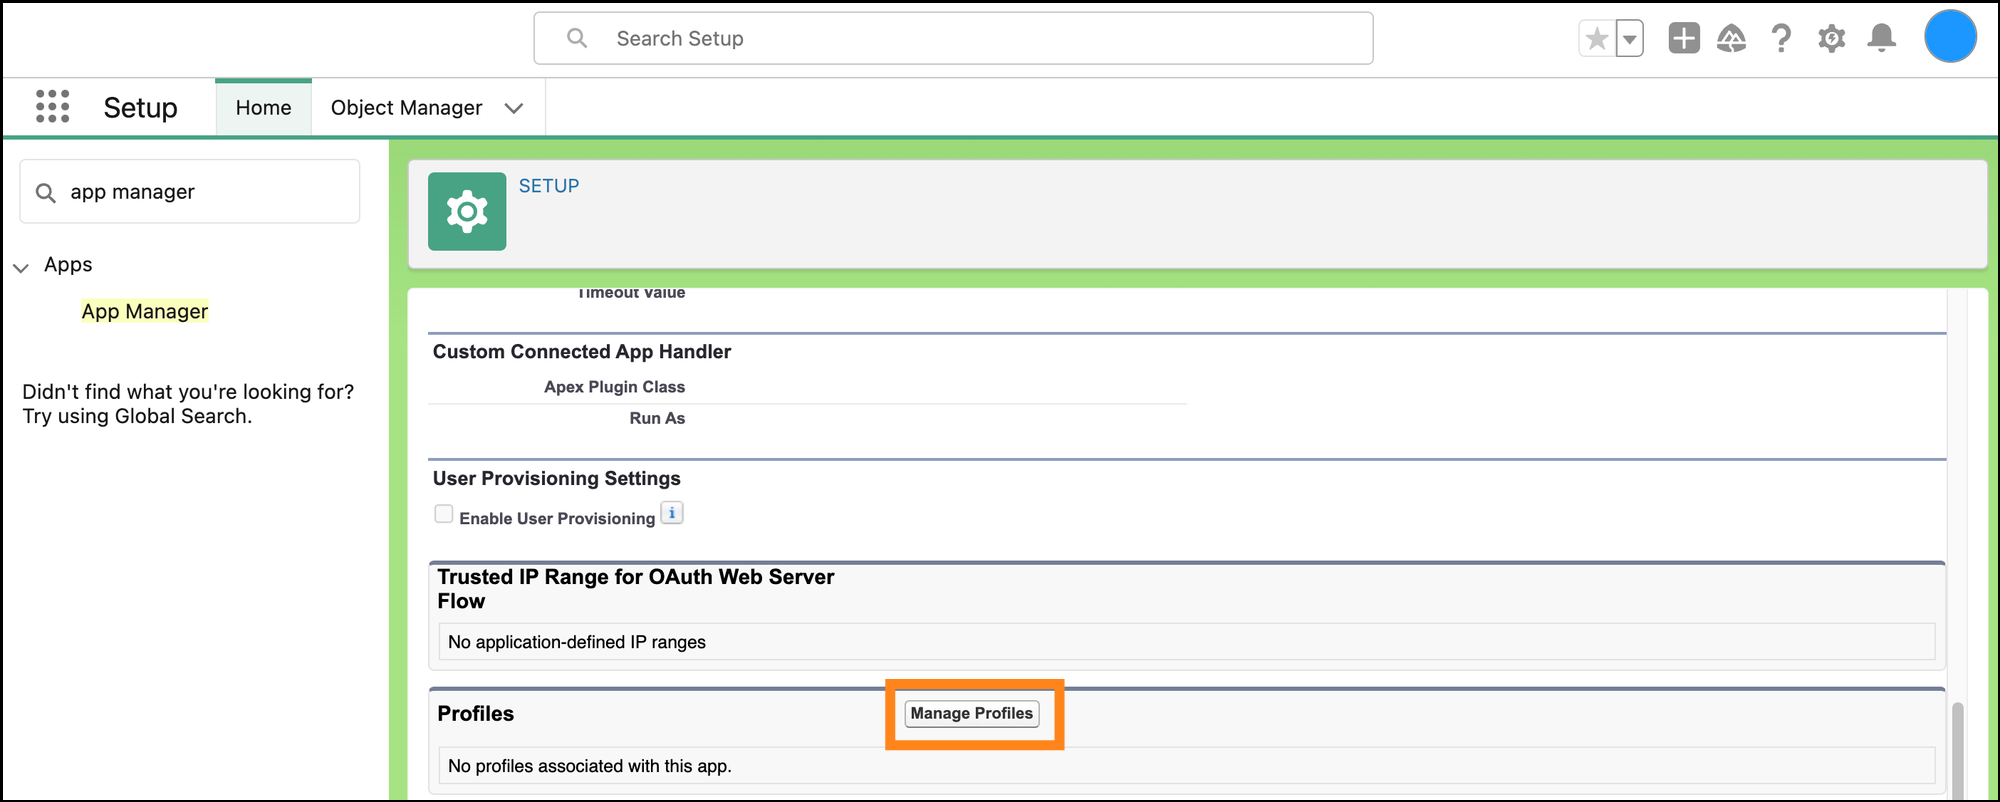
From the same Connected App page, click on "Manage Profiles".
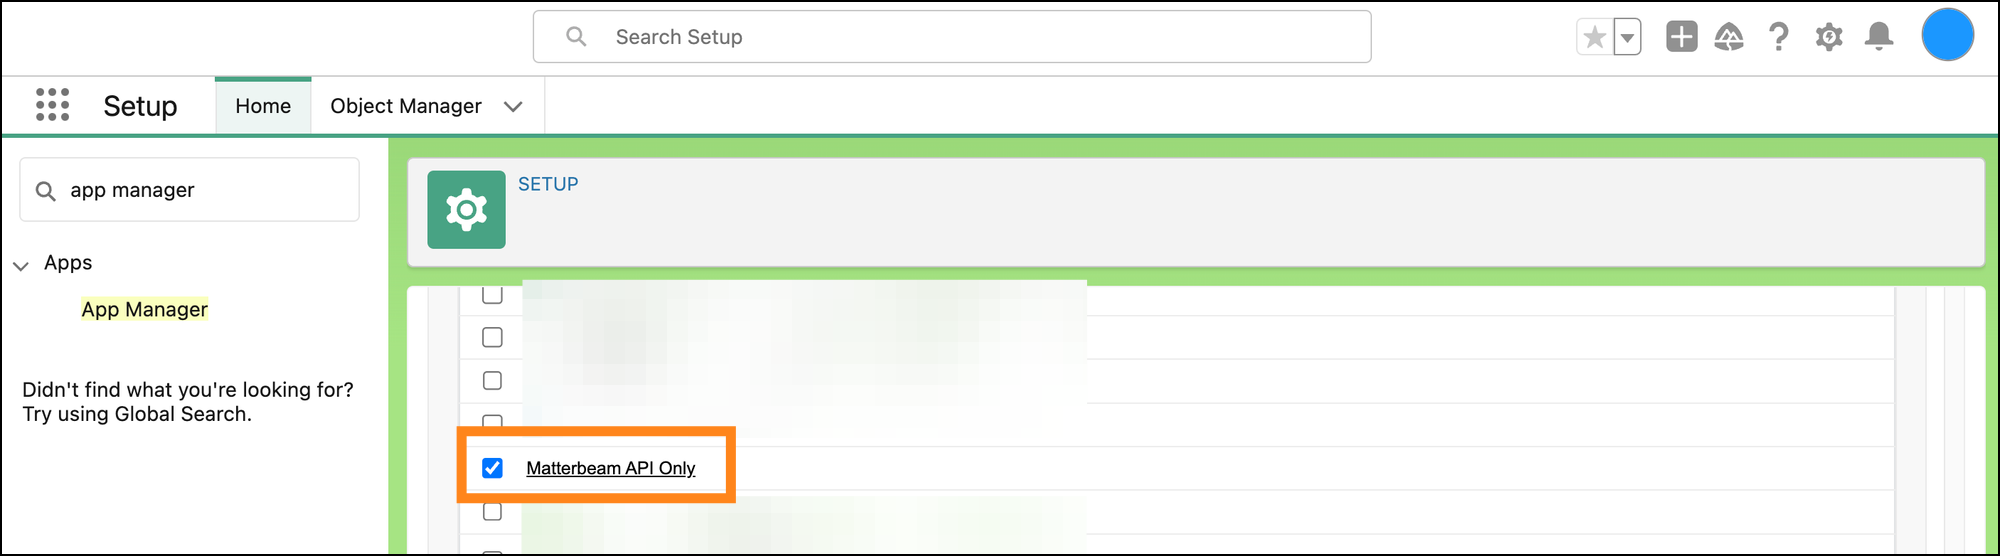
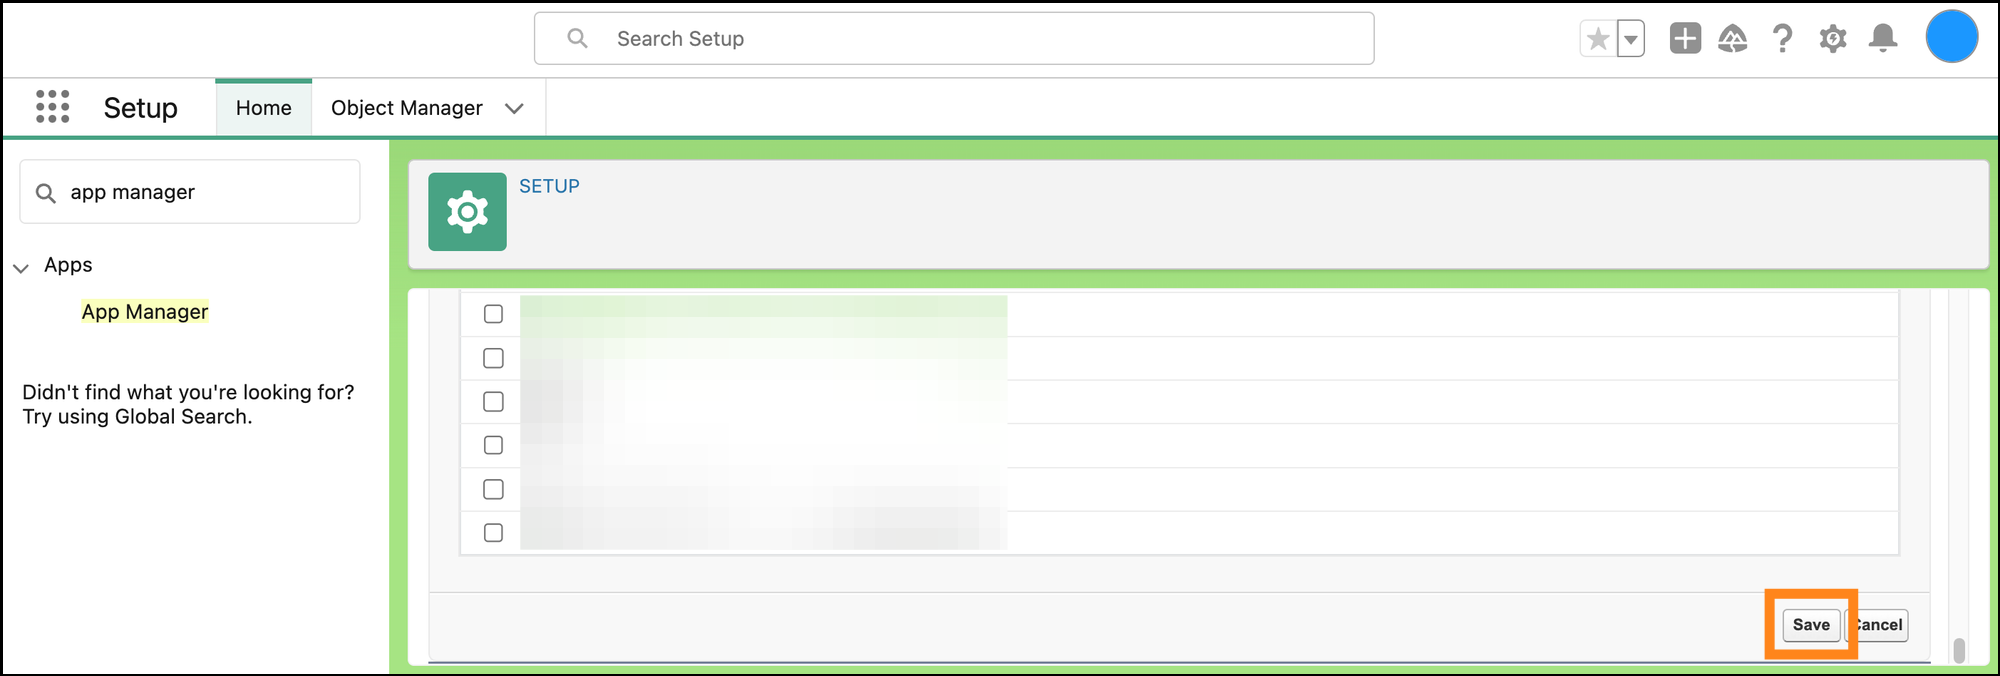
Check off the Matterbeam profile you created, scroll down, and click Save.
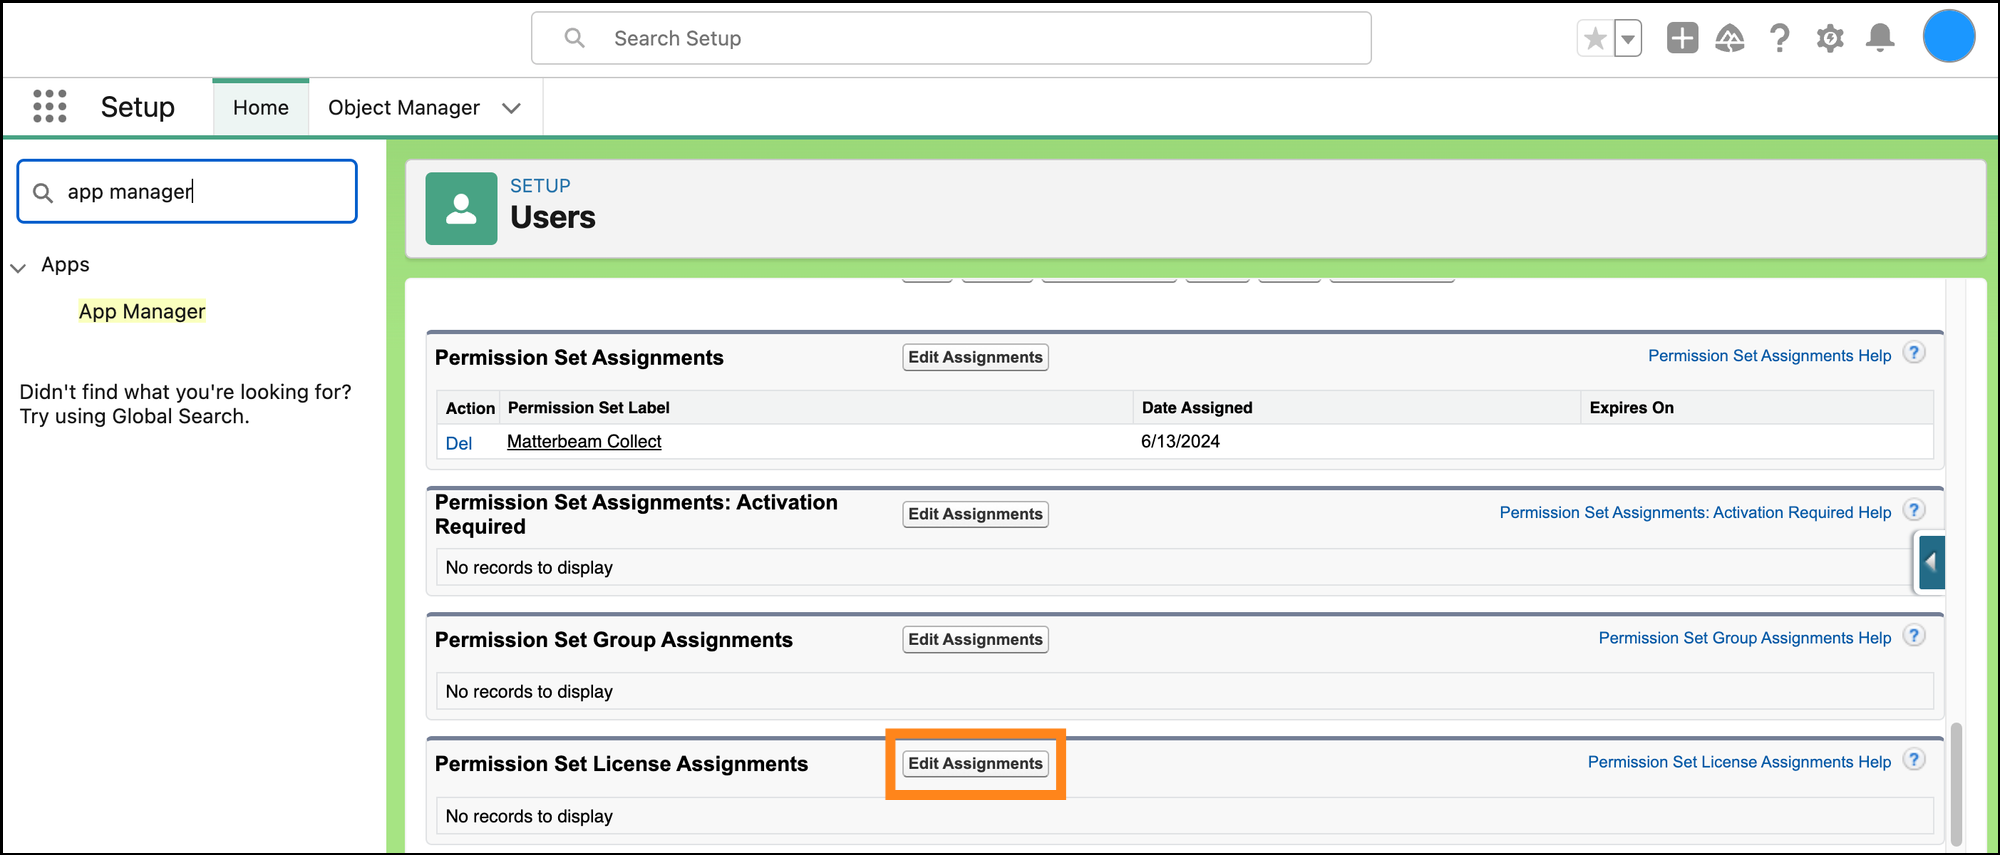
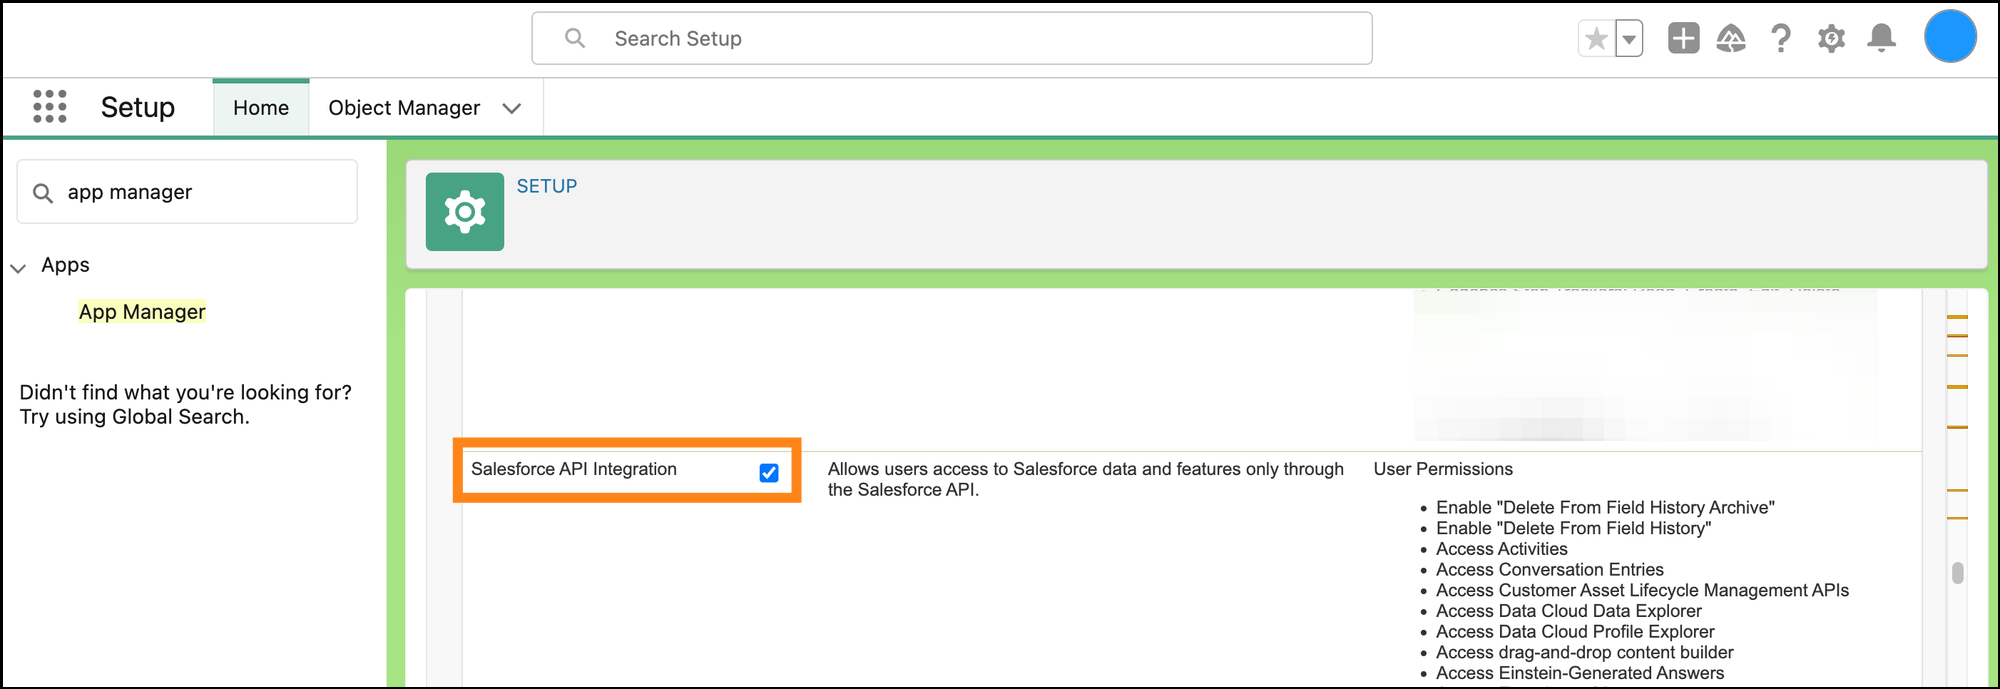
From the same Connected App page, click “Edit Assignments” under “Permission Set License Assignments”.
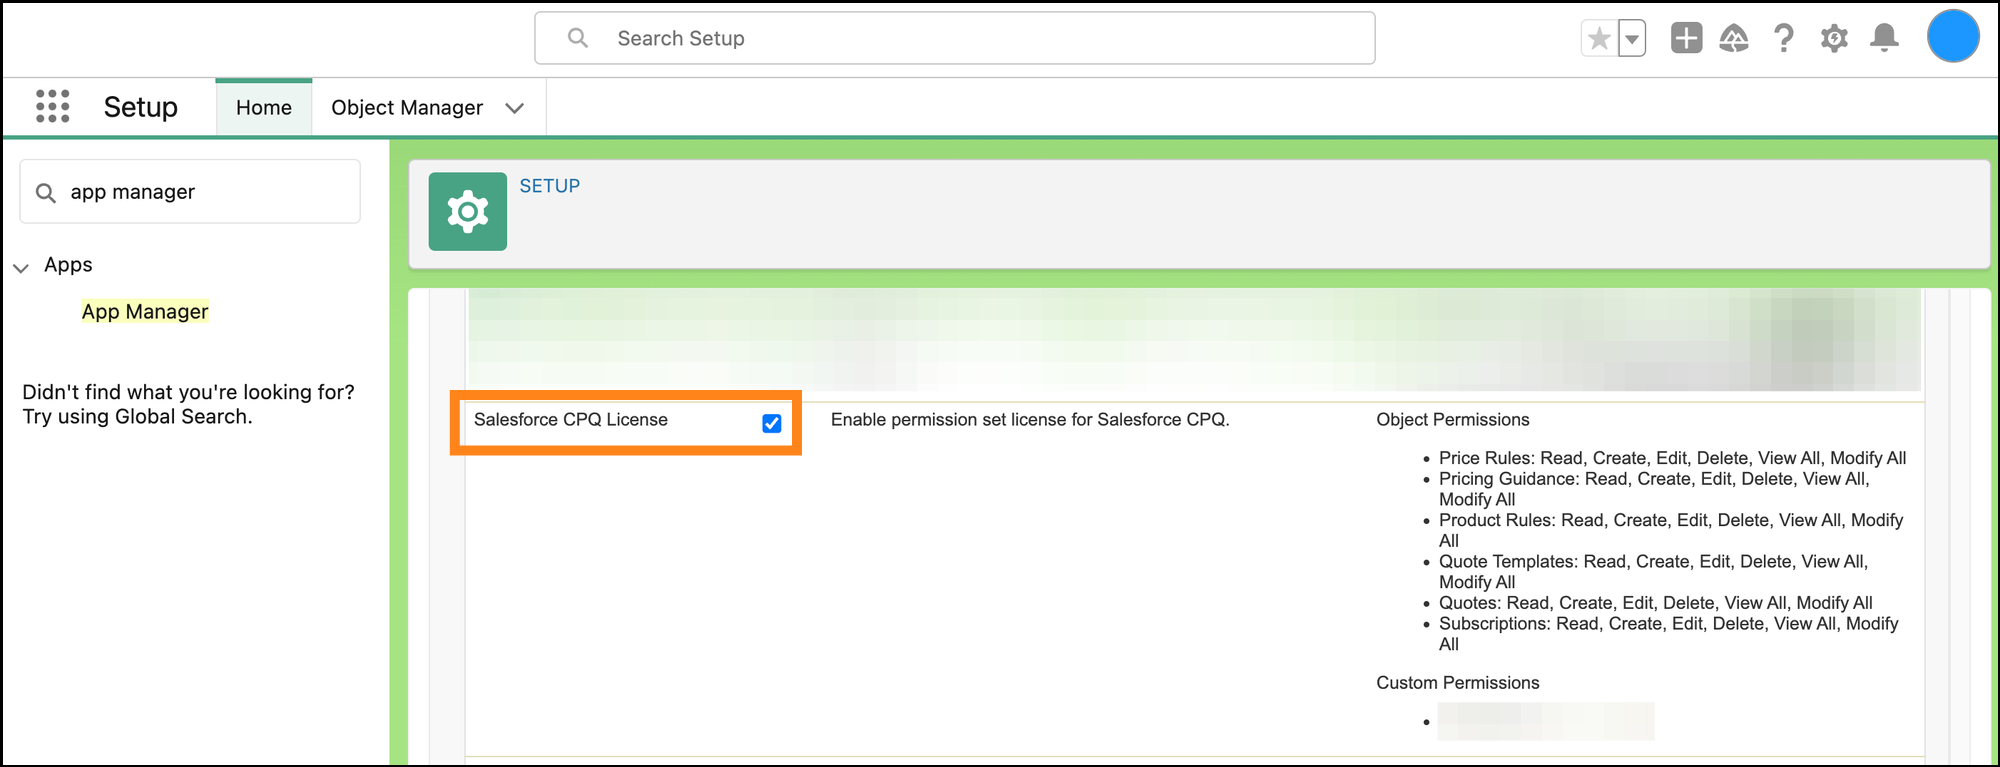
Check off “Salesforce API Integration” and “Salesforce CPQ License”.
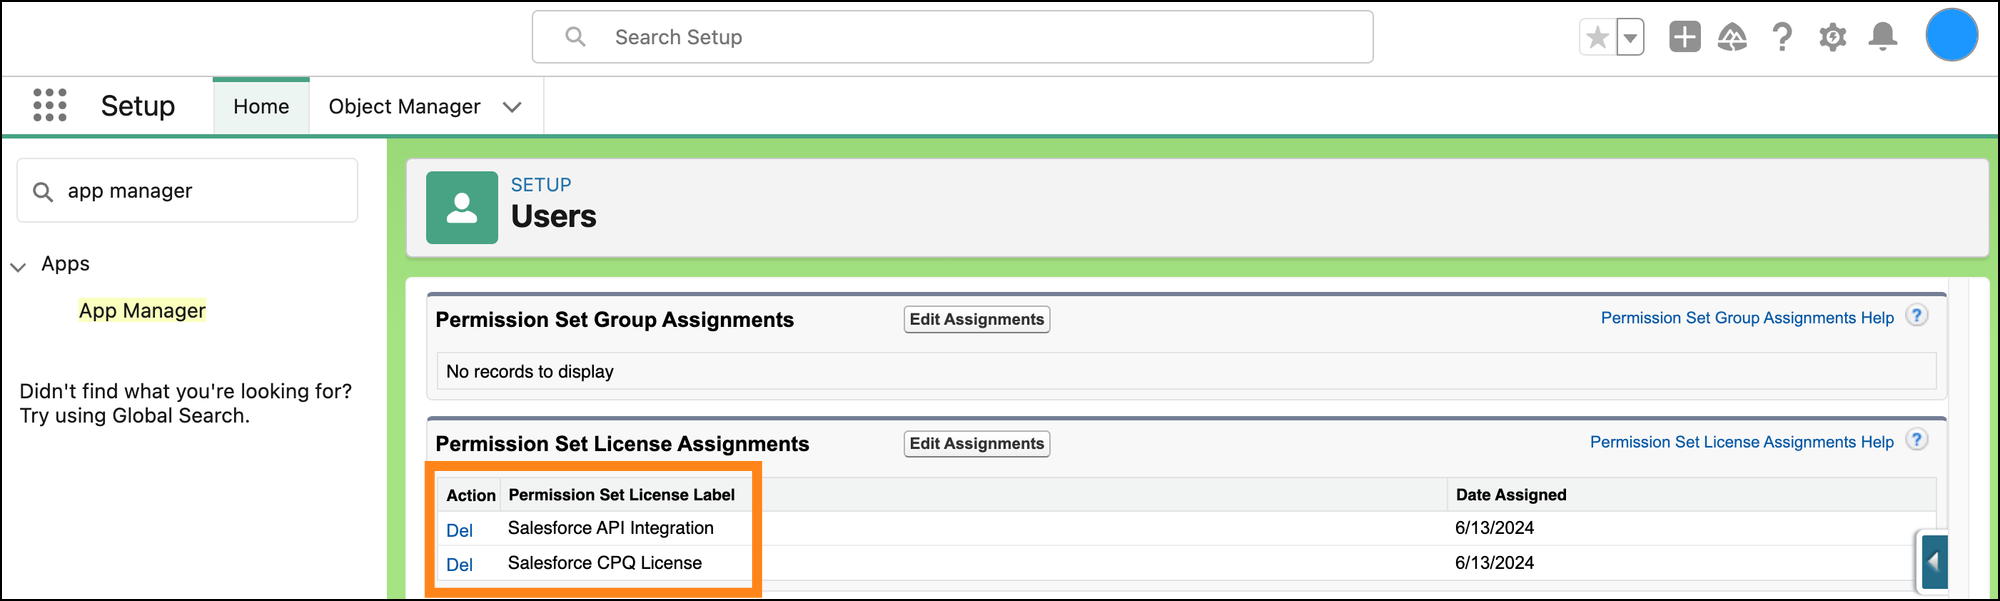
Click "Save" and you should see both now listed under "Permission Set License Assignments".
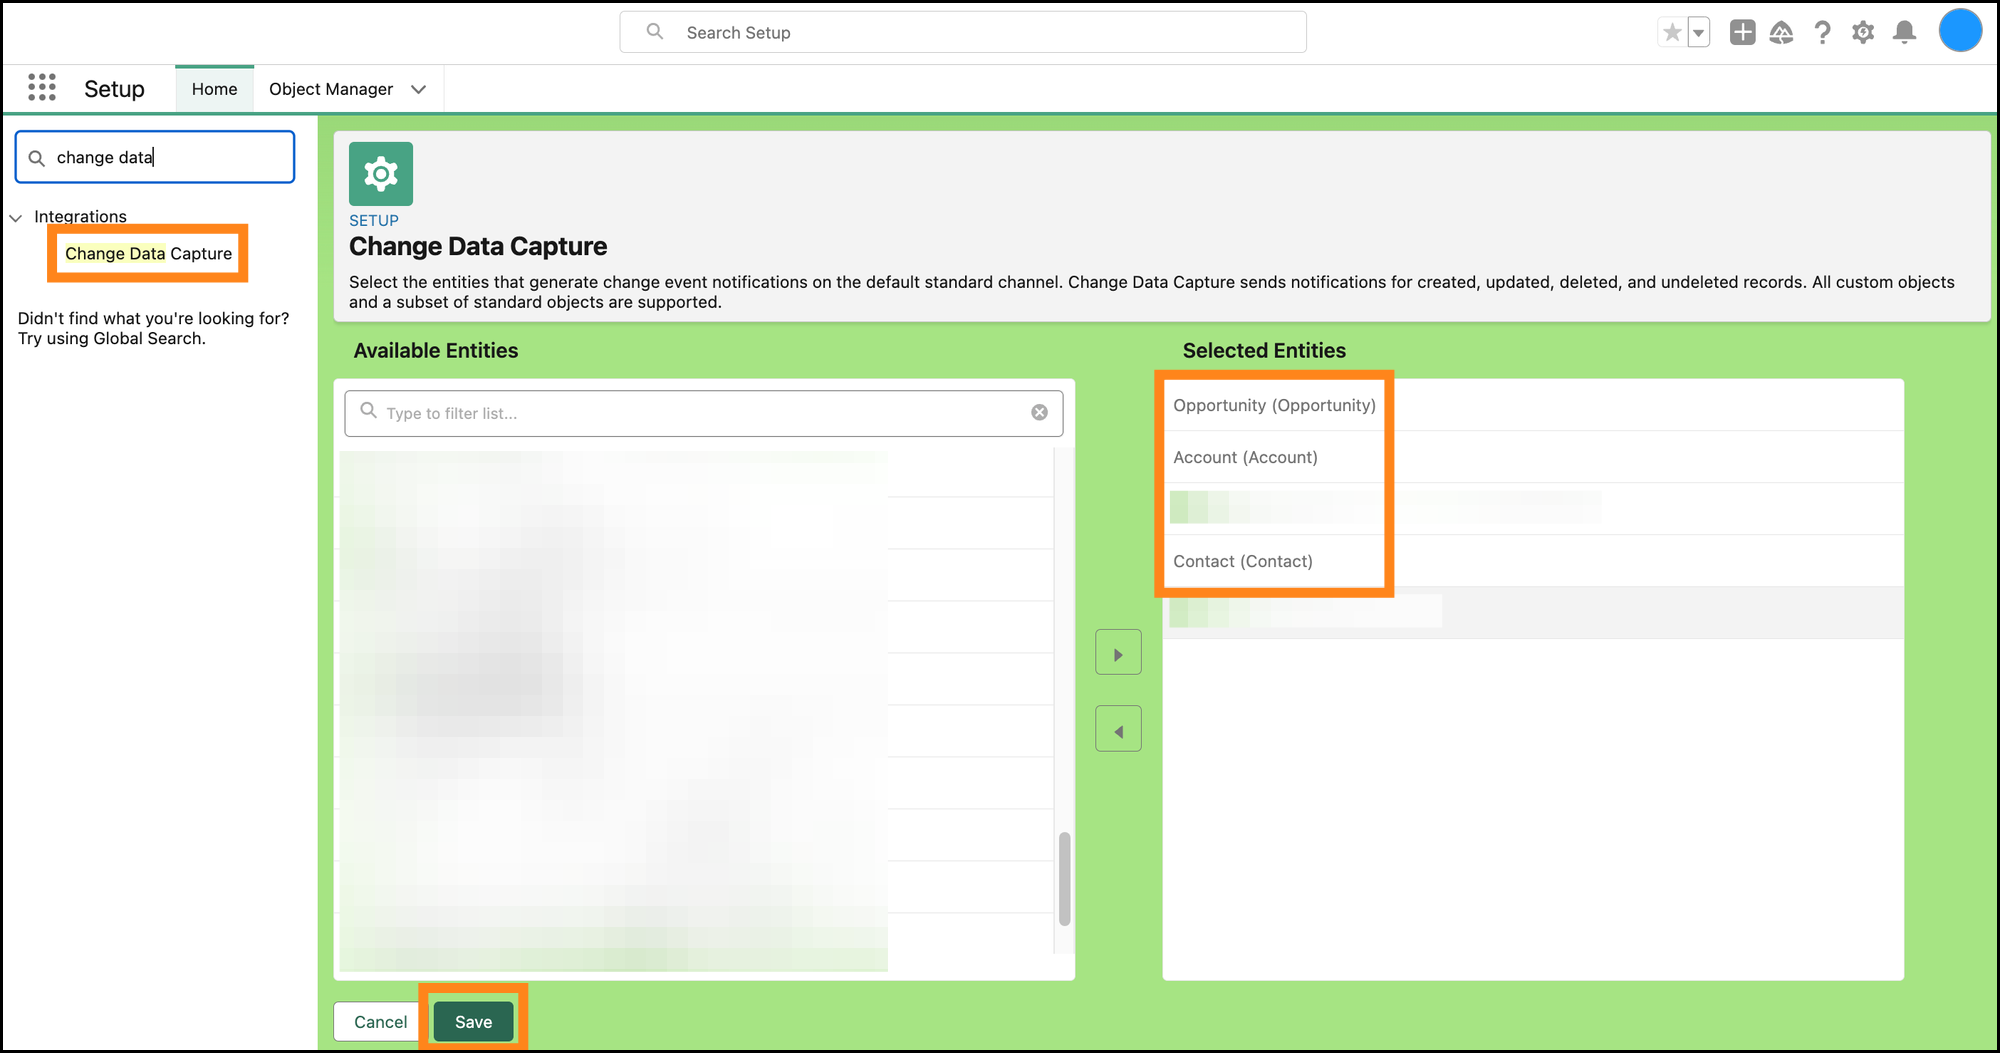
Go to setup and search for “change data”. Click “Change Data Capture” under "Integrations". Add the objects that you want to enable to the "Selected Entities" box and click "Save".
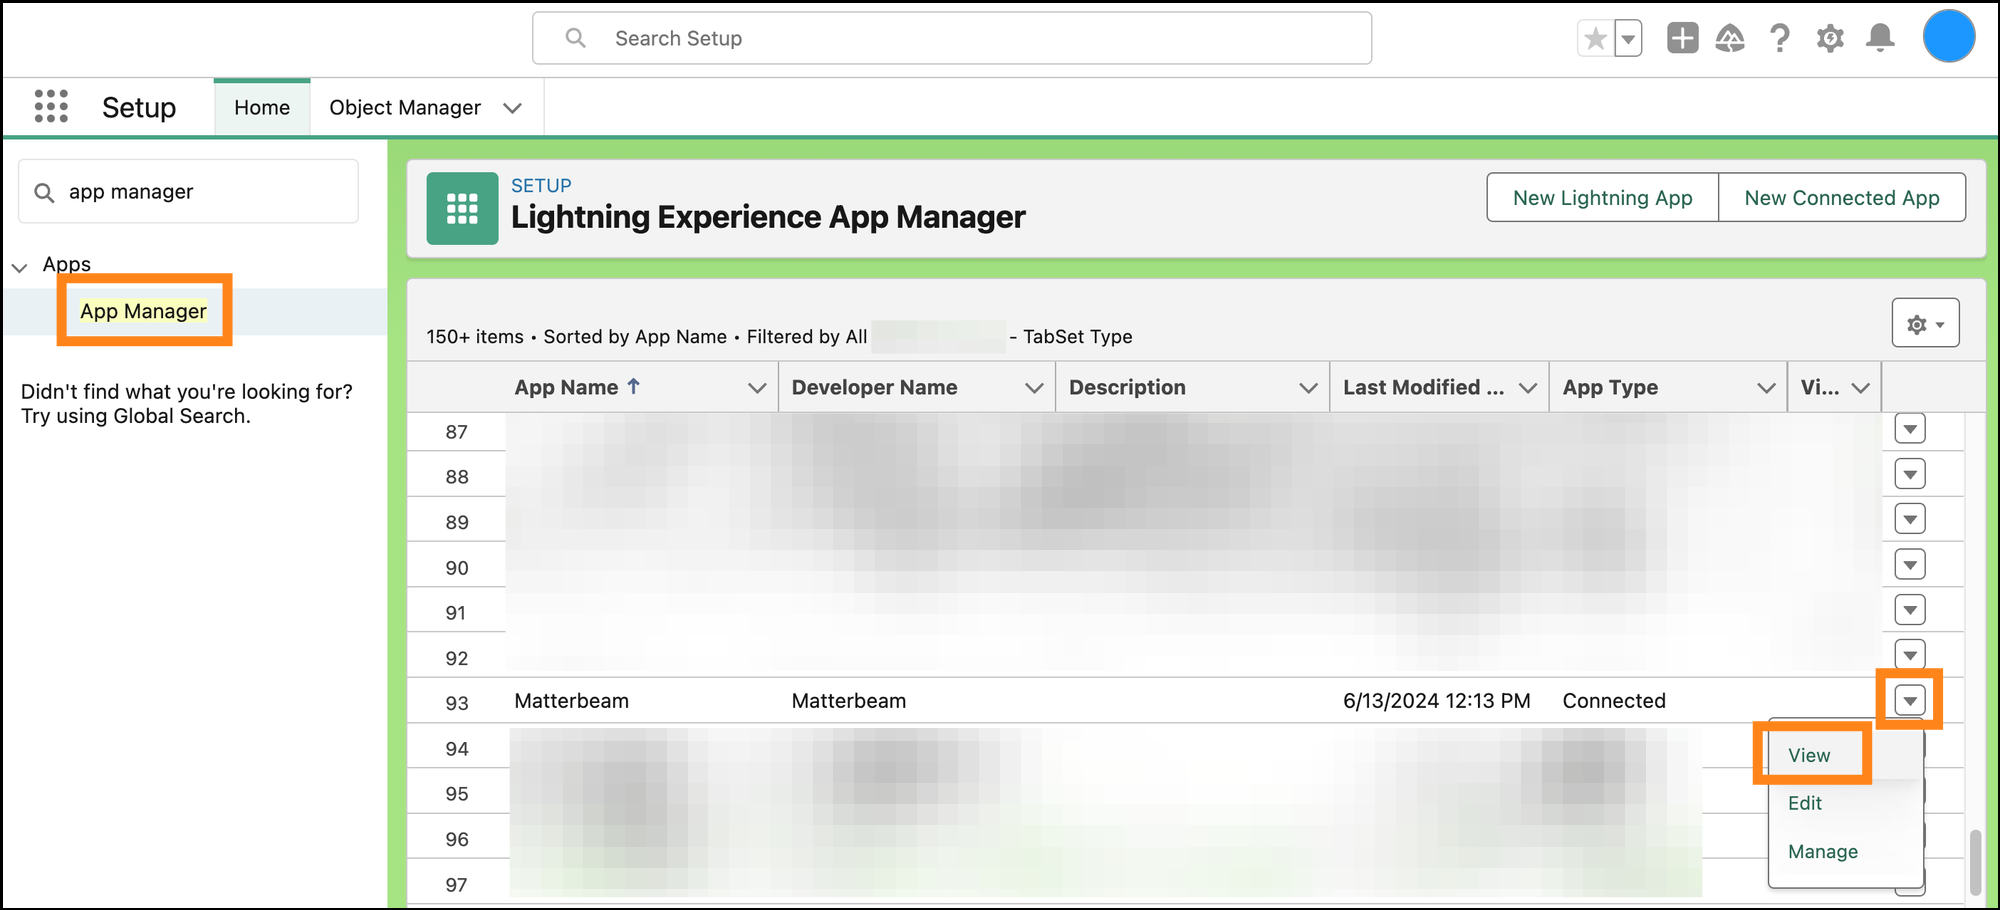
Go to "Setup" and search for "app manager" and click "App Manager". Click the arrow drop down to the right of the Matterbeam connected app that you created earlier, then click "View".
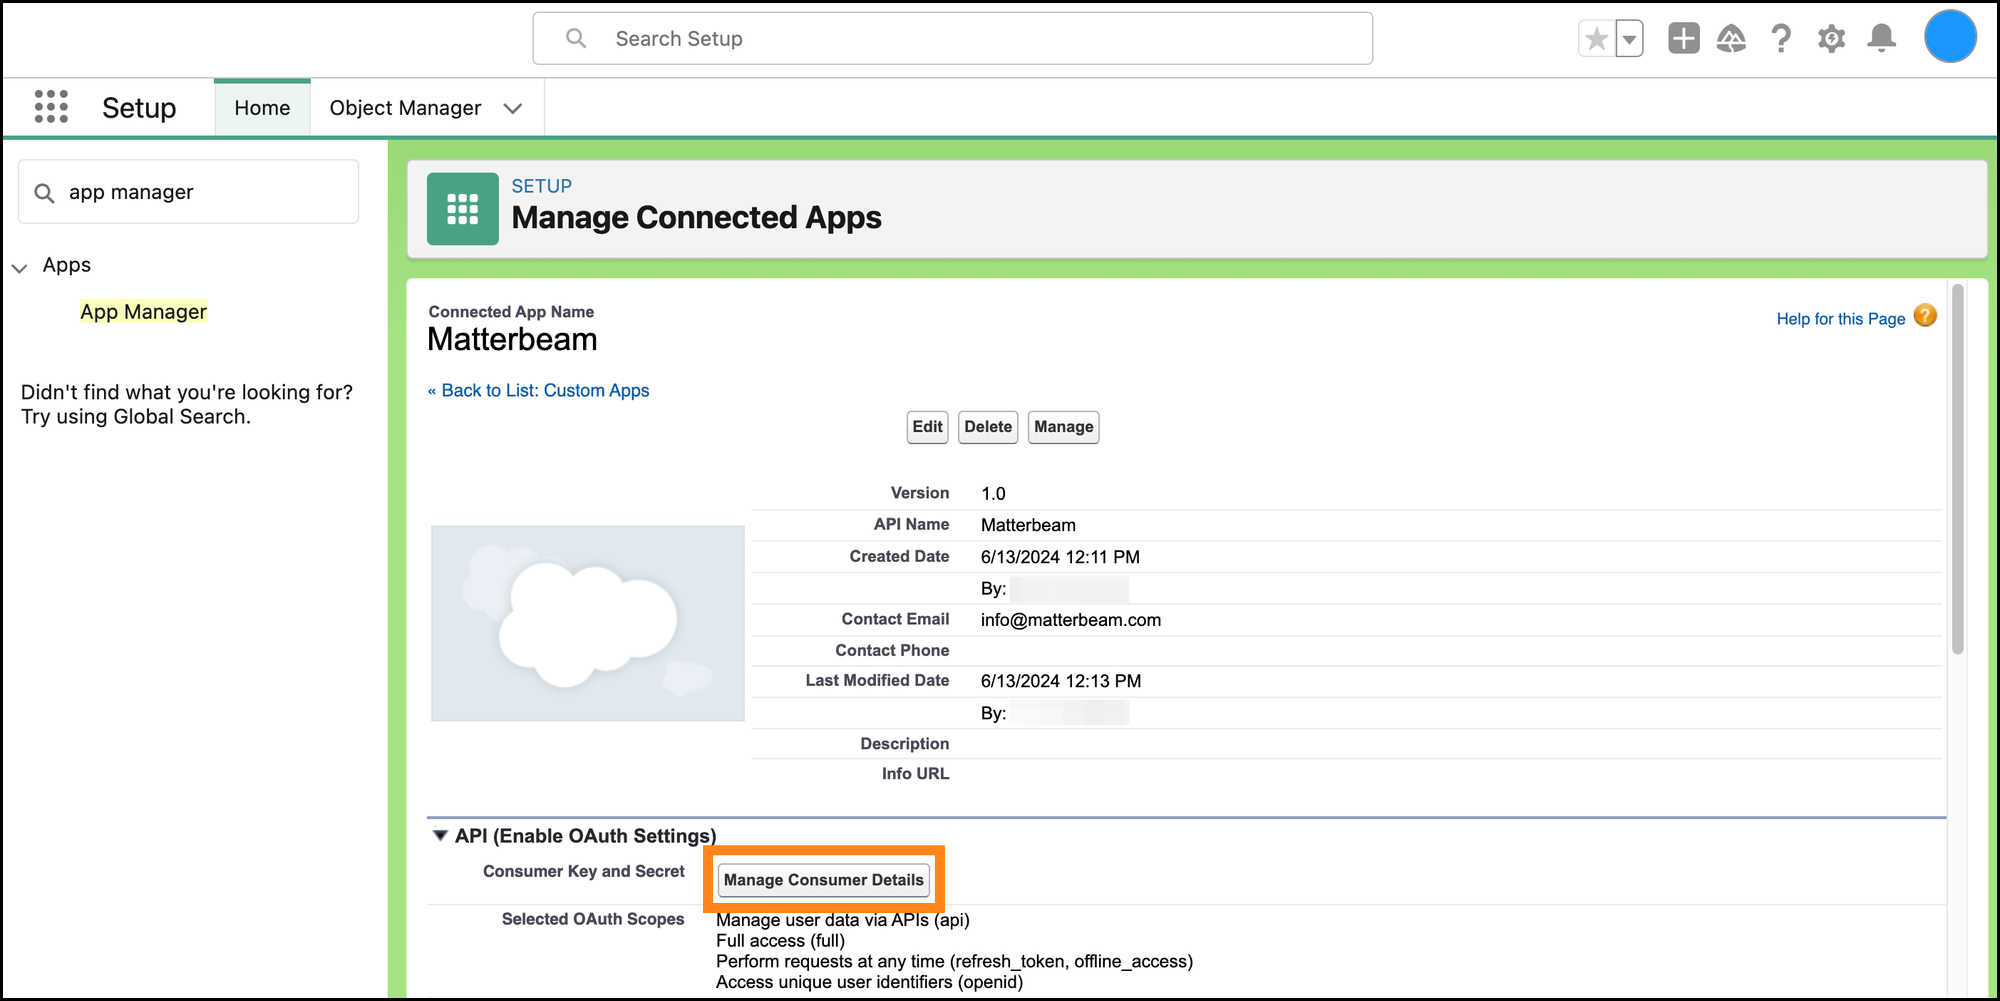
Click "Manage Consumer Details".
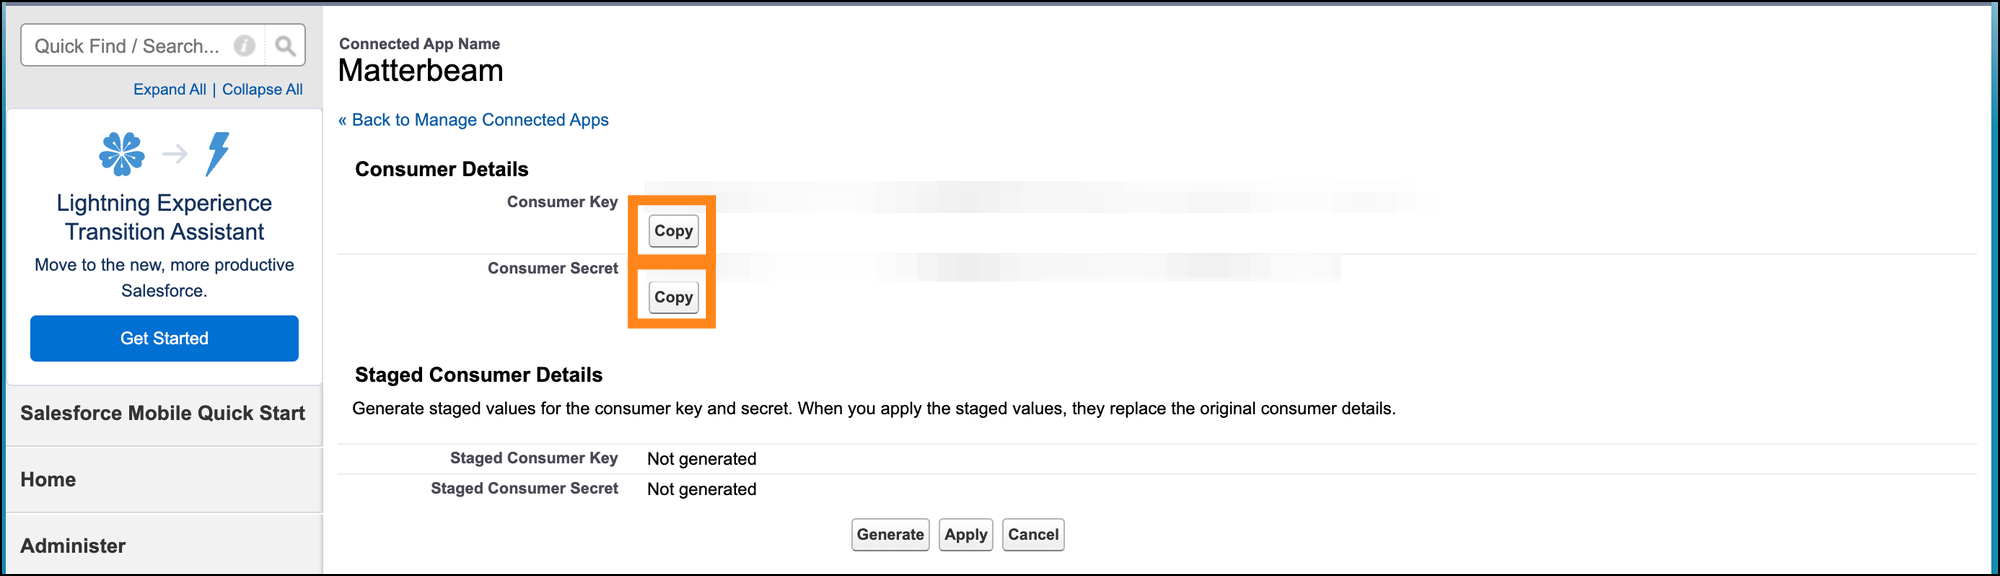
Salesforce may ask you to verify your identify. After verification, you should see the page where you can copy the "Consumer Key" & the "Consumer Secret".
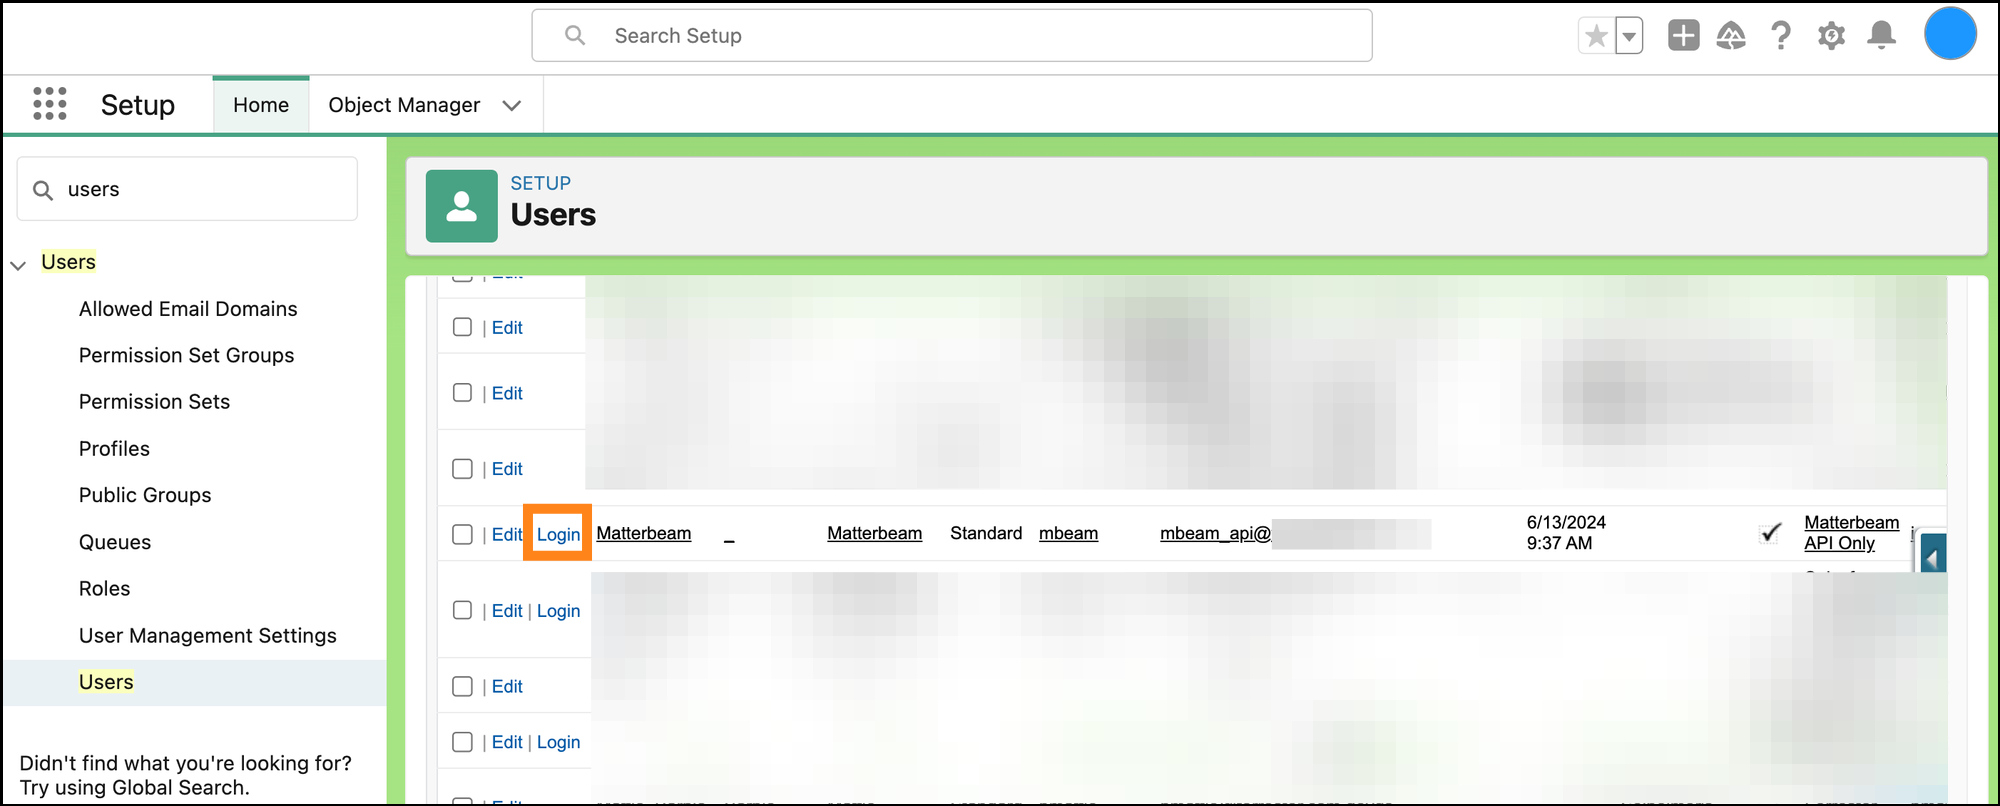
If you do not have your Security Token written down, Salesforce will require you to reset it. To reset, search for "users", clicks "Users", find your Matterbeam user in the list, and click “Login” to login as that user.
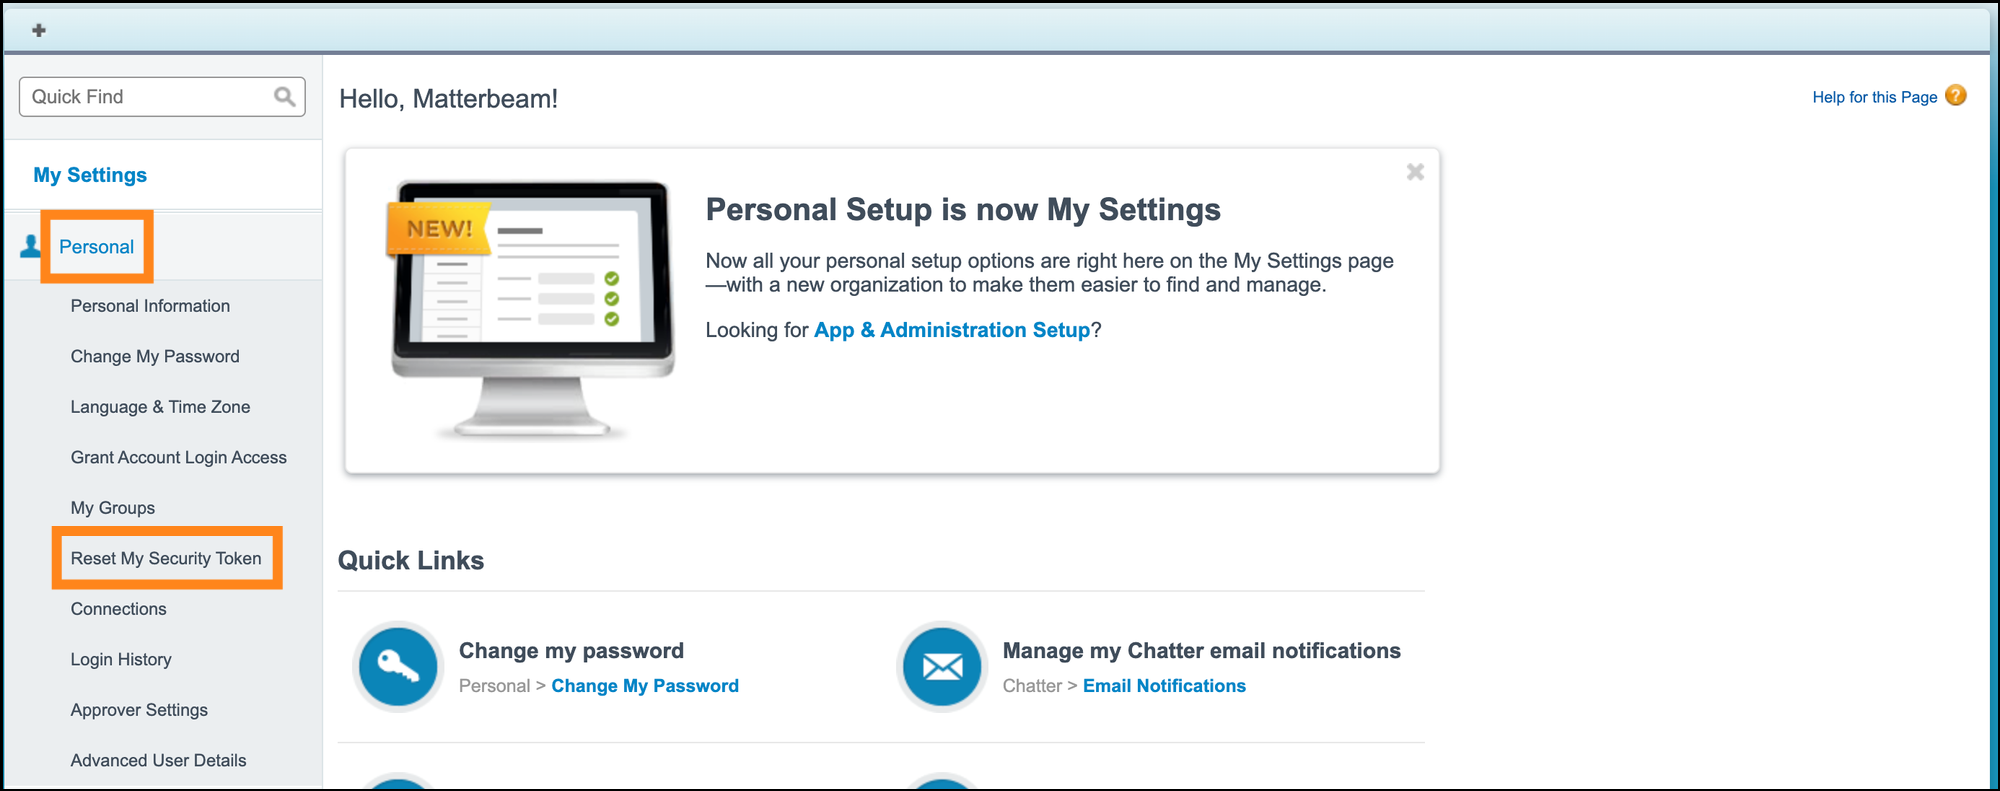
Click the drop down next to the user’s name in the top right, in our example the user's name is "Matterbeam". Click "My Settings".

In the left panel, click "Personal", then click "Reset My Security Token".
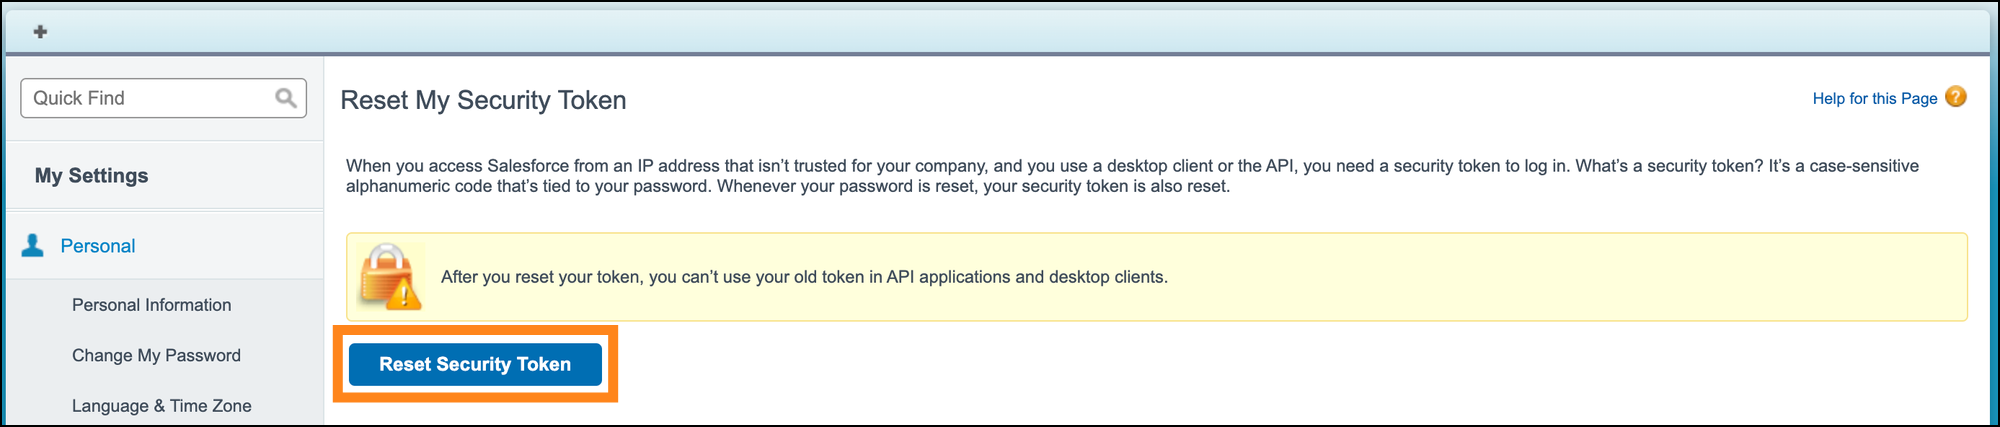
It will ask you again, click the "Reset Security Token" button.
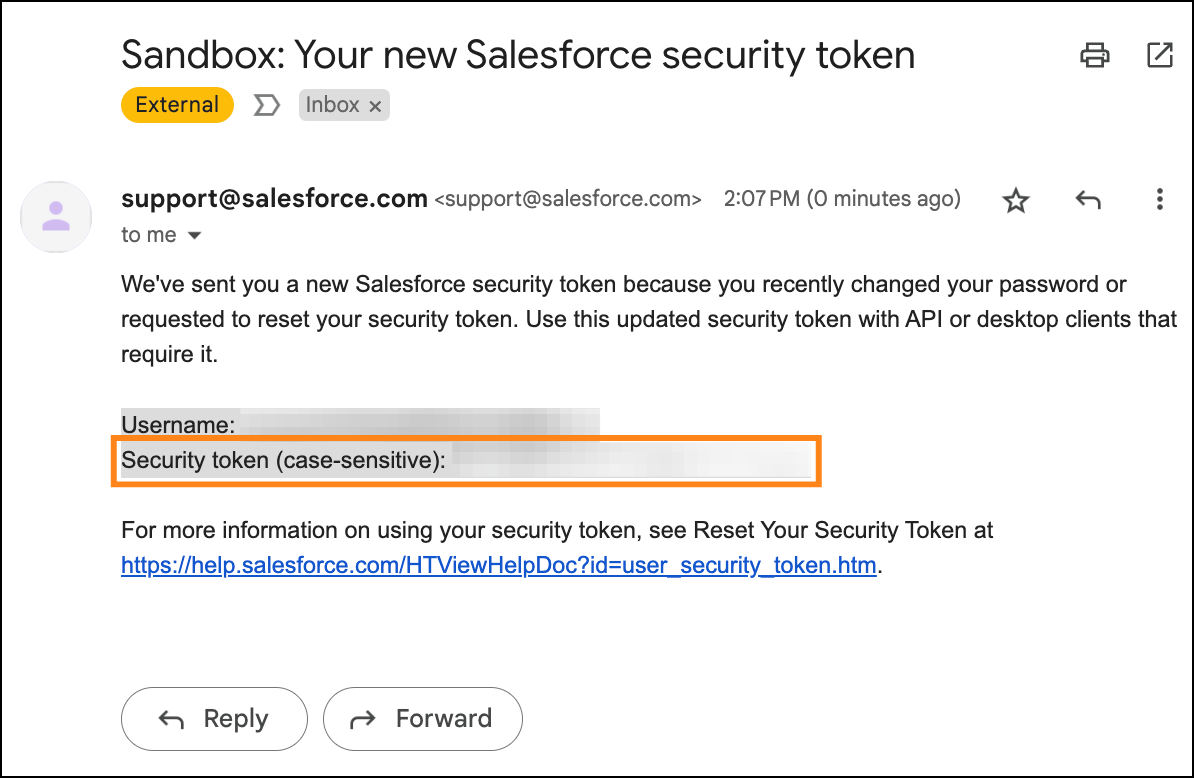
You should see this confirmation page. Retrieve the Security Token from your email.

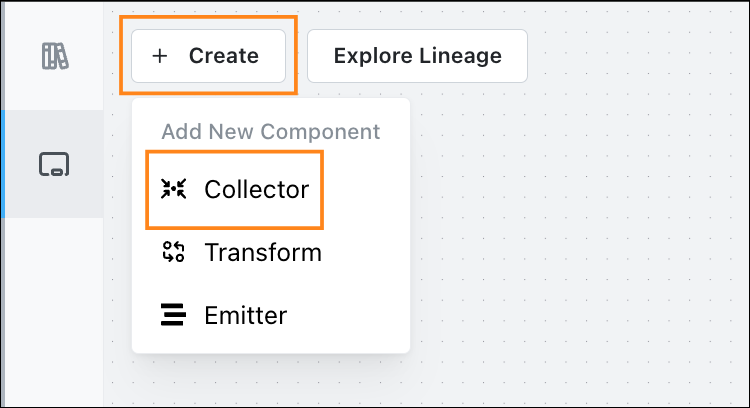
Login to your Matterbeam account. On the top right, click "Create", then "Collector".
Click "Salesforce".
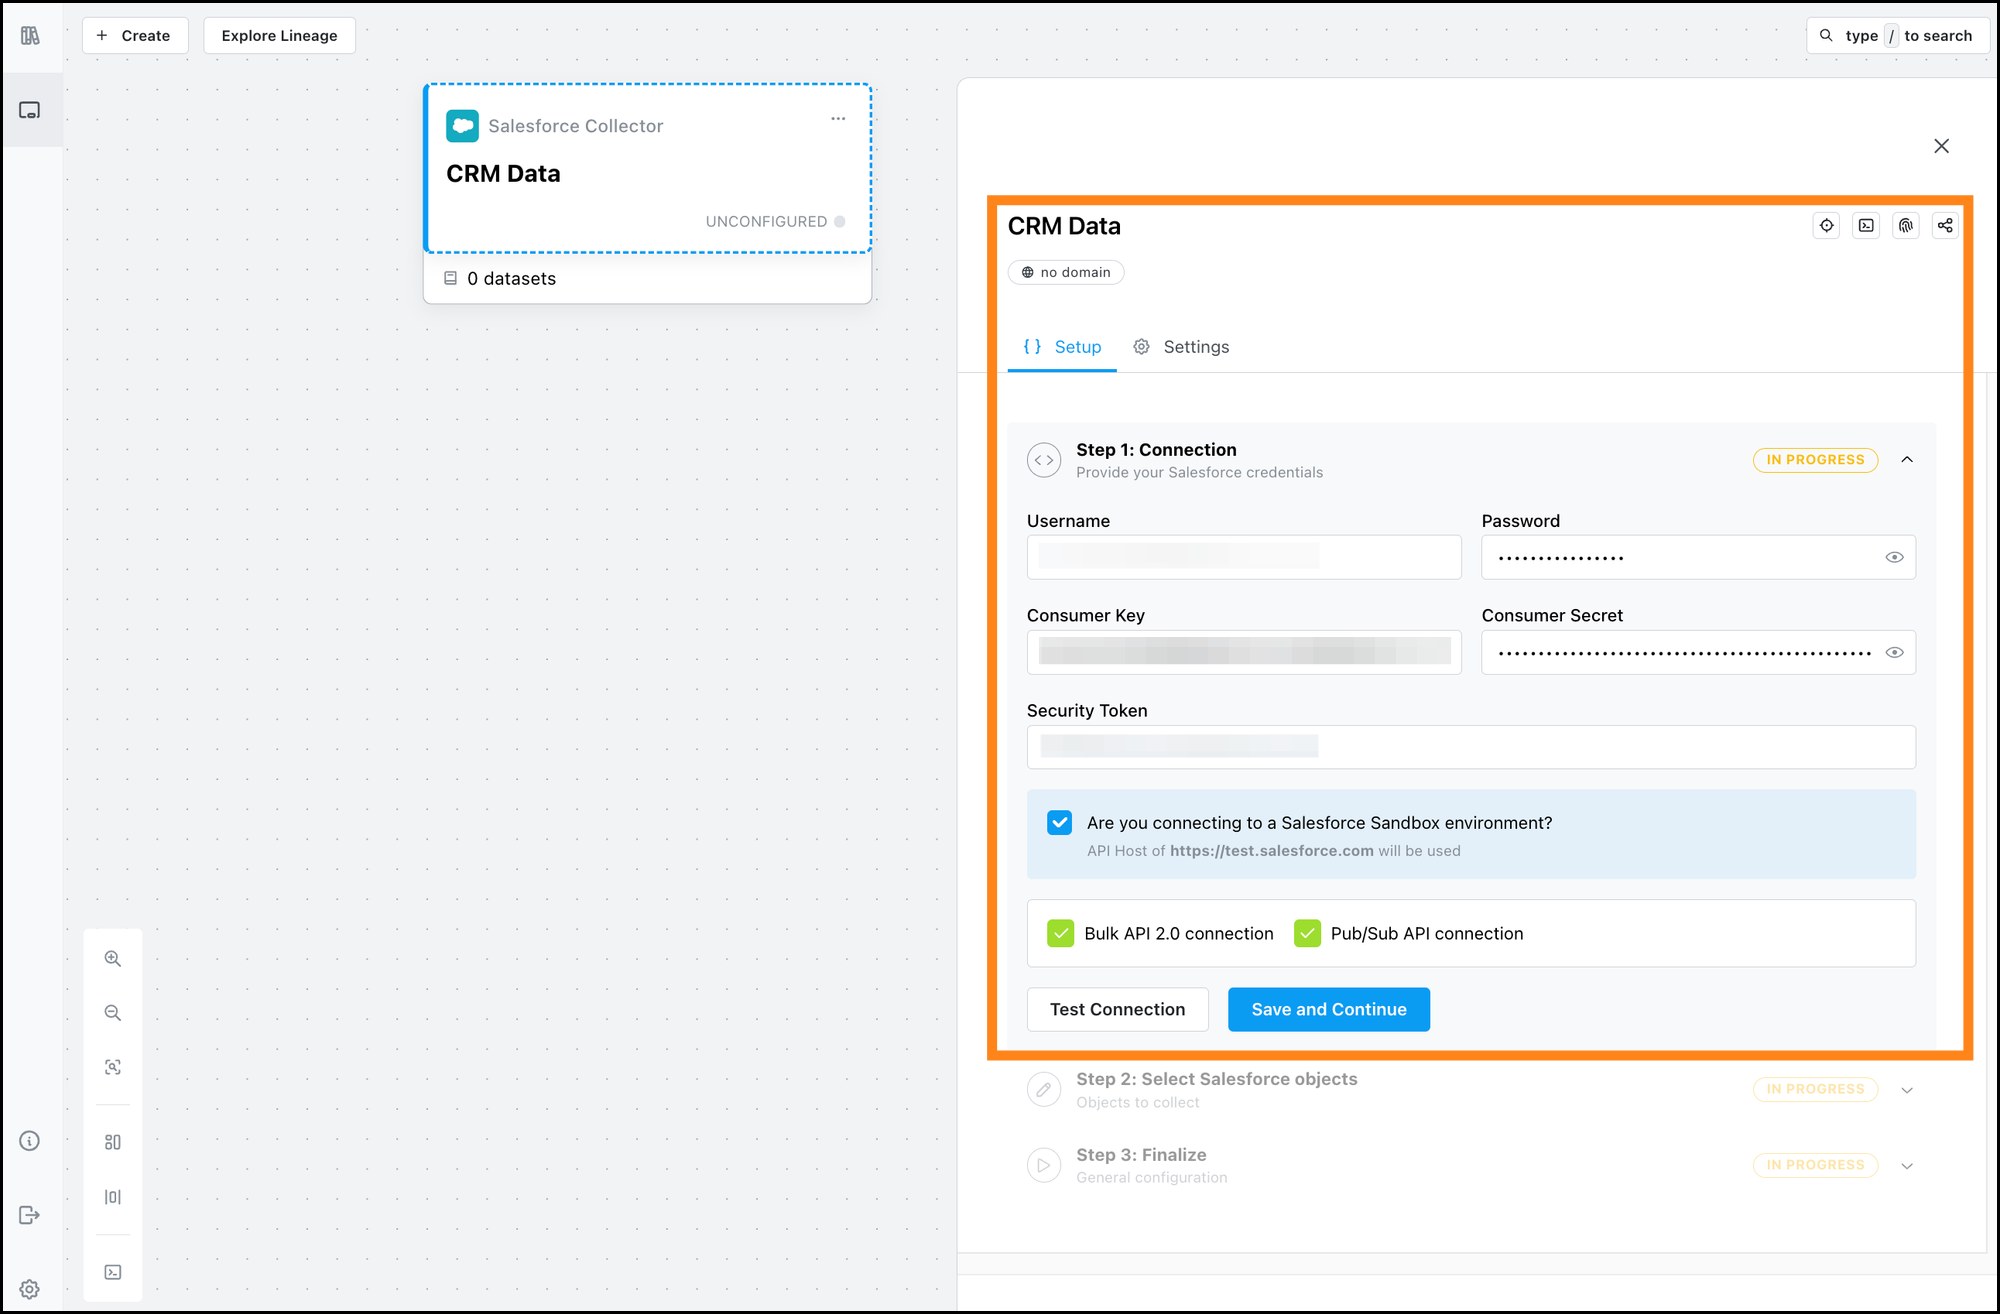
Give your Salesforce Collector a name. Then fill in the Username, Password, Consumer Key, Consumer Secret, and Security Token. If you are connecting to a Salesforce Sandbox environment, make sure the sandbox checkbox is checked. Click "Test Connection". A successful test will look like the below. Then click “Save and Continue”.
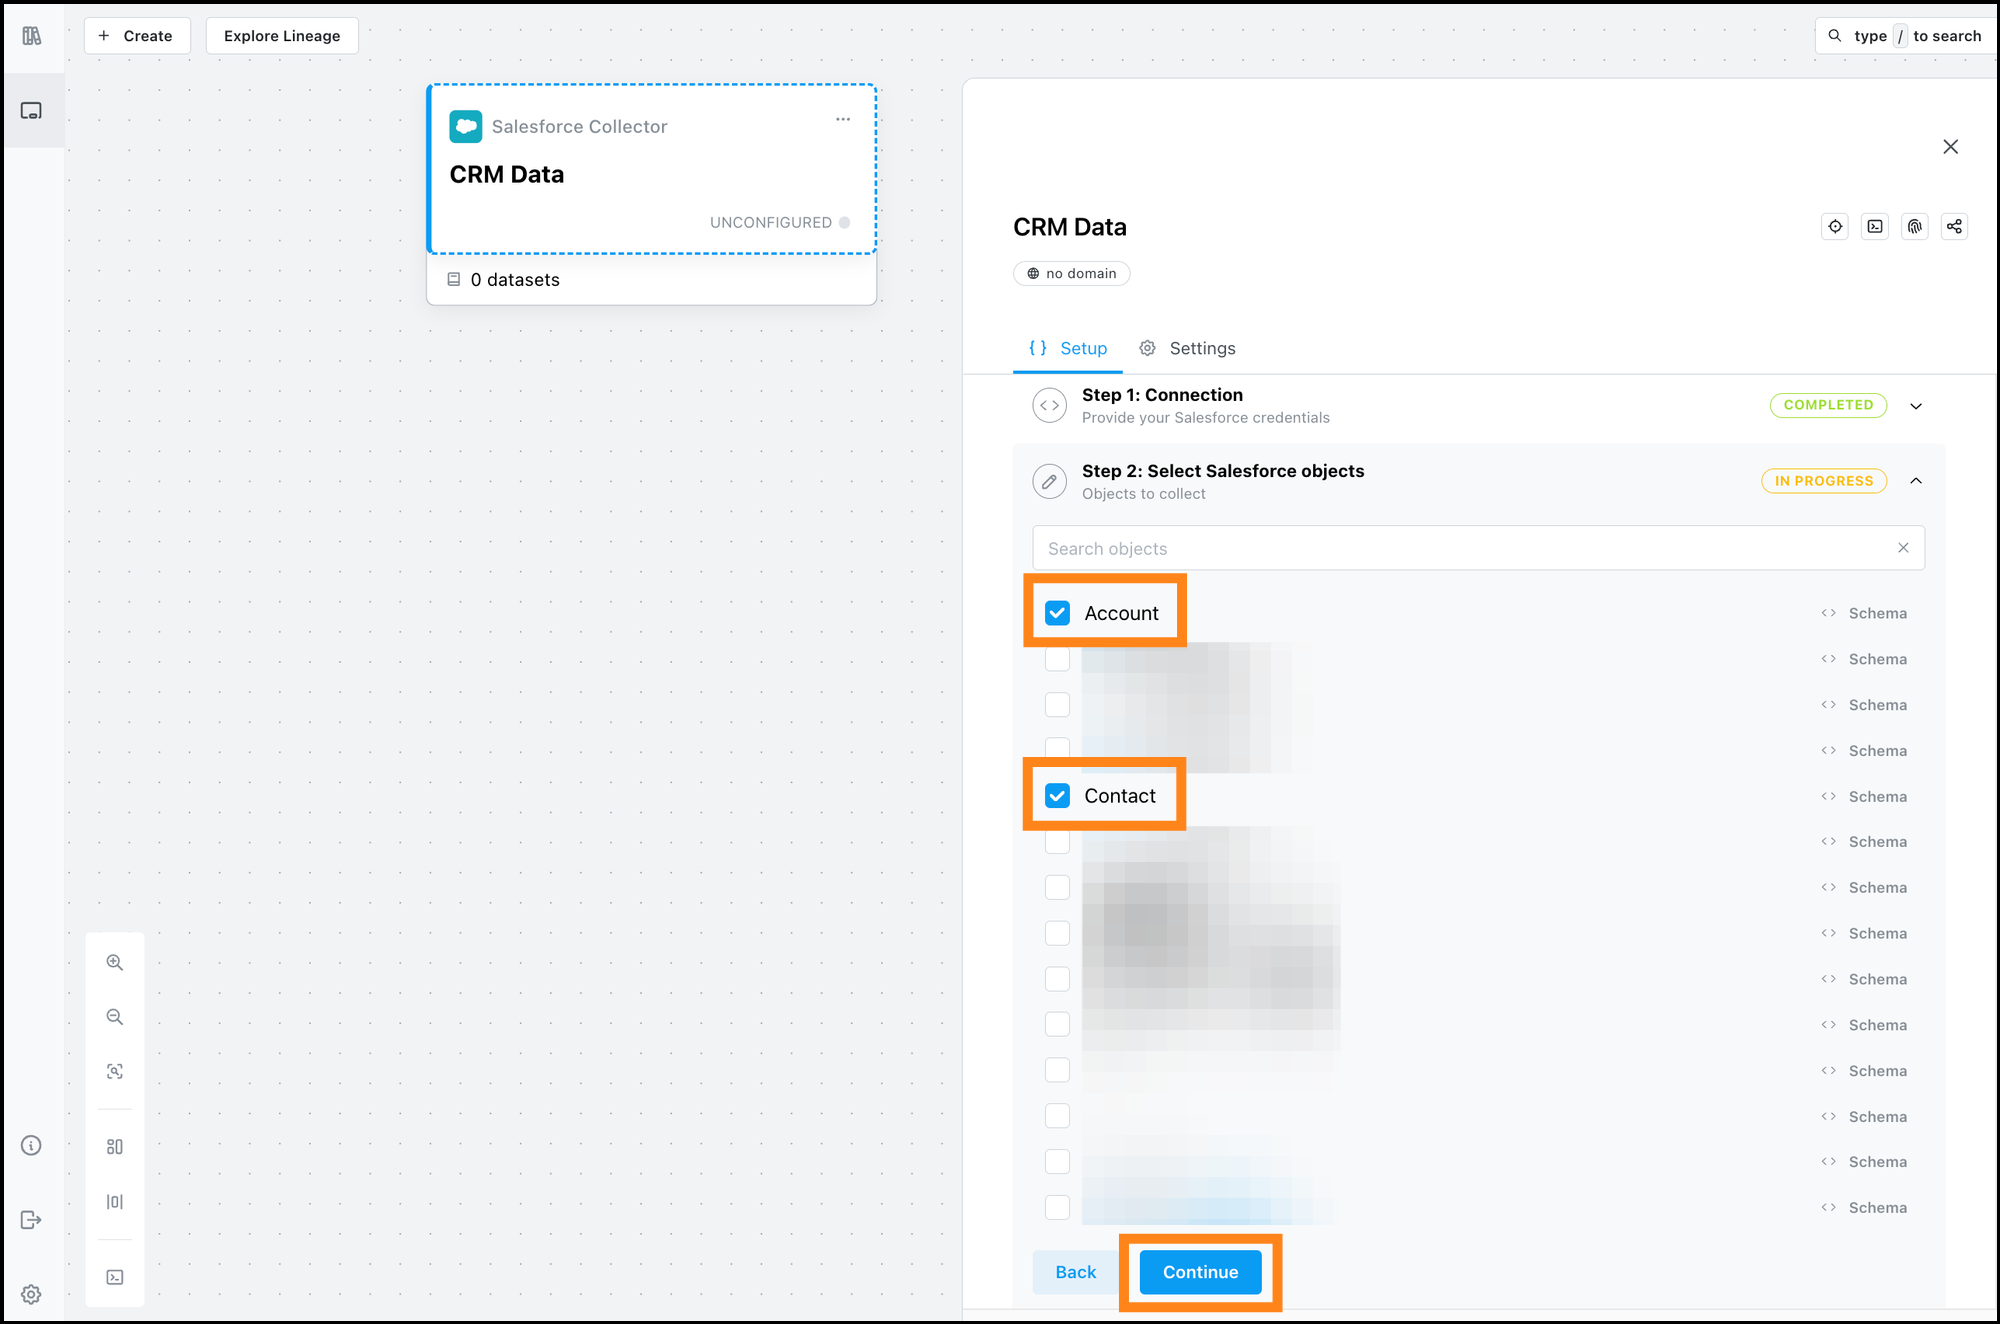
Check off the boxes of the Salesforce objects you want to collect into Matterbeam. Each object will become a dataset. Click “Continue”.
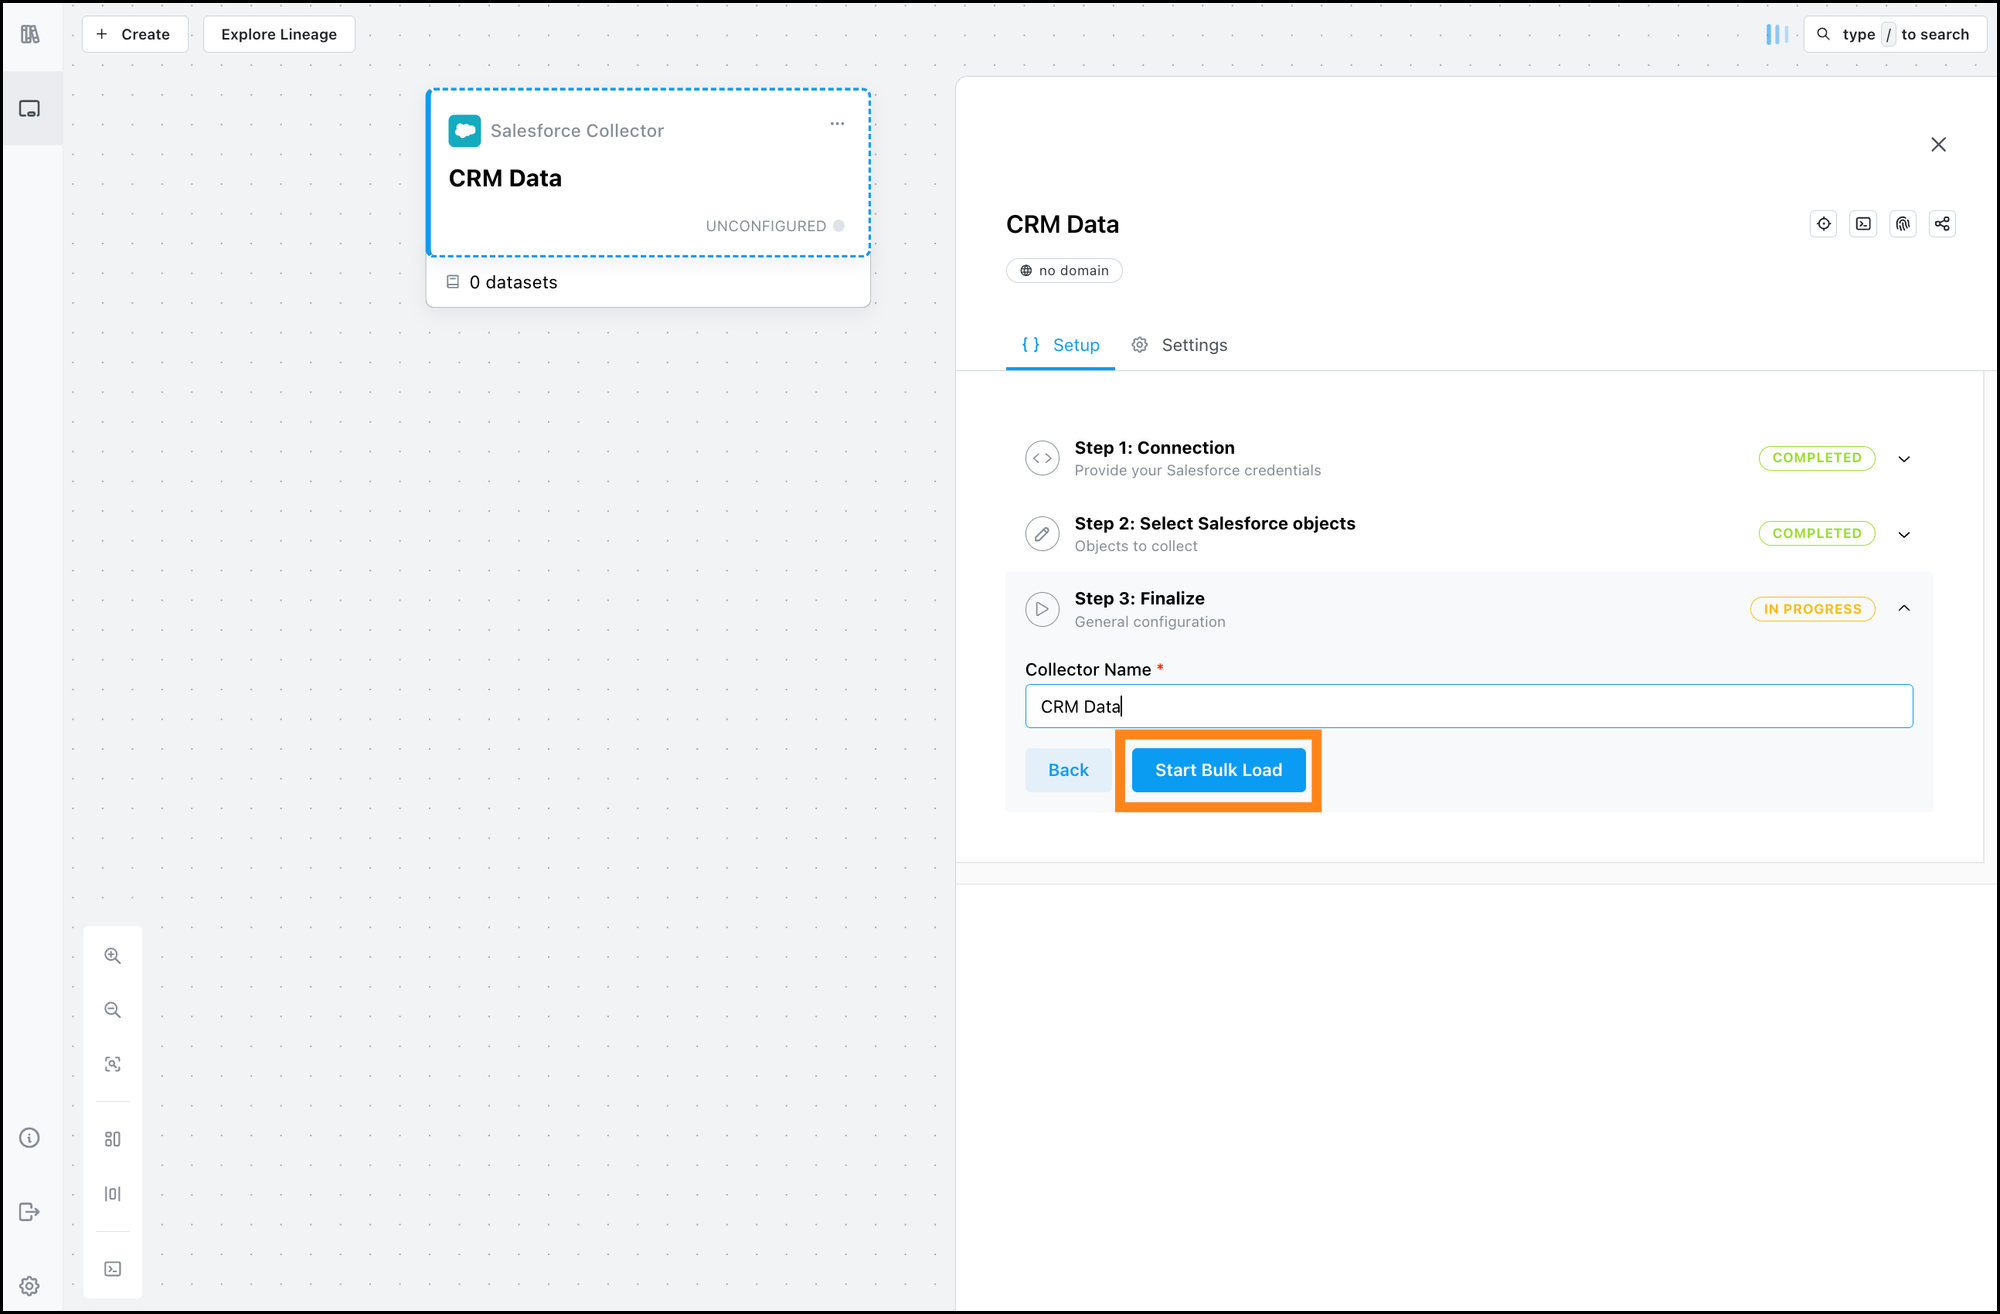
If you didn't do so in the first step, you can also give your Collector a name here, then click “Start Bulk Load”.
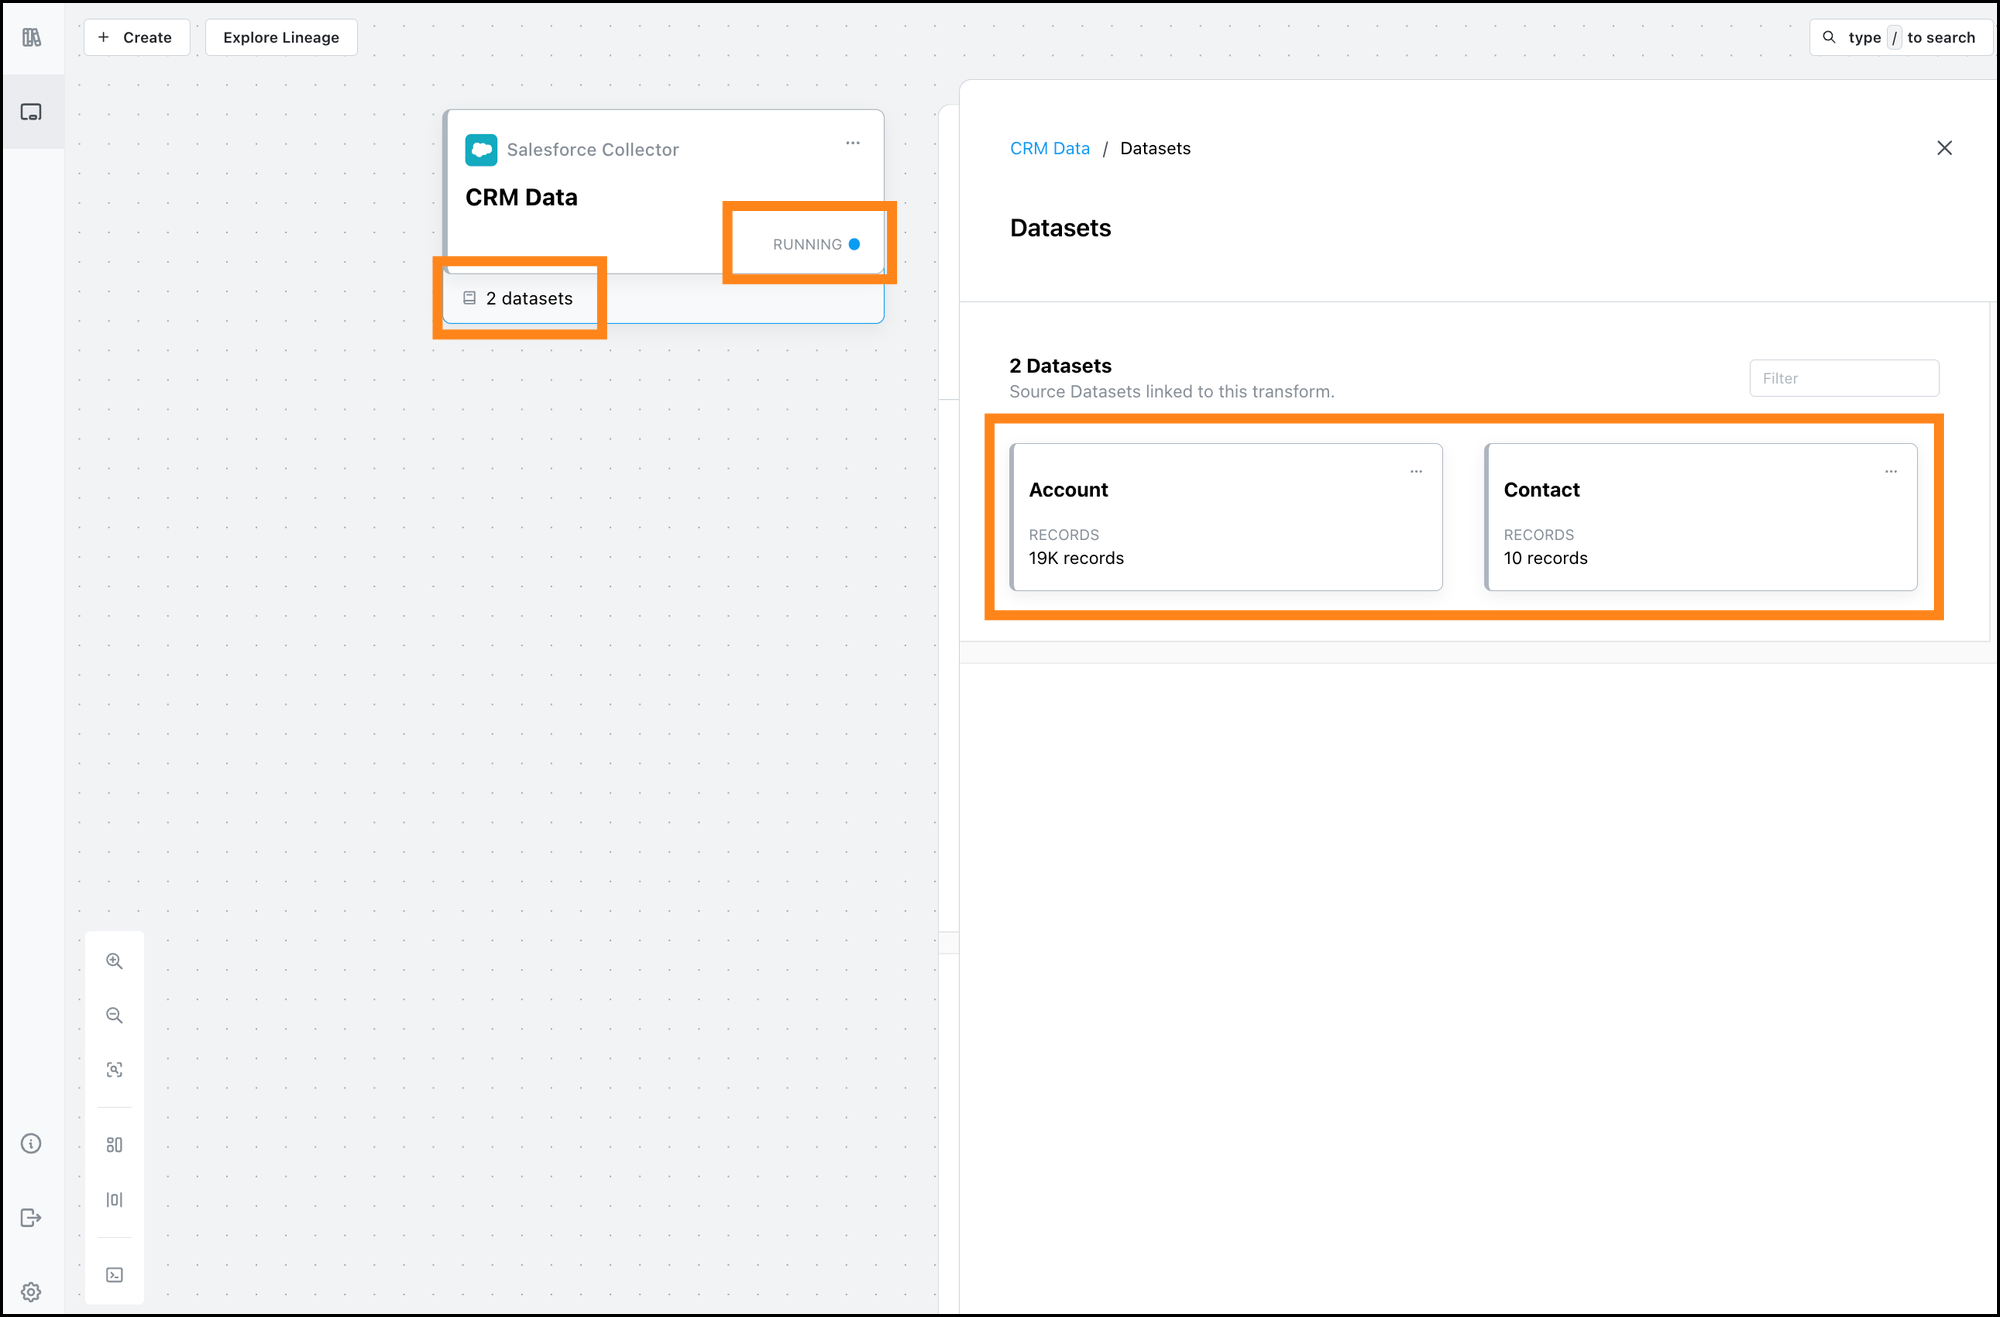
Your Collector will start to run and the selected Salesforce objects will appear as Datasets.
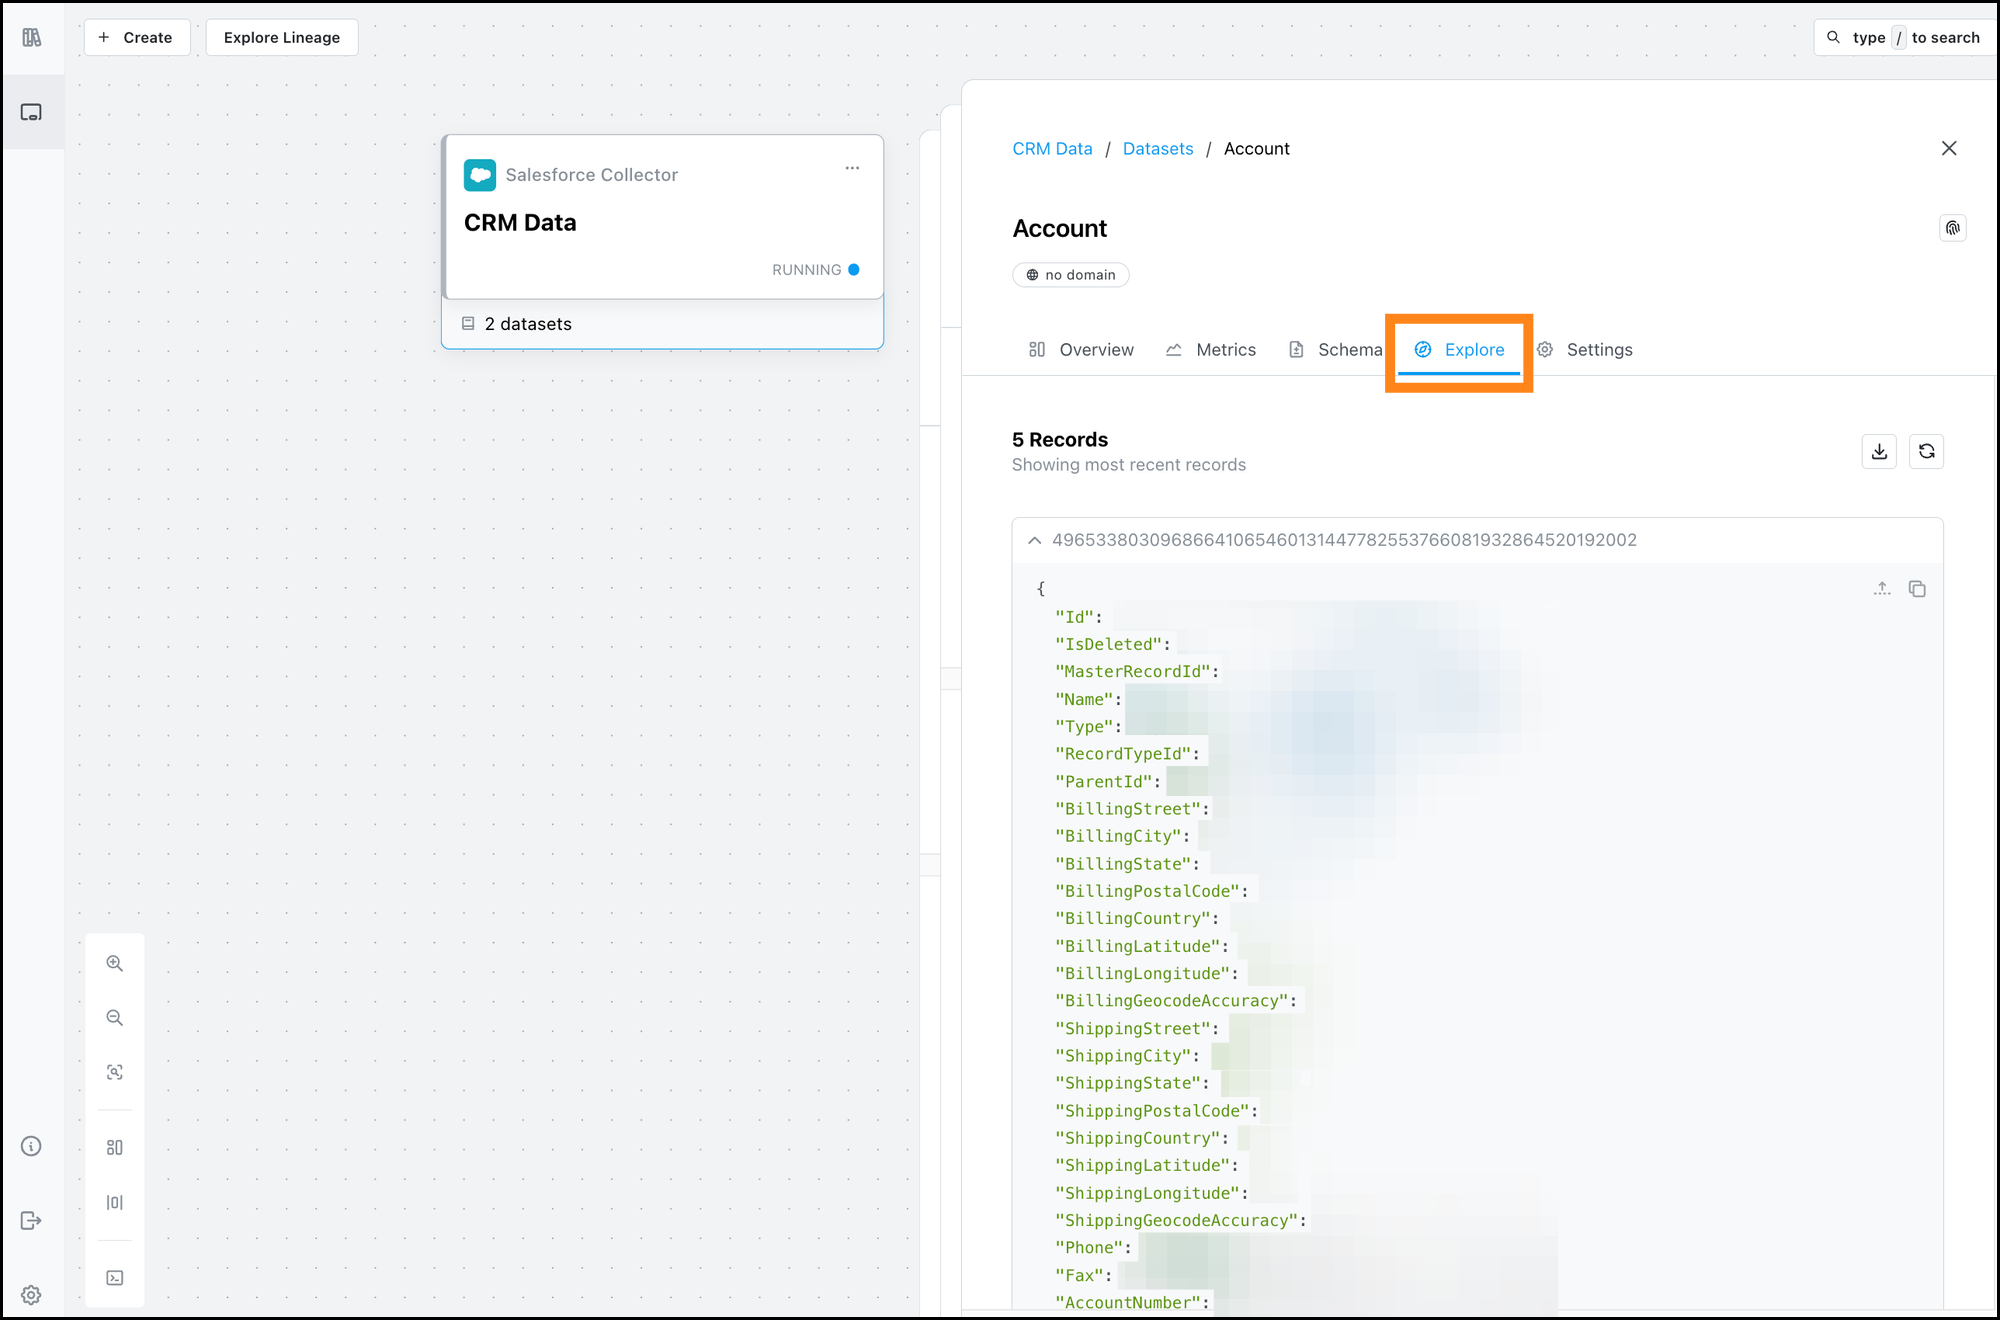
You can click on any Dataset, go to the "Explore" tab, and peek at the records coming in.
Integrating Matterbeam with Salesforce makes your CRM data management seamless and efficient. With the steps outlined in this guide, you can finally:
Now that your Salesforce data is in Matterbeam, you're ready to transform or emit it. Next, we recommend you check out our blog post on effortlessly navigating Matterbeam or watch our demo on how to use stream joins in your data transformations.